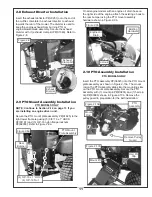
2-8 Exhaust Diverter Installation
Insert the exhaust deflector P#(J0251) onto the end of
the muffler. Orientate the exhaust diverter to exhaust
towards the rear of the mower. The diverter is used to
keep the engine exhaust from burning PTO or
engine/blower/blade assembly. Secure the exhaust
diverter with (1) exhaust clamp kit P#(X1046). Refer to
Figure 2-8.
2-9 PTO Mount Assembly Installation
PTO MODELS ONLY
NOTE:
Continue to Section 2-14 on page 13 if you
are installing an engine driven unit.
Secure the PTO mount plate assembly P#(A1825) to the
right lower frame leg using (5) 3/8”-16 x 1” HHCS
P#(K1191) and (5) 3/8”-16 nylon flange locknuts
P#(K2038). Refer to Figure 2-9a.
On all engine models with an engine oil drain hose on
the right side of the engine, attach the existing J-hook to
the rear bumper using the PTO mount assembly
hardware shown in Figure 2-9b.
2-10 PTO Assembly Installation
PTO MODELS ONLY
Insert the PTO assembly P#(A0623) into the PTO mount
plate assembly as shown in Figure 2-10a. The mount
rod on the PTO assembly slides into the mounting slots
on the PTO mount plate assembly. Secure the PTO
assembly with (1) mount pin P#(B0274) and (1) hair pin
clip P#(K0086) shown in Figure 2-10b. Remove the
pulley guard in preparation for the belt installation.
11
Figure 2-9b
Existing
Hardware
Engine Oil
Drain
J-Hook
Figure 2-8
Mount Pin
Hair Pin
Clip
Figure 2-10a
PTO
Assembly
Mount
Rod
Remove Pulley
Guard
Exhaust
Diverter
Exhaust
Clamp Kit
Figure 2-8a
PTO Mount
Plate Assembly
(4) 3/8”-16 x 1” HHCS
(4) 3/8”-16 Nut
Rear
Bumper
Figure 2-10b
Summary of Contents for 37721231
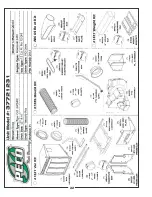
Page 22: ...22 A0664 Boot Kit ...
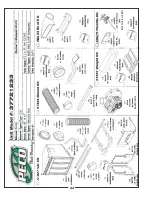
Page 23: ...23 B1117 A0664 Boot Kit ...
Page 24: ...24 B1117 A0664 Boot Kit ...
Page 28: ...28 ...
Page 29: ...NOTES ...


