2-16 Engine/Blower/Blade Assembly
Installation
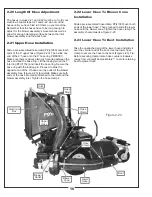
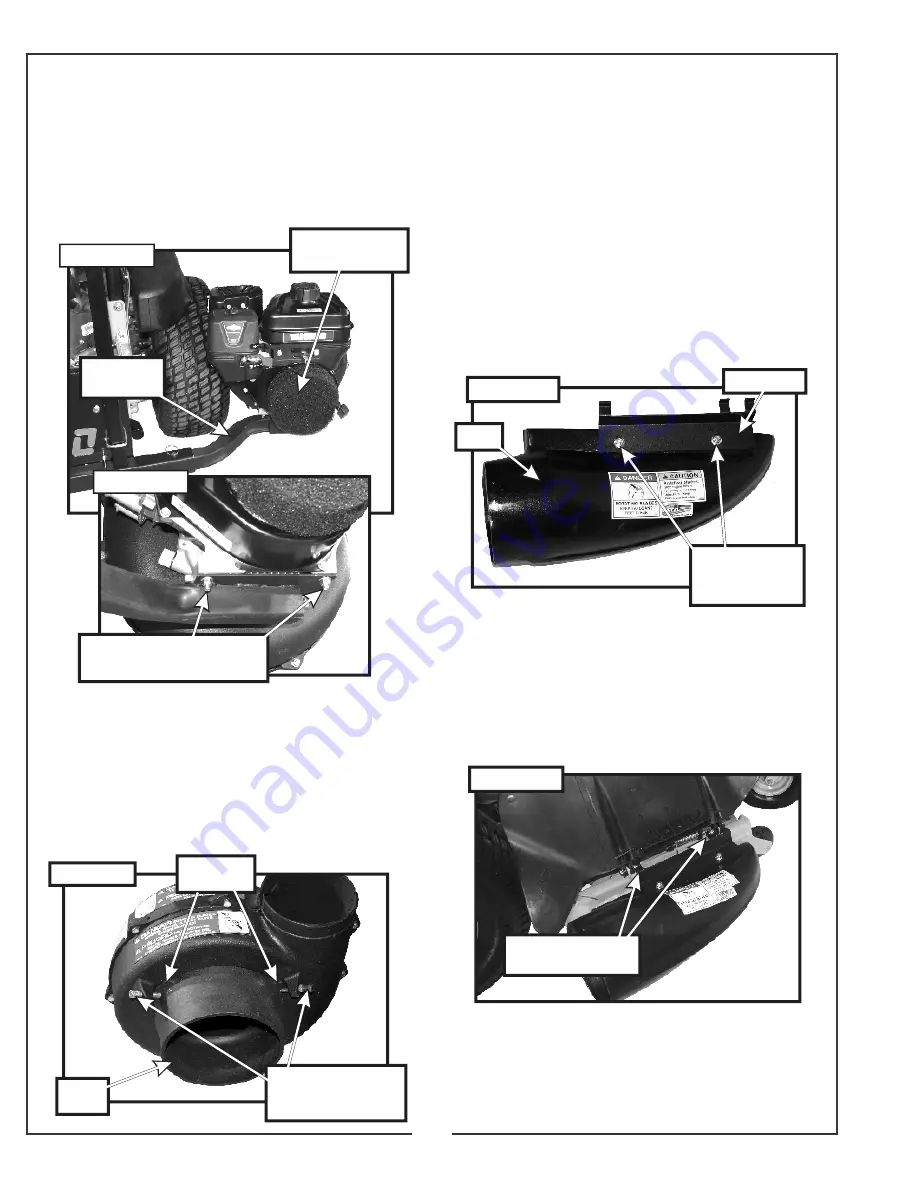
Place the engine blower blade assembly on top of the
engine mount arm as shown in Figure 2-16a. Secure the
assembly using (4) 5/16”-18 x 1-1/2” HHCS P#(K1157)
and (4) 5/16”-18 nylon flange lock nuts P#(K2516) as
shown in Figure 2-16b. Tighten all hardware in Section
2-14.
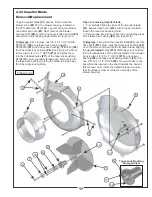
2-17 Blower Cone Installation
Thread (1) 5/16”-18 jam nut P#(K0120) onto each end of
(2) 5/16”-18 x 2-1/2” HHCS P#(K0125). Now partially
thread the bolts into each of the two tabs located on the
blower housing. Place blower cone so the two tabs line
up with the bolts then tighten completely (Figure 2-17).
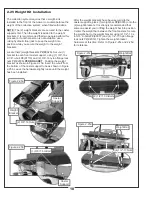
2-18 Boot To Mower Deck Installation
Position the boot plate P#(B0309) on top of the
aluminum boot P#(E0012) as shown in Figure 2-18a.
Secure the boot plate to the boot using (2) 3/8”-16 x 1”
carriage bolts P#(K1182) and (2) 3/8”-16 nylon flange
lock nuts P#(K2038). Insert the bolts from the inside of
the boot so that the threads are on the outside of the
boot. This will prevent any grass clippings from collecting
on the threads. To attach the boot to the mower deck, lift
the grass deflector and hook the tabs on the boot plate
under the deflector hardware as shown in Figure 2-18b.
14
Figure 2-16a
Figure 2-16b
Engine/Blower
Blade Assembly
Engine
Mount Arm
(4) 5/16”-18 x 1-1/2” HHCS
(4) 5/16”-18 Nuts
Figure 2-17
Blower
Cone Tabs
(2) 5/16”-18 x 2-1/2”
All Thread HHCS
(2) 5/16” Jam Nuts
Blower
Cone
Figure 2-18b
Hook Tabs Under
Existing Hardware
Figure 2-18a
(2) 3/8”-16 x 1”
Carriage Bolts
(2) 3/8”-16 Nuts
Boot
Boot Plate
Summary of Contents for 37721231
Page 22: ...22 A0664 Boot Kit ...
Page 23: ...23 B1117 A0664 Boot Kit ...
Page 24: ...24 B1117 A0664 Boot Kit ...
Page 28: ...28 ...
Page 29: ...NOTES ...


