Page 36
NOTE: The base is shipped
with the Hip Strap (Page 11)
already attached. If your Hip
Strap is already attached,
then proceed to Page 40.
The following steps describe
how to install it if it is ever
removed.
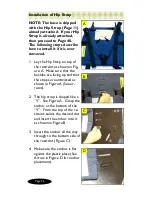
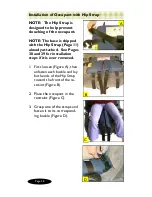
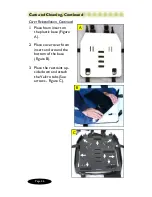
1. Lay the Hip Strap on top of
the restraint as shown in Fig-
ure A. Make sure that the
buckles are facing up and that
the straps are untwisted as
shown in Figure A (See ar-
rows).
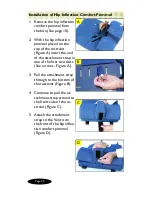
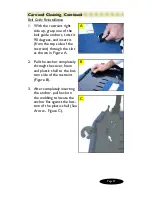
2. The hip strap is shaped like a
“V”. See Figure A. Grasp the
anchor at the bottom of the
“V”. From the top of the re-
straint, select the desired slot
and insert the anchor into it
as shown in Figure B.
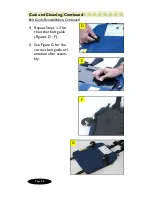
3. Insert the anchor all the way
through to the bottom side of
the restraint (Figure C).
4. Make sure the anchor is flat
against the plastic plate (See
Arrow in Figure D for anchor
placement).
Installation of Hip Strap
D
C
B
A
Page 17
H
G
Installation of Restraint, Continued
NOTE: Spacer Bar
must be parallel to ve-
hicle seat back (Figure
I). If not parallel, re-
peat Steps 5 - 7 on
Pages 14 and 15; and
Steps 13 and 14 0n
Page 16 until it is par-
allel.
Caution: Verify that
Spacer Bar is posi-
tioned behind head
rest or vehicle seat
back (if there is no
head rest).
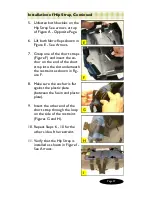
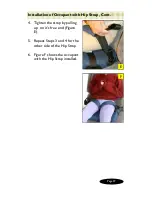
15. Tighten the Support
Harness by pulling up
on each Support Har-
ness pull strap ( Figure
H).
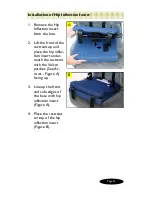
16. Continue to tighten
the Support Harness
(Figure H) until both
straps are taut and the
spacer bar is level
(parallel to the vehicle
seat back as shown
Figure I.
I

