PedigreeTechnologies.com | Support: (701)-499-0022
4
CameraView
Mitac
APMM Power Module Installation
for Cab-Mate One
STEP ONE
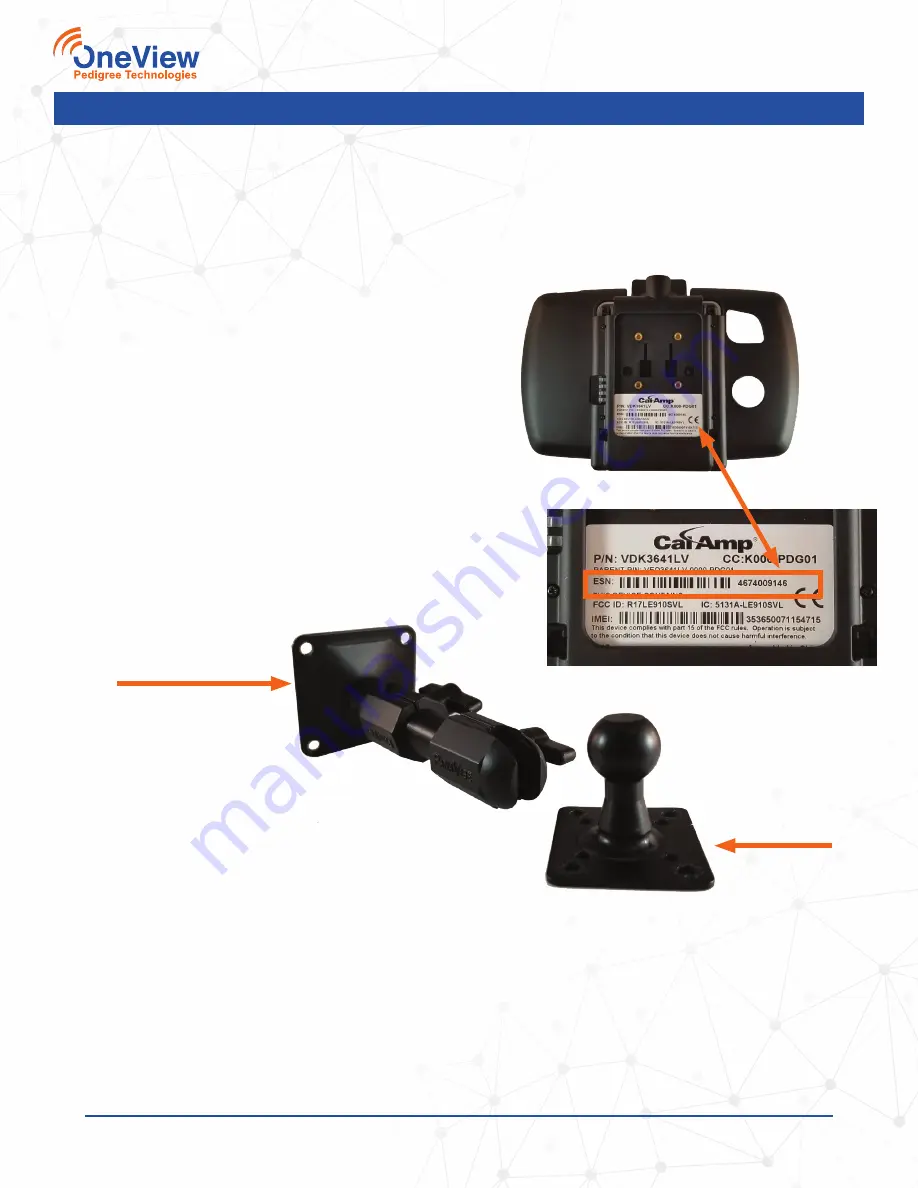
Identify and record the ESN of the Cab-Mate One
before proceeding. The following steps will cover the
serial number and you will need it for activating the
device later, or servicing the device in the future.
STEP TWO
For new intalls of the Cab-Mate One, install
the diagnostic data cable as per the Cab-Mate
One installation document. DO NOT CONNECT
DIAGNOSTIC CABLE TO CRADLE YET
STEP THREE
(for new Cab-Mate One installs)
Remove the ball mount from the Panavise mount.
With the other side (the long piece) locate the
desired position on the dash of vehicle and secure
with hardware.
Secure to Dash
Secure to tablet in
step five
Panavise Mount
STEP THREE - 2
(for previously installed Cab-Mate One)
Remove the ball mount from the Panavise mount and remove from the back of the tablet by
removing the 4 fastening screws.
STEP FOUR
Dry fit CameraView module as per the installation instructions
(page 3 of this document)
, routing
the USB cable to the Cab-Mate One, but do not plug it into the APMM module yet.
Installation of new Cab-Mate One plus camera - Start with
Step One
Installation of camera on previously installed Cab-Mate One - Start with
Step Three - 2
Installation of new camera on Cab-Mate One with previously installed camera (switching out
cameras) - Start with
Step Eleven


