ISSUED: 09-24-10 SHEET #: 125-9146-2 (6-25-13)
Visit the Peerless Web Site at www.peerlessmounts.com
5 of 5
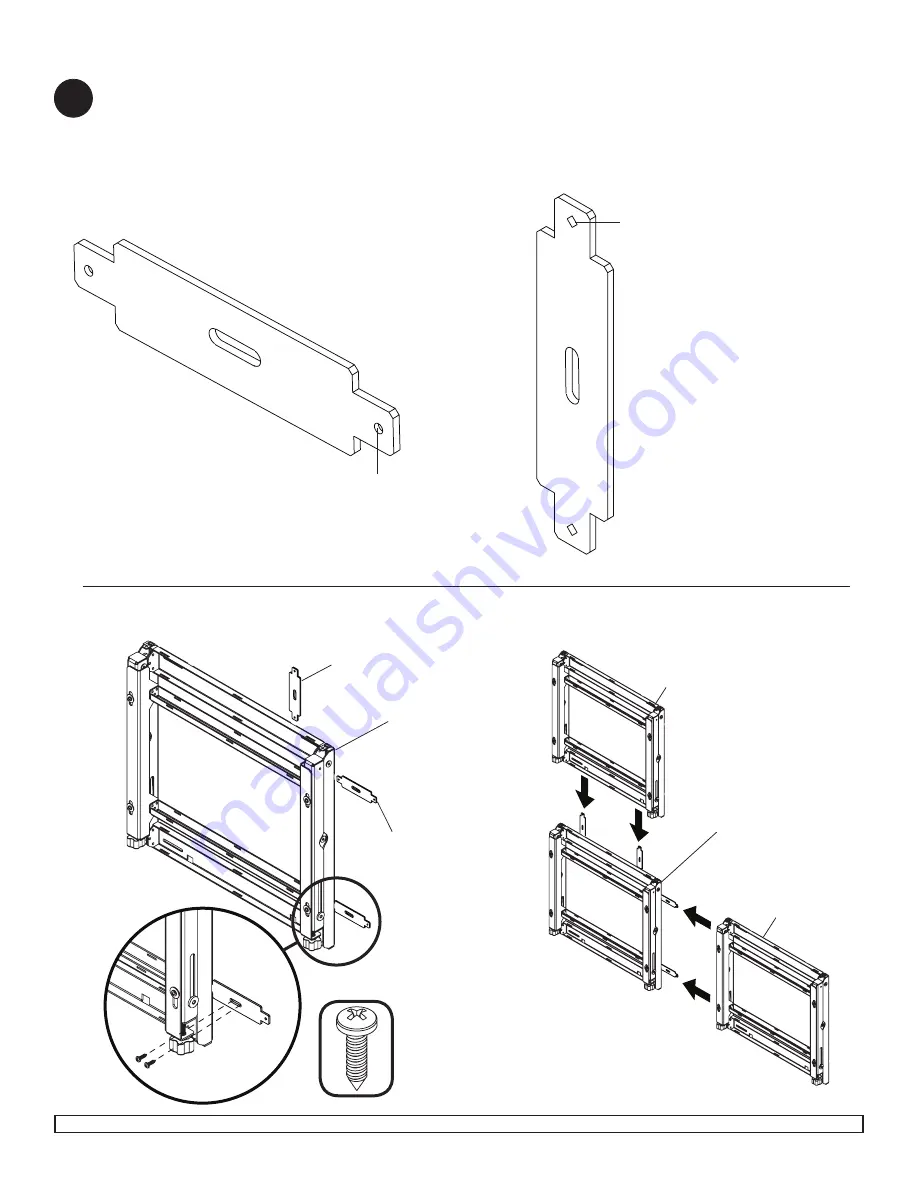
Optional for Multiple Displays: Installing Spacer Kit (Sold Separately)
Slide spacers into tab of mounted wall plate as shown. Keeping spacers flush against wall plate, fasten two
#10 x 3/4
"
wood screws as shown. There must be two spacers placed on the same side as the additional
wall plate. Align the tabs of the additional wall plate flush with the spacers. Follow main instruction for proper
installation of additional wall plates.
4
MOUNTED
WALL PLATE
NOTE:
SUPPORTING SURFACE NOT SHOWN FOR CLARITY
NOTE:
ADDITIONAL WALL PLATES SOLD SEPARATELY
ADDITIONAL
WALL PLATE
ADDITIONAL
WALL PLATE
DIAMOND CUT
VERTICAL
ORIENTATION
DIAMOND CUT
ROUND CUT
ROUND CUT
HORIZONTAL
ORIENTATION
MOUNTED
WALL PLATE
WALL PLATE ASSEMBLIES MAY BE DIFFERENT
THAN ILLUSTRATED


