background image

II.  PRE-INSTALLATION TESTING

Before you uncoil any cables, you should interconnect and test the
system components, as described below. This will allow you to
become familiar with the system and assure that all components
are functioning properly before you install them.

Setup

1.  Carefully remove each component from its shipping container
and place them all on a clear work area.

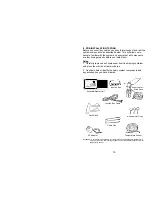
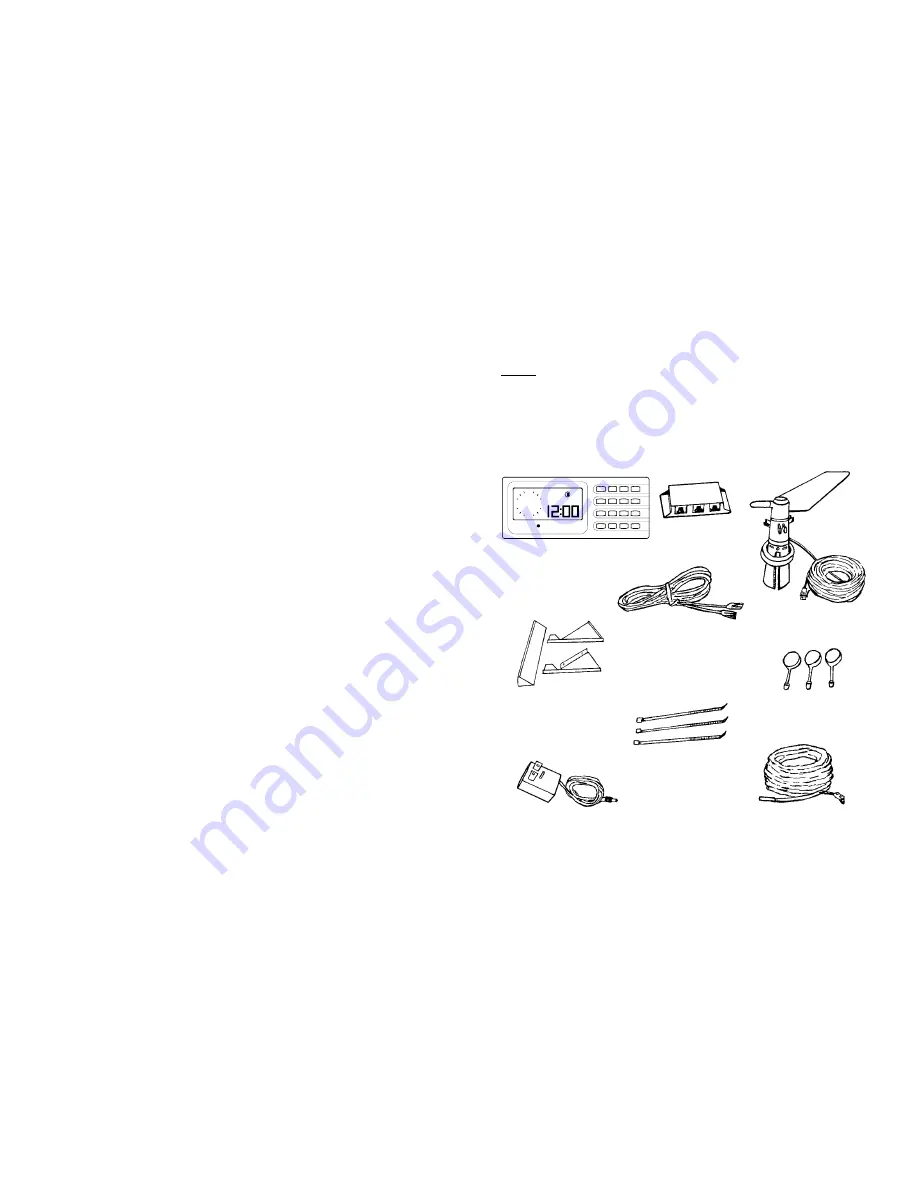
2.  As shown below, identify the basic system components and
any accessories you have ordered.

Keyboard/Display Unit

Junction Box

Anemometer/
    Wind Vane

Junction Box Cable

Desk Stand

AC Adapter

Cable Ties

Anemometer Cups

Temperature Sensor

ULTIMETER

W


N

S

E

2000

R

Not shown:  2 screws for desk stand; 2 screws for wall mounting keyboard/display unit; 2

drywall screws for wall mounting keyboard unit; mounting bracket and screw for
temperature sensor.

10

Summary of Contents for Ultimeter 2000

Page 1: ...SELECT TEMPERATURE UNITS 28 SELECT WIND SPEED UNITS 28 SELECT RAIN GAUGE INCREMENTS UNITS 28 TO ADJUST THE LONG TERM RAIN TOTAL 30 VII DISPLAYING CURRENT DATA 31 VIII THE ULTIMETER 2000 HI LO MEMORY...

Page 2: ...XII THE ULTIMETER 2000 SERIAL PORT 40 XIII SUPPLEMENTAL WIND VANE CALIBRATION 41 XIV ROUTINE MAINTENANCE 42 XV REPAIR EXCHANGE SERVICE 43 XVI SPECIFICATIONS 44 XVII AVAILABLE ACCESSORIES 45 2...

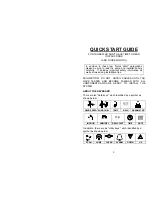
Page 3: ...time saving installation tips SUGGESTION DO NOT UNCOIL CABLES UNTIL YOU HAVE TESTED AND BECOME FAMILIAR WITH ALL COMPONENTS AND ARE READY TO INSTALL THE SYSTEM ABOUT THE KEYBOARD There are ten data k...

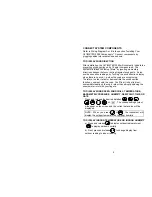
Page 4: ...erefore in order to test or demonstrate the wind direction function you must spin the cups You ll find it is best to blow somewhat steadily on the cups rather than abruptly spinning the anemometer rot...

Page 5: ...as necessary to select mm hg mb or hPa d To set the barometric pressure reading press and hold and simultaneously for at least three seconds The display will flash three times and the reading will beg...

Page 6: ...rred the highest or lowest value since last reset and the time at which it occurred This display mode is easily recognized by the flashing when the date is displayed NOTE THIS USER RESETTABLE HIGH LOW...

Page 7: ...chill and dew point d p will be the same as for temperature b Press the same data key a second time AND KEEP IT PRESSED UNTIL THE DISPLAY CHANGES Repeat this step until data is displayed in the desir...

Page 8: ...that you always turn off backlighting when not in use WHAT DOES THE BATTERY SYMBOL MEAN The battery symbol not flashing means the instrument is operating from battery power Likely causes are a discon...

Page 9: ...Y TO INSTALL THE SYSTEM IMPORTANT NOTE CONCERNING WIND DIRECTION The ULTIMETER 2000 is designed to detect and display the prevailing wind direction on its 16 point compass rose The system minimizes co...

Page 10: ...m its shipping container and place them all on a clear work area 2 As shown below identify the basic system components and any accessories you have ordered Keyboard Display Unit Junction Box Anemomete...

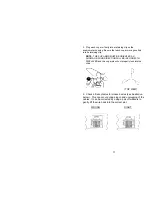
Page 11: ...RIENTED AS SHOWN OR WIND DIRECTION WILL BE INCORRECTLY DISPLAYED and the cup arms will not properly lock into the clips TOP VIEW 4 Check all receptacles for crossed wires see illustration below This c...

Page 12: ...crystal screen will come on displaying the clock symbol 12 00 and the compass rose for wind direction as shown below ULTIMETER W N S E 2000 R Test Anemometer Wind Vane Functions 1 Press the wind spee...

Page 13: ...Test Temperature Functions 1 Press and release the temperature key which is marked on the keyboard display unit The screen will display current temperature in degrees Fahrenheit and a thermometer symb...

Page 14: ...t you determine the optimum location of the prime components in the order shown below Control Unit Location The primary considerations in placement of the Keyboard Display unit are which room it shoul...

Page 15: ...adapter with a 6 inch piece of 3 4 inch Schedule 40 PVC pipe onto the top of your mast b If you are using 1 inch EMT electrical conduit as a mast just press a 12 inch long piece of 3 4 inch Schedule...

Page 16: ...more are outside the structure in the open air so that the cable rather than the sensor itself is secured by the supplied mounting clamp It is surprising how much these factors affect temperature read...

Page 17: ...tend the total cable length from the temperature sensor to the keyboard display unit beyond 33 feet the 25 foot temp sensor cable plus the 8 foot junction box cable Longer cables tend to increase the...

Page 18: ...NOTE If you plan to use a sensor extension cable that will be joined outside you must plan to waterproof the connection We offer inexpensive and effective weatherproofing kits for this purpose 18...

Page 19: ...r other directional reference Tip Use a piece of tape to hold the wind vane pointed in the direction of the silver mark and use the wind vane pointer to help to install the anemometer in the correct p...

Page 20: ...he sensor using wood screws provided for a wooden wall or drywall anchors provided for a concrete wall Installing the optional Indoor Humidity Sensor 1 Drill two pilot holes 6 in apart at the desired...

Page 21: ...e it clicks into place 4 If the junction box cable is to run down the wall insert the cable into the groove provided on the back of the keyboard display unit 5 Hang the keyboard display unit from the...

Page 22: ...ded 3 prong outlet Then plug the AC adapter output cable into the junction box Allow 2 or 3 seconds for the keyboard display to come on 3 Install a fresh 9 volt back up battery not included at this ti...

Page 23: ...attery in need of replacement Your keyboard automatically performs a battery check daily To perform a battery check manually press and simultaneously to initiate the battery check function In a few se...

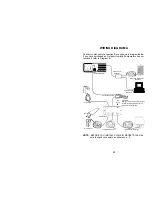
Page 24: ...PC Data Logger Optional Keyboard Display Junction Box Cable AC Adapter Junction Box Wind Sensor Temperature Sensor Rain Gauge Optional ULTIMETER W N S E 2000 R Indoor Humidity Sensor Optional Not Use...

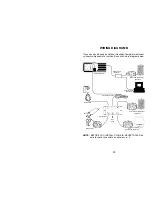
Page 25: ...ULTIMETER Duplex Cable Optional PC Data Logger Optional Keyboard Display Junction Box Cable AC Adapter Junction Box Wind Sensor Rain Gauge Optional Not Used ULTIMETER W N S E 2000 R Indoor Humidity Se...

Page 26: ...change Then press or as required until the leap year setting shows the number of years until leap year i e 1 if the present year is 1995 0 if the present year is 1996 3 for 1997 2 for 1998 and 1 for...

Page 27: ...gin to change Press or as required to set the correct time If you press and hold or the display will change rapidly 4 Press to return to normal operation SET BAROMETRIC PRESSURE AND PRESSURE UNITS NOT...

Page 28: ...ius 1 Press and release the key 2 Press again and hold until the display stops flashing Temperature will be displayed in Celsius To return to Fahrenheit repeat this step NOTE Units for wind chill and...

Page 29: ...of rain the rain display will increase by 0 1 inches If your rain gauge reports rainfall in increments of 0 1 inches skip the rest of this section 4 Press and hold the key a fourth time until the disp...

Page 30: ...long term rainfall memory to display the current week to date total month to date total or year to date total rainfall To initialize the long term rainfall total 1 Press and hold and simultaneously u...

Page 31: ...ty 2 Next press and release to change display from outdoor reading to indoor reading The symbol will appear in the display and the current indoor value will be shown TO DISPLAY 3 HOUR CHANGE IN BAROME...

Page 32: ...r Outdoor 3 Hr Pressure Change To select data to be scanned 1 Press c b a and keep it pressed until SEL select appears on display 2 Press the data key of each function you wish to include in the scan...

Page 33: ...ERDAY S HIGHS LOWS AND RAINFALL Each midnight the instrument moves TODAY S highs and lows and rainfall into separate memory now calling them YESTERDAY S values At any time in the following day you can...

Page 34: ...through yesterday s date yesterday s high value and the time at which it occurred 4 To display the LONG TERM highest value press a third time The display will repeatedly cycle through the date the hig...

Page 35: ...RAINFALL 1 To display TODAY S rainfall thus far since midnight press The instrument will display today s total rainfall 2 To display YESTERDAY S rainfall from midnight to midnight press The display wi...

Page 36: ...etting each Long Term high and low memory individually you may simultaneously reset all Long Term highs and lows including the Long Term rainfall total To do so Press and hold and simultaneously for a...

Page 37: ...sh Flood Alert 1 Select the function for which you wish to set an alarm by pressing H or for indoor temperature or humidity next press For 3 Hr Pressure Change Alarm press and simultaneously If you ar...

Page 38: ...The rain rate alarm is set in inches of rain or mm of rain per hour An alarm will sound of a specified minimum amount of rain called the threshold falls at a rate equal to or greater than the rain rat...

Page 39: ...of 2 5 mm 3 Press or repeatedly until the desired threshold value is shown TO MOMENTARILY STOP AN ALARM FROM SOUNDING With the alarm setting displayed press the key The alarm sound will stop temporar...

Page 40: ...ve minutes with the associated wind direction the 3 hour barometric pressure change station calibration numbers and current time and date Key Combo Press and hold and for 3 seconds to enter this mode...

Page 41: ...ress and hold or to adjust the wind vane correction constant After approximately 3 seconds the wind vane correction will start changing Increase the constant if you want the direction diamond on the d...

Page 42: ...and rotor at the same time in the palm of your hand hook your fingers under the cup arms retaining clips and pull upward After overcoming initial resistance the vane and rotor will be removed together...

Page 43: ...re is no charge Beyond warranty the charges are modest depending upon the condition of the instrument Copyright 1999 Peet Bros Company Inc All Rights Reserved WARRANTY Each ULTIMETER 2000 carries a li...

Page 44: ...8 high R H same as for Outdoor Humidity Desk or Wall Mount Junction Box Wind Speed Range 0 to 274 km h Has receptacles for external power 0 to 170 mph and all outside sensors 0 to 76 m s Built in Sta...

Page 45: ...er data you have pre selected without having to press a single key Its 8 compass rose and large 0 8 illuminated red numerals are clearly visible day and night THE WEATHER PICTURE is perfect for homes...

Page 46: ...4 simultaneous graphs of weather conditions over the last 20 hours updated every five minutes Or you can display data from any selected part of the log file in graphic or tabular form Splitter Juncti...

Page 47: ...t interference will not occur in a particular installation If this equipment does cause harmful interference to radio or television reception which can be determined by turning the equipment off and o...

Reviews: