V. CONNECTING THE ULTIMETER 2000 SYSTEM
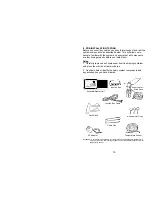
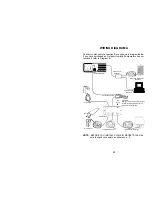
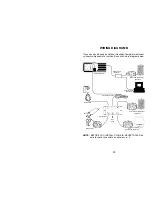
Connect components to configure your system as shown in
Diagram A. If your system includes the optional Outdoor
Humidity/Temperature Sensor, connect the components as
shown in Diagram B.
Using the following sequence, apply power to your system:
1. Plug one end of the 8-conductor cable into the junction
box. Plug the other end into the back of the instrument.
2. Connect the AC adapter into an AC outlet. In 110 volt
systems, be sure to use the 3-prong AC adapter and a
properly grounded 3-prong outlet. Then, plug the AC adapter
output cable into the junction box. Allow 2 or 3 seconds for
the keyboard display to come on.
3. Install a fresh 9 volt back-up battery (not included) at this
time, in order to preserve any settings or adjustments that you
make while installing the system.
The back-up battery compartment is located on the lower right
side of the keyboard/display unit. To open the compartment,
slide the cover in direction of arrow. Insert a 9-volt battery,
with the
+
and
-
terminals oriented as shown in the diagram
on the back of the keyboard housing. Replace the cover.
4. Press
and
simultaneously to initiate the battery
check function. In a few seconds, the flashing battery symbol
should go out.
22

