1
2
4
5
6
2
3
CAUTION
CAUTION
Only well-qualified technicians should make this sensitivity
adjustment. The power is on while this adjustment is being made.
Therefore, the machine could start unexpectedly.
Great care should be taken in carrying out the procedures.
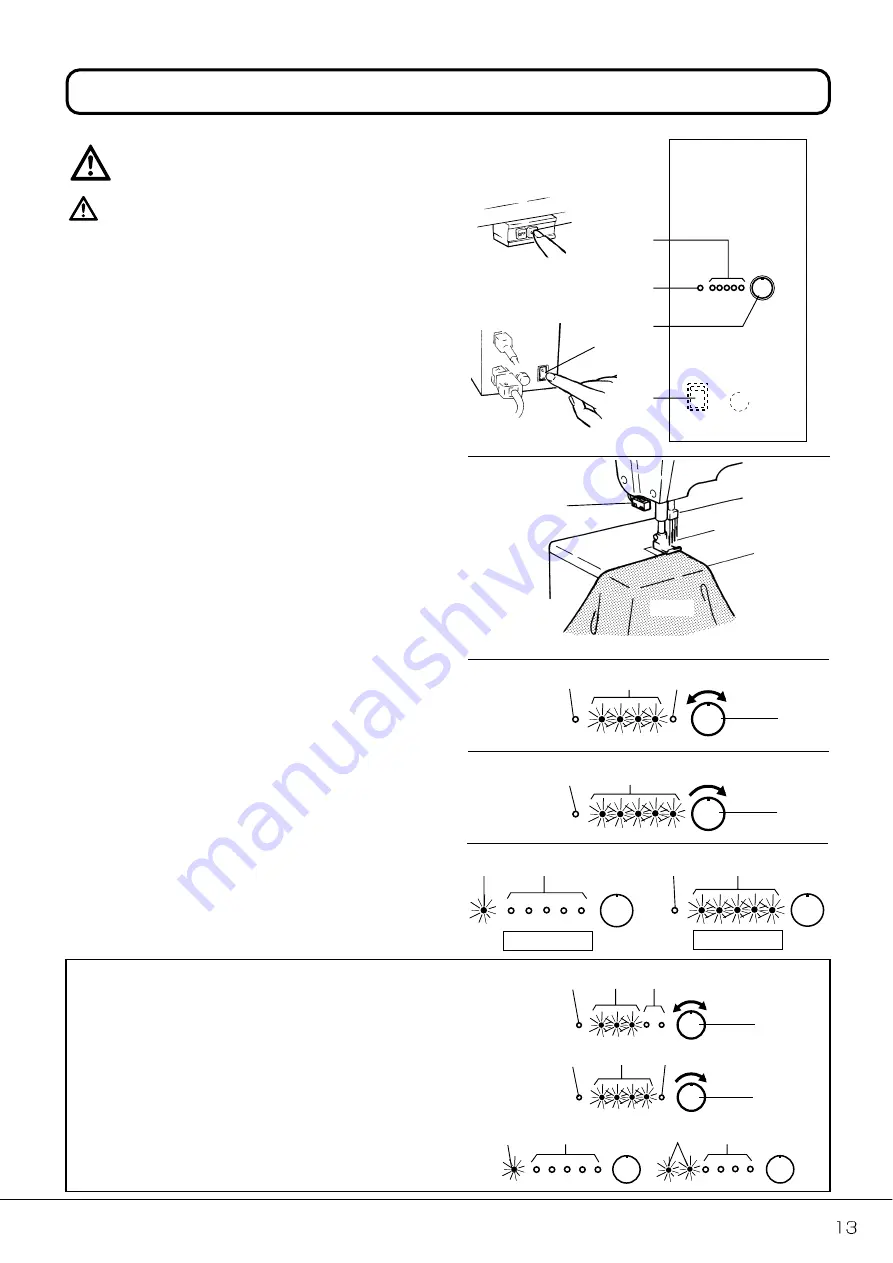
1.
Turn on power switches
1
and
2
.
2.
Ensure that no material is inserted when adjusting
sensor
3
.
3.
Turn dial
4
until the fourth from the left of indicator lights
6
is turned on completely.
4.
Turn dial
4
clockwise slowly and stop turning dial
4
until
the fifth light is turned on.
Check the indicator lights carefully if they are turned on/off
correctly with fabric or no fabric. (Confirm that the lamps
indicated by
6
are all terned off when material is inserted.)
ON
ON
Adjusting the sensitivity of sensor
Note 1
: To sew special materials and/or extra light fabrics which
the light from the sensor goes through, see below.
1
. Turn dial
4
until the third from the left of indicator lights
6
is
turned on completely.
2
. Turn dial
4
clockwise slowly and stop turning dial
4
until the
fourth light is turned on.
3
. Position the fabric under the fabric sensor and then check to
make sure lamp
5
is turned on and all indicator lights
6
are
turned off or the first light (of indicator lights
6
) from the left is
turned on.
Note 2
: Clean the reflector on the top surface of the needle plate.
Otherwise malfunction may occur.
AI power box
Fabric
With fabric
With no fabric
On
Off
Off
Off
On
On
On
Off
Off
4
4
4
4
On
Off
Off
Off
Off
On
Off
Off
On
On


