The system then recalculates after the new ones
the conditions.
.
Self-calibration
The machine is calibrated from the factory - there
is a risk that the calibration has changed during
transport. Therefore, it may be a good idea to
calibrate the machine before using it. (Test first
and run the machine - it is very rare that the
settings have changed).
Switch on the machine and program the rim data
according to point 7, use a mid-range tire (14 ”or
15”). You can always press STOP or C to cancel.
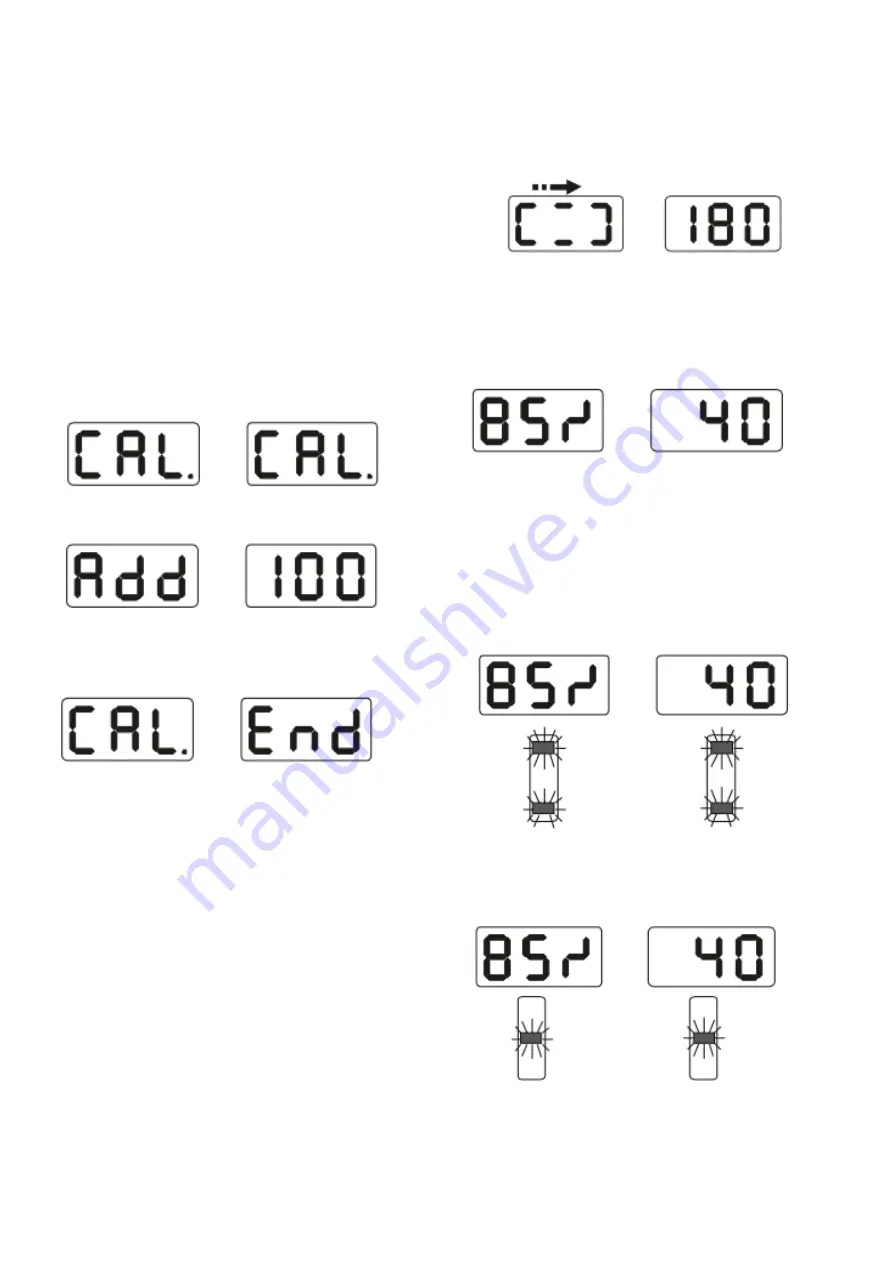
Press F and the C button. The user is prompted to
perform the necessary actions during the
calibration.
Close the hood.
Open the hood, the user is instructed to mount a
balance weight of 100 g on the outside, then close
the hood.
Close the hood, the wheel rotates and when it
stops you can read in the display ”cal end”. Press
C.
Remove the calibration wheel and test with other
wheels so that everything works.
When calibrating, remember to be careful with
settings of rim data and that the calibration weight
is correct, otherwise the calibration will be
incorrect and subsequent balances will not keep
the promised precision.
Do not mount the 100 gram weight before
calibration - then the computer thinks it is not
there and all calibration is incorrect - it will be
wrong to cancel and enter the calibration program
from step one.
Be careful about the enclosed calibration weight,
for a good result it is important that the correct
weight is used in a possible calibration.
Optimization of imbalance
If the wheel imbalance exceeds 30 g, the system
will display OPT. Do the following to optimize the
tire’s position on the rim.
Press the OPT button.
Make a mark on the rim and on the tire with a
chalk, then loosen the tire with a tire machine to
move it 180 degrees on the rim. Refit the tire on the
balancing machine and press START.
The display shows the optimization in percent, if
the optimized value is 40 g and the optimization
is 85%, it means that the static value that remains
after the action is only 6 g (15% x40g = 6g).
Rotate the wheel slowly by hand until the outer
indicators light up, make a mark with the chalk on
the rim (12 o’clock).
Rotate the wheel slowly until the center indicators
illuminate, making a mark with the chalk on the tire
(12 o’clock).
Then loosen the tire with a tire machine to adjust
the marking on the tire and the rim in the middle of
each other. You have now optimized the position of
the tire on the rim.
Summary of Contents for 506799
Page 1: ...Automatic wheel balancer U 800 D ckbalanseringsmaskin U 800 Item No 506799...
Page 12: ...Reservdelslista...
Page 13: ......
Page 14: ......
Page 16: ...Funktionsdiagram...
Page 17: ...Blockschema...
Page 18: ......
Page 29: ...Spare parts list...
Page 30: ......
Page 31: ......
Page 33: ...Function diagram...
Page 34: ......
Page 35: ......


