


Tires can explode due to the following:
1. The wheel rim and tyre are not the same
sizes.
2. The tyre or wheel rim is
damaged.
3. The pressure on tyre
inflation is above max.
pressure recommended by
the manufacturer.
4. The operator fails to comply with the safety
regulations.
Please use the following methods:
1. Remove the valve cover from the valve stem.
2. Check that the air nozzle is completely
depressed over the threads of the valve stem.
3. Check that the tyres and wheel rims are the
same size.
4. Lubricate both the tyre clamp and the wheel
rim, additional lubrication is required if
necessary.
5. Inflate the tyres with pause, when inflating,
check the pressure indicated on the pressure
gauge. Also, check if the clinch is fixed or not.
Repeat the operation above until the clincher is
attached; you need special steps when inflating
a convex rim or double convex rim.
6. Continue to inflate and check the air pressure
frequently until it reaches the desired pressure.
Note! Never exceed the max. pressure
recommended by the tyre manufacturer.
Keep your hands and body away from inflated
tyres.
Only specially trained persons may perform these
operations, do not allow others to use or be near
the tyre changer.
Moving the machine
Use a forklift to move the machine. Disconnect the
tyre changer from the mains and the pneumatic air
supply, lift the base plate and insert the feet of the
forklift trucks. Then mount the tyre changer to a
new position and fix it properly.
Note! The location chosen for fixing the tyre
changer must comply with the safety regulations.
Maintenance
Warning: Only professionals can
Warning: Before performing maintenance,
disconnect the tyre changer from the mains, the
power supply and the pneumatic air supply, and
push the hooks down so that they are open and
close the pedal of the mounting table. Depress
3-4 times to evacuate all compressed air from the
machine. Damaged parts must be replaced by pro
-
fessionals with spare parts provided by the manu
-
do the maintenance. To
extend the life of the
machine, maintain the
machine carefully
according to the operating
instructions. Otherwise, it will
affect the reliability of the machine
or even damage the operator and
others nearby.
facturer.
• Clean the machine once
every day after
usage. Clean the
dirt on the mounting
table with diesel oil once
a week and lubricate the
slides and clamps.
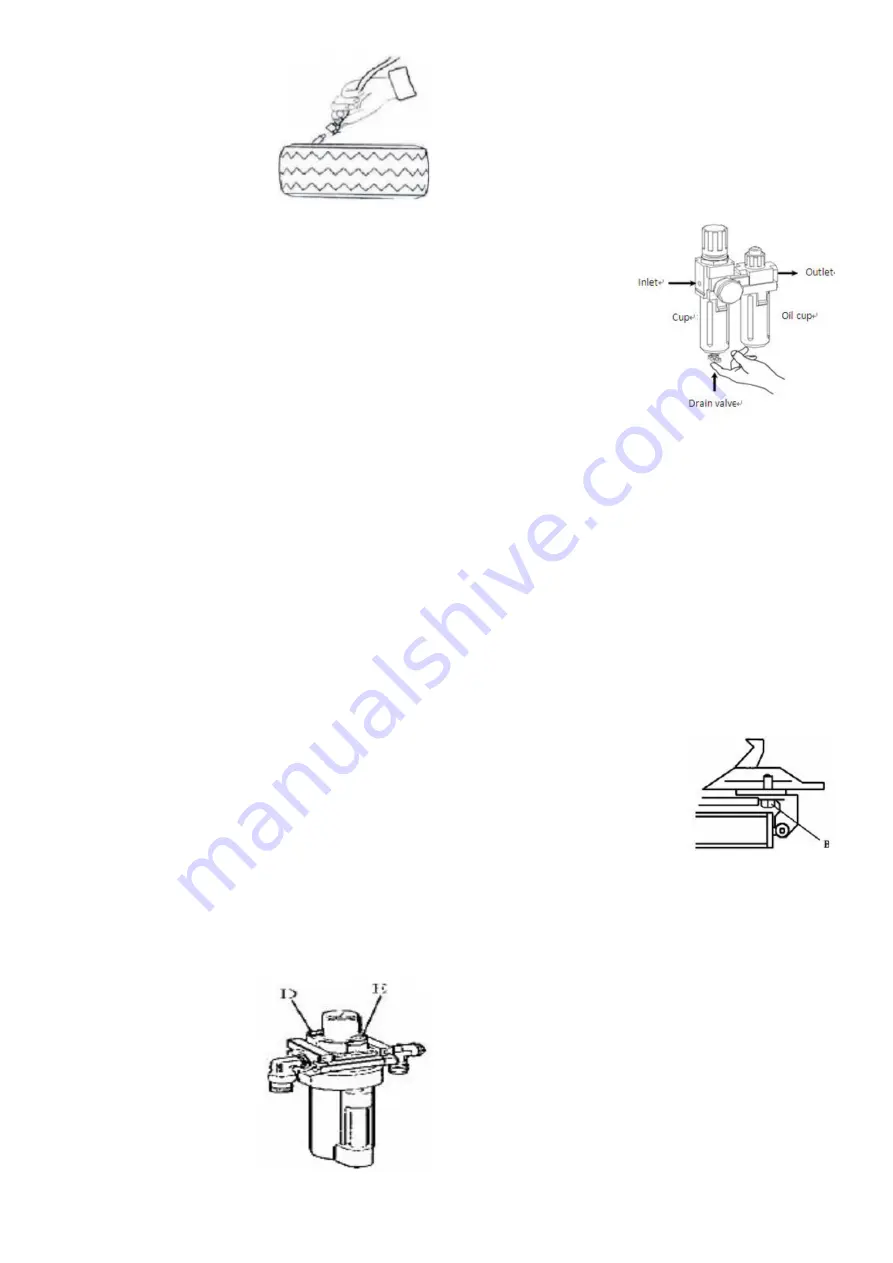
• Subsequent
maintenance must be
done at least once a month: Check the oil level
in the oil feed machine, top up with SAE30 # oil
if necessary. Unscrew with Allen key (E). Based
on the connection of compressed air, firstly,
push up the hooks and step on the pedal to the
assembly table 5-6 times, and check if oil falls
into the oil cup. For continuous operation, press
twice each time, release the oil,
otherwise, adjust the screw (D) that checks that
the oil enters.
• When you have found that there is some
water in the cup, push up the drain valve to
drain water with your fingers. Release your
finger after draining the water, the drain valve
closes automatically.
Note! After the first 20 days, tighten the hooks with
the tightening screws (B) on the
mounting table.
Note! If the mounting table
loses power, check if the belt
is tightened according to the
following steps:
• Remove the left side cover by unscrewing the
screws. Adjust the two screws on the engine
support, keeping a suitable distance between
the engine support and the engine base.
Tighten the belt tension screws.
Warning: Disconnect the machine from the mains
and pneumatic power supply.
Note! If the vertical arm is not locked or does not
meet the 2-3 mm requirement from the bottom of
the mounting / disassembly head to the rim, adjust
the hexagonal locking plate, and adjust (X).
Summary of Contents for 514019
Page 1: ...Tyre changer without a table Däckmaskin utan bord APO 3266 Item No 514019 ...
Page 10: ......
Page 19: ......
Page 20: ......
Page 21: ......
Page 22: ......
Page 23: ......
Page 24: ......
Page 25: ......
Page 26: ......
Page 27: ......
Page 28: ......
Page 29: ......
Page 30: ......
Page 31: ......


