background image

INSTALLATION INSTRUCTION – INSTRUCCIONES DE INSTALACIÓN

FOR CLAD HINGED PATIO DOOR

PUERTA DE BISAGRA PARA PATIO

Installation Instructions for Typical Wood Frame Construction.

These instructions were developed and tested for use with typical wood frame wall construction 

in a wall system designed to manage water. These instructions are not to be used with any other 

construction method. Installation instructions for use with other construction methods, multiple 

units or bow and bay windows, may be obtained from Pella Corporation or a local Pella retailer, 

or by visiting 

http://www.pella.com. Building designs, construction methods, building materials, 

and site conditions unique to your project may require an installation method different from 

these instructions and additional care. Determining the appropriate installation method is the 

responsibility of you, your architect, or construction professional. 

Always read the Pella

®

 Limited Warranty before purchasing or installing Pella 

products. By installing this product, you are acknowledging that this Limited 

Warranty is part of the terms of the sale. Failure to comply with all Pella installation and maintenance 

instructions may void your Pella product warranty. See Limited Warranty for complete details at 

http://warranty.pella.com.

REMEMBER TO USE APPROPRIATE PERSONAL PROTECTIVE EQUIPMENT.

Part Number: 801V0101

©2008 Pella Corporation 

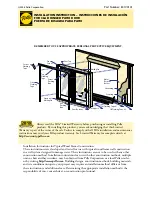
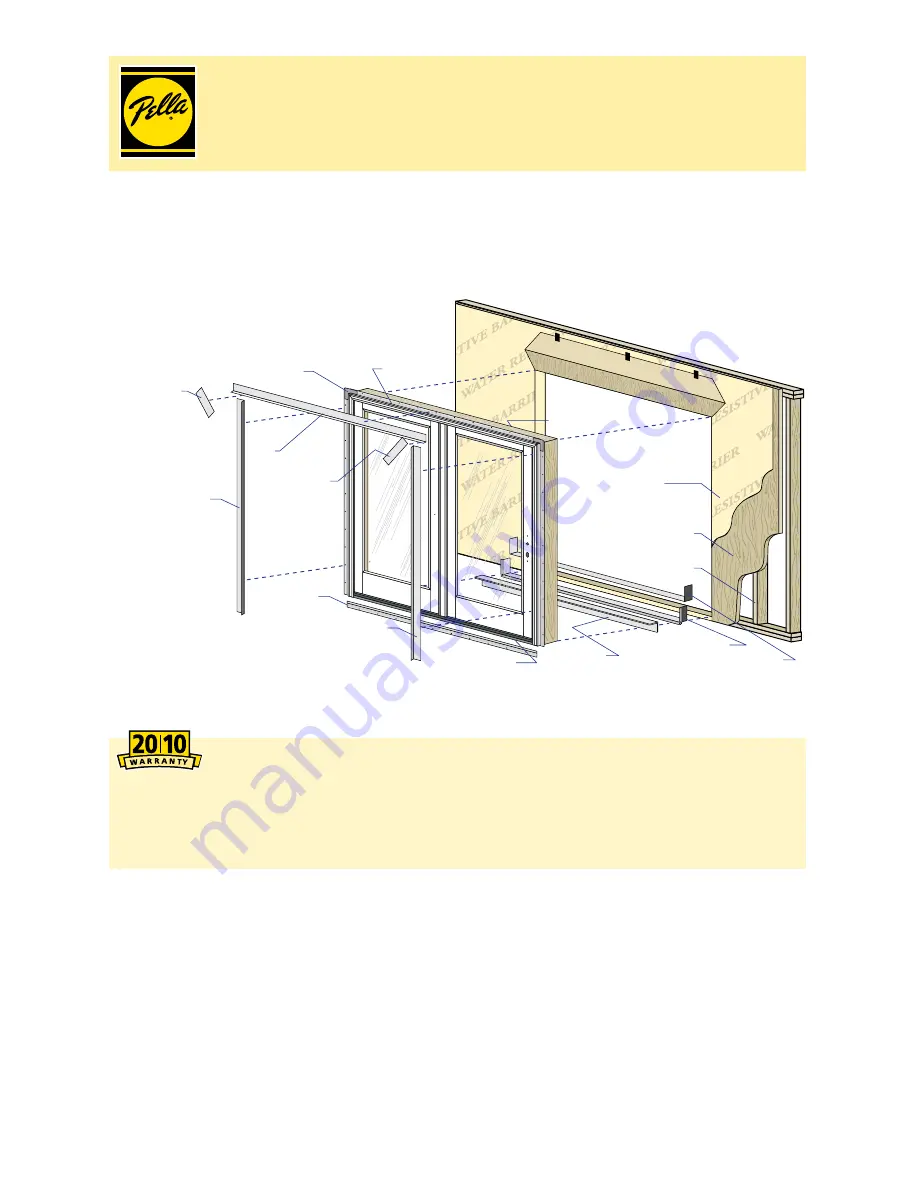
Framing 

Sill Flashing Tape #2 

Sill Flashing Tape #1 

Nailing Fin 

Water 

Resistive  

Barrier 

Sheathing 

Top 

Flashing 

Tape 

Fin 

Corner 

Door Top 

Door Bottom 

Side 

Flashing 

Tape 

Side 

Flashing 

Tape 

Corner 

Flashing 

Tape 

Corner 

Flashing 

Tape 

Optional  

Nailing Fin 

Sill Support 

Summary of Contents for 801V0101

Page 1: ...hod different from these instructions and additional care Determining the appropriate installation method is the responsibility of you your architect or construction professional Always read the Pella...

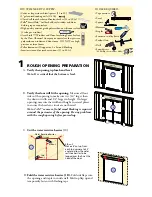
Page 2: ...ity knife Sealant Gun Drill Screwdrivers 2 Phillips small flat blade B Verify the door will fit the opening Measure all four sides of the opening to make sure it is 3 4 larger than the door in width a...

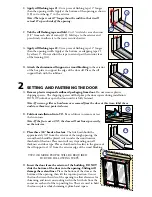
Page 3: ...shown 1E so it overhangs 1 to the exterior Note The tape is cut 12 longer than the width so that it will extend 6 up each side of the opening 2 SETTING AND FASTENING THE DOOR F Tab the sill flashing...

Page 4: ...ove all shipping spacers Note Be sure to remove the spacers from the bottom edge of the door panel I Insert and attach shims directly above the astragal in the center of the unit J Center hinge double...

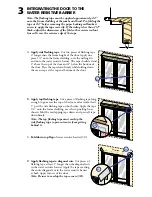
Page 5: ...The top flashing tape must overlap the side flashing tape to prevent water from getting behind it C Fold down top flap of water resistive barrier 3C 3 INTEGRATING THE DOOR TO THE WATER RESISTIVE BARR...

Page 6: ...oor Insulation Foam by the Dow Chemical Company allow the foam to cure completely usually 8 to 24 hours before proceeding to the next step Note DO NOT completely fill the space from the back of the fi...

Page 7: ...per DO NOT use steel wool BE CAREFUL NOT TO SCRATCH THE GLASS Remove sanding dust Pella products must be finished per the below instructions failure to follow these instructions voids the Limited Warr...

Page 8: ...ems The determination of the suitability of all building components including the use of Pella products as well as the design and installation of flashing and sealing systems are the responsibility of...

Reviews: