B.
Check the window operation
YHQWXQLWVRQO\E\RSHQLQJDQGFORVLQJWKHZLQGRZ
Note: If the window does not operate correctly, check to make sure it is still plumb, level,
square, and the jambs are not bowed. If adjustments are required, remove the foam with
a serrated knife. Adjust the shims, and reapply the insulating foam sealant.
C.
Inspect the interior and carefully trim all excess foam sealant
if needed.
5
INTERIOR SEAL
CAUTION: Ensure use of low pressure polyurethane window and door insulating foams
and strictly follow the foam manufacturer’s recommendations for application. Use of high
pressure foams or improper application of the foam may cause the window frame to bow
and hinder operation.
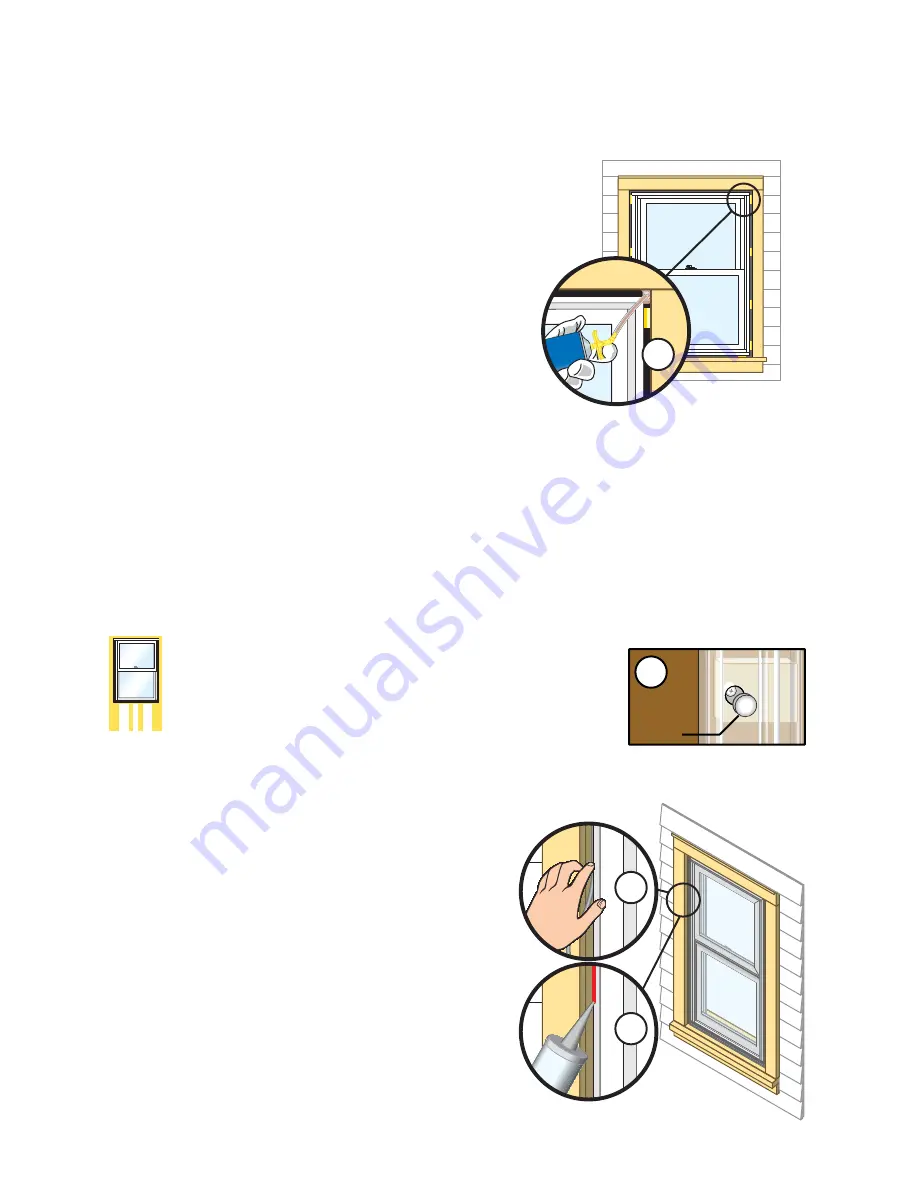
A.
Insulate between new frame
and the existing frame with
ORZH[SDQVLRQLQVXODWLQJIRDP)5207+((;7(5,25
LQVHUWWKHQR]]OHRIWKHDSSOLFDWRUDSSUR[LPDWHO\IURP
WKHLQWHULRUVWRSDQGDSSO\DGHHSEHDGRIIRDP7KLV
will allow room for the expansion of the foam and will
minimize squeeze out. Follow foam manufacturer’s
instructions. If over filled with foam, the foam must
be trimmed back to allow room for backer rod and
sealant.
Note: It may be necessary to squeeze the end of
the tube with pliers to be able to insert into the
space between the window frame and the rough
opening.
Note: Masking between the window and the existing interior stop will
help alleviate possible squeeze out of the expandable foam to the interior.
&95&3*03
"
D.
Insert jamb hole plugs
SURYLGHGLQWRHDFKVFUHZKROH
for single-hung and double-hung units.
Jamb
plug
5D
4*/(-&
)6/(
BOE
%06#-&
)6/(
6
EXTERIOR SEAL
A.
Insert backer rod
into the space around the window
at the head and jambs. This should provide at
OHDVWFOHDUDQFHEHWZHHQWKHEDFNHUURGDQG
the exterior face of the window.
Note: Backer rod adds shape and depth for
the sealant line.
B.
Place a bead of sealant
at the jambs and head
between the existing window frame and the
replacement window frame.
Caution: DO NOT seal the bottom exterior to
allow for incidental water to weep.
C.
Shape, tool, and clean excess sealant.
When
finished, the sealant should be the shape of an
hourglass.
Note: This method creates a more flexible sealant line capable of expanding
and contracting.
&95&3*03
"
#


