{
i
i
4
SEALING AND FASTENING THE WINDOW
3
PREPARE THE WINDOW FOR INSTALLATION
A.
Remove packing materials
from the window.
Note: Check product for any cracks or
penetrations in the frame. DO NOT install
damaged windows.
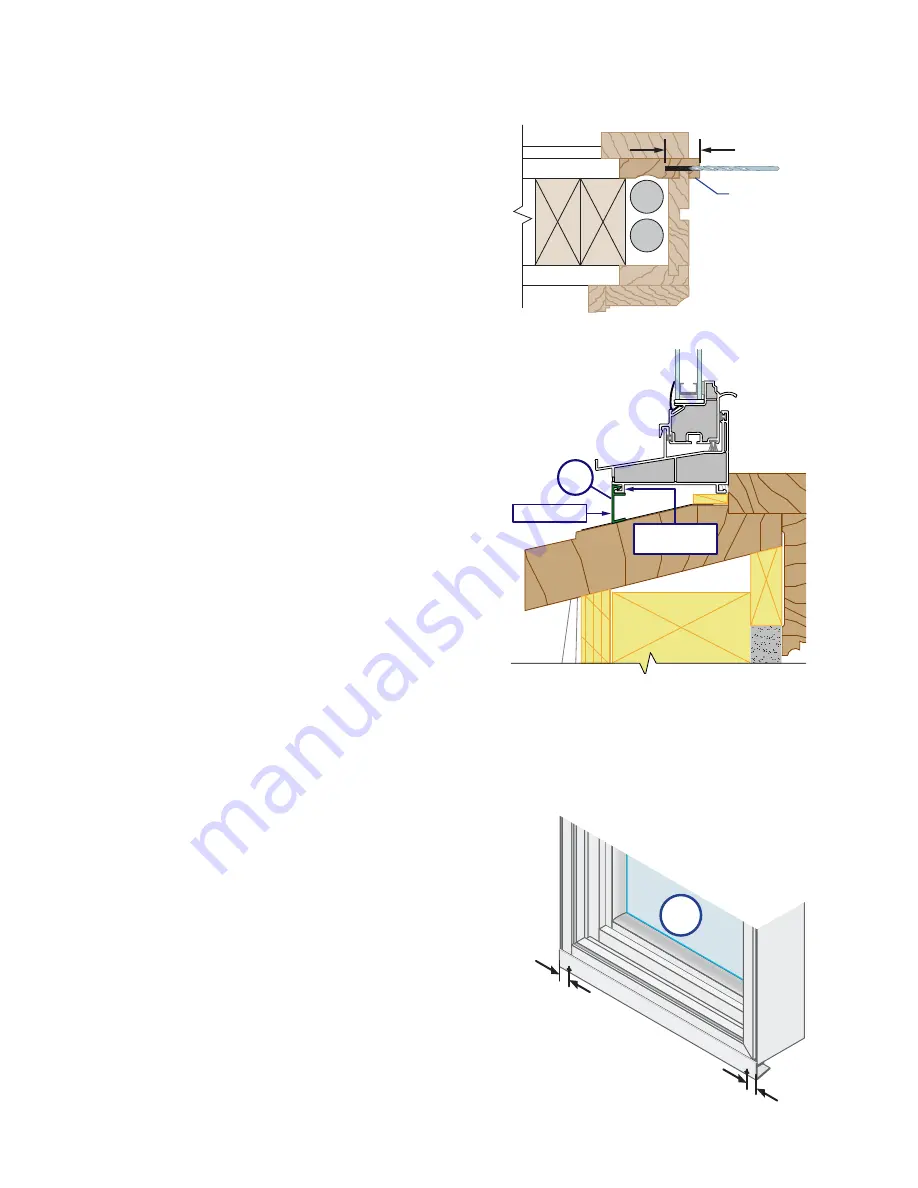
4JMMBDDFTTPSZ
HSPPWF
4JMMBEBQUFS
Î
B.
Install the sill adapter
in the sill
accessory groove.
Note: Use a rubber mallet to drive
the sill adapter into the sill accessory
groove. The vertical leg of the sill
adapter may be cut to accommodate
different sill angles.
A.
Test fit the window in the opening.
With the window closed and locked, set the bottom
of the window into the opening, then tilt the top into position.
B.
Ensure the window is resting against the interior surface of the blind stops
and the sill
adapter meets the original sill.
Note: The height of the window frame can be
increased by as much as 3/8" by applying the
head expander (included) to the window
frame. If more than 3/8" height adjustment
is required, install a continuous shim at
the sill.
DO NOT use the head expander in High
Performance installations.
C.
Apply the head expander (if required).
For installation
USINGTHEHEADEXPANDERGOTO).34!,,!4)/.
).3425#4)/.3(%!$%80!.$%2LATERINTHISBOOKLET
F.
Verify that the installation jamb screws will fasten into solid wood.
If not, insert
solid filler at screw locations.
Note: Raise the lower sash to access the lower
installation holes. There will be four or six
installation holes in each jamb, depending on
the window frame size.
High Performance Installations:
Using a
DRILLBITPREDRILLDEEPANDINSERT
XmATHEADEXTERIORGRADEWOODSCREWSIN
ALLTHEEXTERIORBLINDSTOPS3CREWSSHOULDBE
PLACEDFROMEACHENDANDNOTMORETHAN
ONCENTER
&95&3*03
&YUFSJPS
CMJOETUPQ
w
D.
Drill two 1/4
weep holes
INTHESILLADAPTER,OCATETHEHOLESvFROMEACH
end. The bottom of the weep hole must be at the bottom of the vertical leg of
the sill adapter.


