PV20a / PV30a pellet burner
page
13/ 41
DK9902A1 www.pelltech.eu
Installation of the burner to the boiler
2.2
Following tools are needed to install the burner:
Spanner no. 13 for fixing the mounting flange to the boiler’s door.
Spanner no. 10 for connecting the burning chamber to burner housing.
Crosshead screwdriver for fixing the cover of the burner.
4 mm hex wrench for fixating the burner to the flange.
In order to install the burner properly, you must go through the following steps:
Measurement
Unit
Value
⌀
D
hole for burning chamber neck
mm
90
⌀
D1
flange bolt ring diameter
mm
130..150
⌀
D2
bolt holes
mm
8..9
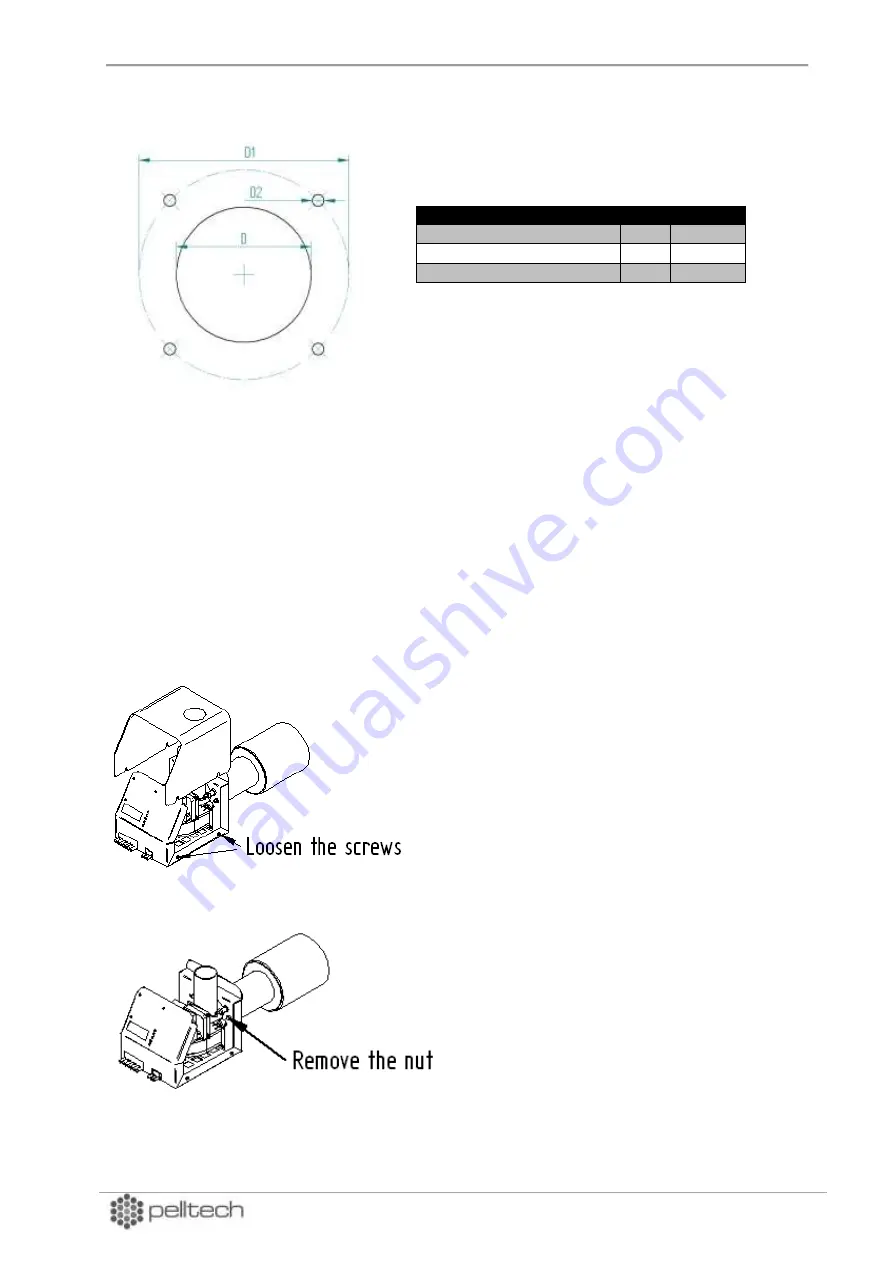
Figure 6 Mounting holes with supplied flange for boiler door
Figure 7
Figure 8
1. Remove the cover of the burner by
loosening 4 screws of the cover. There
is no need to remove the screws
Figure 7 .
2. Remove the burning chamber
from the burner by releasing the M6
nut (Figure 8) that connects the 2
halves of the burner.
Separate the halves of the burner by
pulling the burning chamber and
slightly turning it at the same time.
Table 3 Mounting hole measurements


