background image

6

SPECIFICATIONS
For PT950-B Control Module

Display Range:

0 to 99   for Toxic and Combustibles
0 to 25.0 %  for Oxygen deficiency ( 3 Digit
Display)
Others depend on the range of the Sensor.

Input Signal

:

4-20mA  (Optional 1-5 VDC)

Analog Output

:

Linear 4-20mA output.  < 1.5mA when remote
sensor in malfunction.
Maximum of 350 Ohms loop resistance.

Relay Ratings

:

4 each Form “C”  type relay contacts
Rated 5 Amps each
 Low, High, High-High, and Malfunction
Field programmable alarm levels, Latching or
non-latching,  Normally open or Normally
Closed contact

Visual Indicators:

4 Bright LEDs on the front panel to indicate
alarm status.  Amber LED for Low Alarm
Red LEDs for High and High-High and
Malfunction Alarm

Power Input:

24 VDC power  input. Power is supplied
to remote sensor & transmitter through a 2
Amp miniature fuse

Power Consumption

:

< 1.2 Watt normal operation for each control
module.  Max of 2.4 watt with all relays active.

Summary of Contents for PT900-16FG

Page 1: ...MODEL PT900 16FG 16 CHANNEL GAS MONITOR CONTROLLER Operator s Manual Revision 2 0 March 2001 Pem Tech Inc Houston Texas U S A ...

Page 2: ...rol of PEM TECH including but not limited to damage by accident negligence tampering or failure to operate in accordance with the procedures outlined in the Operations Manual PEM TECH s liability under no circumstances will exceed replacement of the unit claimed to be defective Tampering with the equipment and altering it for uses other than the intended use or replacement of parts not supplied by...

Page 3: ...and obtain shipping address Properly pack the equipment before shipping Also include your complete shipping address and contact name and phone number For non warranty repairs you must provide the limit to repair costs State if a quote for repair cost is required before you can authorize the repair cost For this an additional charge may be applicable NOTE 1 For all the repairs under warranty serial...

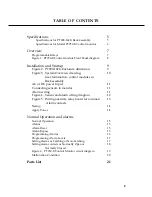
Page 4: ... Rack assembly AC or DC power Input 11 Connecting sensors to monitor 11 Alarm wiring 11 Figure 4 Sensor and alarm wiring diagram 12 Figure 5 Wiring auxiliary relay board for common 13 Alarm contacts Startup 14 Apply Power 14 Normal Operation and alarms Normal Operation 15 Alarms 15 Alarm Reset 15 Alarm Bypass 15 Programming Alarms 16 Programming Alarm Levels 17 Setting alarms as Latching or Non La...

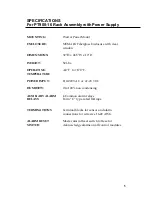
Page 5: ...0 D WEIGHT 52 Lbs OPERATING 40 F to 170 F TEMPERATURE POWER INPUT 110 220 VAC or 24 28 VDC HUMIDITY 0 to 100 non condensing AUXILIARY ALARM 4 Common alarm relays RELAYS Form C type rated 10Amps TERMINATIONS Terminal blocks for sensor and alarm connections for wire size 16 22 AWG ALARM RESET Master alarm Reset switch to Reset or SWITCH Acknowledge alarms on all control modules ...

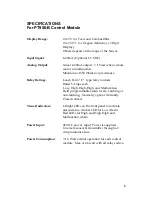
Page 6: ...ch Form C type relay contacts Rated 5 Amps each Low High High High and Malfunction Field programmable alarm levels Latching or non latching Normally open or Normally Closed contact Visual Indicators 4 Bright LEDs on the front panel to indicate alarm status Amber LED for Low Alarm Red LEDs for High and High High and Malfunction Alarm Power Input 24 VDC power input Power is supplied to remote sensor...

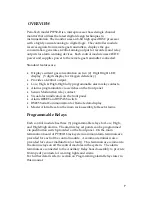
Page 7: ... programmable via switches on the front panel Sensor Malfunction relay contact Visual alarm indicators on the front panel Alarm RESET and BYPASS switch RS485 Serial Communication for Remote data display Master Alarm Reset on the main rack assembly to Reset Alarms Programmable Relays Each control module has three 3 programmable relays for Low High and High High alarms The alarm relay set points can...

Page 8: ...S PEM TECH INC LOW HIGH HI HI MALF MODEL PT 950 MONITOR HOUSTON TEXAS Digital Display Visual Alarm LED indicators Alarm Bypass Switch Pushbutton switch Alarm Reset Adjust Captive Screw Handle Figure 1 PT950 B Control Module ...

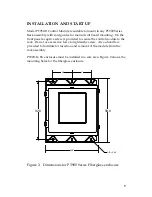
Page 9: ...ovided to secure the control module to the rack Do not use excessive force to tighten the screw Also a handle is provided to facilitate for insertion and removal of the module from the rack assembly PT900 16 FG enclosure must be installed in a safe area Figure 2 shows the mounting holes for the fiberglass enclosure Figure 2 Dimensions for PT900 Series Fiberglass enclosure 9 9 24 5 DIA 0 44 32 0 33...

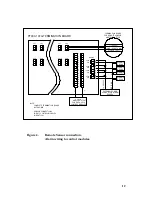
Page 10: ...SOR SIGNAL IN DRY ALARM RELAY CONTACTS SELECT LATCHING OR NON LATCHING ON CONTROL MODULE B2000108 1 0 1 OF 1 NONE USER TERMINATION MODEL PT900 16FG 16 EACH PT950B CONTROL MODULES IN FIBERGLASS ENCLOSURE 3 10 99 1 0 POWER ON OFF CH1 E CH9 E CH10 E CH2 E CH11 E CH3 E CH12 E CH4 E CH13 E CH5 E CH14 E CH6 E CH15 E CH7 E CH16 E CH8 1 2 3 4 7 8 6 5 11 12 10 9 15 16 14 13 COM OUT LOW OUT COM HIGH OUT COM...

Page 11: ...is fused through a 2 amp miniature fuse on the control module Each remote sensor should be connected by a 3 conductor shielded cable See figure 4 for remote sensor connection Alarm Wiring Figure 4 shows a typical wiring diagram for connecting alarm devices to relay contacts on the control module Note that contacts are dry or potential free contacts Refer to the wiring details provided by the manuf...

Page 12: ...OUT COM MALF ALARMS 24 VDC GND DC RETURN E mA OUTPUT TERMINATION BOARD FOR REMOTE SENSOR AND TRANSMITTER EXTERNAL POWER SOURCE FOR ALARM DEVICES ALARM 1 DEVICE DEVICE ALARM 2 DEVICE ALARM 3 DEVICE ALARM 4 V SUPPLY RETURN 4 20mA ANALOG OUTPUT FOR EACH OF 16 CONTROL MODULES NOTE COMPLETE TERMINATION BOARD NOT SHOWN SENSOR CONNECTIONS FOR ALL CONTROL MODULES IS IDENTICAL PT900 16FG TERMINATION BOARD ...

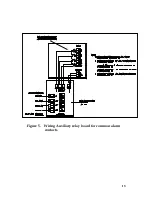
Page 13: ...13 Figure 5 Wiring Auxiliary relay board for common alarm contacts ...

Page 14: ...or and verify following conditions 1 All the installed control modules will display their corresponding channel number on the display channel 1 thru 16 For example the control module in the slot 1 will display 01 module in slot 2 will display 02 and so on The channel number will rapidly flash for few seconds 2 Each control module will then display low high and High High alarm set points The visual...

Page 15: ...fy the alarm set points and make changes if desired Refer to section on Programming Alarm Set points Factory Alarm Settings are Alarm Alarm Level Alarm Type Contact Type Low Alarm 10 Non Latching Normally Open High Alarm 15 Non Latching Normally Open High High 20 Non Latching Normally Open Alarm Reset Once the gas concentration has dropped below the alarm level the relay will deactivate itself How...

Page 16: ...ms Alarm levels must be programmed in order to activate the dry relay contacts on the main control board Alarm levels can be set anywhere between 0 and the full scale of the sensor Alarm relays can also be selected as Latching or non latching type Also jumpers on the control module can be selected to program the relay contacts to be Normally Open or Normally Closed If any alarm level is set to 00 ...

Page 17: ...arm level is set Now High alarm LED starts flashing and the display will show the High alarm level The monitor is ready for High alarm level Repeat steps 3 and 4 to set High and High High alarm levels 6 After setting High High alarm level the monitor will return to normal operation Setting Alarm as Latching or Non Latching The alarms can be set as latching or Non Latching by setting the Dip Switch...

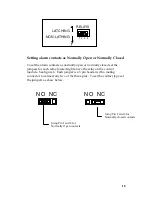
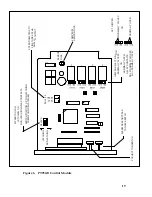
Page 18: ...elay located right above the relay on the control module See figure 6 Each jumper is a 3 pin header with a mating connector to connect any two of the three pins To set the contact type set the jumpers as show below RELAYS LATCHING NON LATHING 1 2 3 4 NO NC NO NC Jump Pin 2 and 3 for Normally closed contacts Jump Pin 1 and 2 for Normally Open contacts ...

Page 19: ...Y OPEN RELAYS LATCHING NON LATHING ADJ 4 20 OFST SPAN SENSOR FUSE HI HI HIGH LOW MALF NO NC NO NC NO NC NO NC 4 AMP MINI SENSOR FUSE SET JUMPER NORMALLY CLOSED OR NORMALLY OPEN NO NC NO NC SWITCH POSITION UP FOR LATCHING DOWN FOR NON LATCHING POTENTIOMETERS TO FINE TUNE 4 20mA ANALOG OUTPUT PUSHBUTTON SWITCH ALARM RESET BYPASS TOGGLE SWITCH Figure 6 PT950 B Control Module ...

Page 20: ...ogrammed as normally open or normally closed If a fault condition occurs 1 Make sure the wires on the sensor input terminal of the main connection board are secure and connected properly 2 Check if the sensor supply fuse located on the control module is OK The fuse can be checked by verifying the DC power on the sensor terminal using a digital voltmeter If the and pin on the sensor terminal reads ...

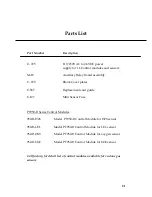
Page 21: ...87 Replacement card guide C 127 Mini Sensor Fuse PT950 B Series Control Modules 950 B H2S Model PT950 B Control Module for H2S sensor 950 B LEL Model PT950 B Control Module for LEL sensor 950 B OXY Model PT950 B Control Module for oxygen sensor 950 B SO2 Model PT950 B Control Module for SO2 sensor Call factory for detail list of control modules available for various gas sensors ...

Reviews: