background image

3

www.PennBarry.com

INTRODUCTION

Receiving and Handling

PennBarry fans are carefully inspected before leaving the factory. When the unit is received, inspect for any signs of tampering. 

Inspect the unit for any damage that may have occurred during transit and check for loose, missing or damaged parts. Mishandled 

units can void the warranty provisions. If units are damaged in transit, it is the responsibility of the receiver to make all claims against 

the carrier. PennBarry is not responsible for damages incurred during shipment.

Avoid severe jarring and/or dropping. Handle units with care to prevent damage to components or finishes. If the unit is scratched 

due to mishandling, the protective coating may be damaged. Incorrect lifting may damage the fan and void the warranty.

Storage

Long-term storage requires special attention. Store units on a level, solid surface, preferably indoors. If outside storage is necessary, 

protect the units against moisture and dirt by encasing them in plastic or in some similar weatherproof material. Periodically inspect 

units and rotate wheels to spread bearing lubricant. Failure to rotate wheels results in reduced bearing life and may void the 

manufacturer’s warranty. If the unit will be stored for an extended time, remove belts. Belts that remain under tension in a stationary 

position for extended periods are likely to have a reduced operating life.

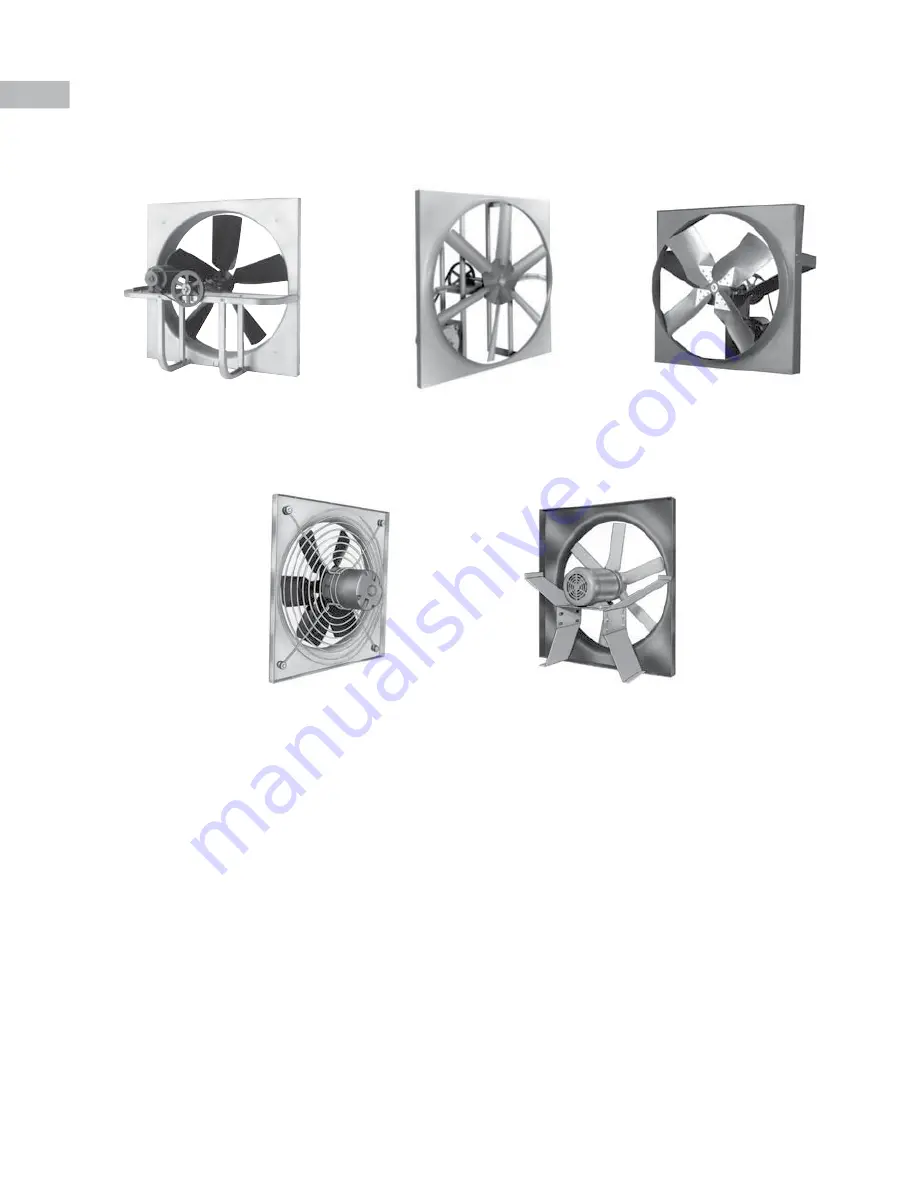
TYPE BHM/BHH

TYPE BCH

TYPE P

TYPE BC

TYPE BLL

Summary of Contents for Breezeway BC

Page 1: ...refully before attempting to assemble install operate or maintain the product described Protect yourself and others by observing all safety information Failure to comply with instructions could result...

Page 2: ...DUCTION 3 5 START UP AND OPERATION 6 7 MAINTENANCE 8 9 TROUBLESHOOTING CHECKLIST 10 11 WALL MOUNTING SLEEVE ASSEMBLY 12 WEATHERSHIELD ASSEMBLY 13 2 PIECE WALL MOUNTING SLEEVE WEATHER SHIELD GUARD ASSE...

Page 3: ...nents or finishes If the unit is scratched due to mishandling the protective coating may be damaged Incorrect lifting may damage the fan and void the warranty Storage Long term storage requires specia...

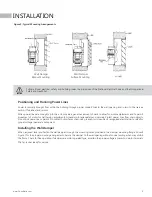
Page 4: ...mmends the use of guards on all exposed non ducted fans Installing the Panel Fan Wall openings must be square and must be a minimum of 1 2 greater than the outside dimension of the panel fan housing w...

Page 5: ...on adjustments Ground motor adequately and securely Protect power lines from sharp objects Do not kink power line or permit it to contact hot surfaces chemicals grease or oil Use only UL recognized el...

Page 6: ...oaches to the unit are free from obstruction To ensure maximum air movement make sure adequate supply air is available Before putting fan into operation complete the following check list a Turn off an...

Page 7: ...k rotating components for adequate clearance b Check proper belt tension and pulley alignment c Check installation and anchoring d Check fan bearings Switch on electrical supply and allow fan to reach...

Page 8: ...r c Under extreme temperature conditions and extremely dirty atmospheres lubrication should be at least once or twice a month Motor Lubrication In general standard motors are furnished with prelubrica...

Page 9: ...he fan for the first time completely inspect the ductwork and interior of the fan with power locked off to make certain there is no foreign material which can be sucked into or blown through the ductw...

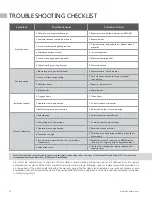
Page 10: ...tage or under voltage 2 Contact power supply company 3 Operation in wrong direction 3 Reverse direction of motor 4 Fan speed too high 4 Slow down fan by opening variable pitch pulley on motor shaft 5...

Page 11: ...correctly Incorrectly sized shafts belts pulleys impellers etc can damage the fan Typical Parts List 1 Panel 2 Venturi Orifice 3 Fan Blade Cast Aluminum or Fabricated Steel 4 Ball Bearing Motor 5 Str...

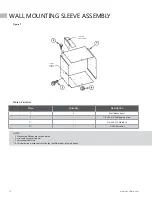
Page 12: ...2 Parts List Item Quantity Description 1 4 Wall Sleeve Panel 2 1 4 20 X 3 4 Self Tapping Screw 3 1 4 20 X 3 4 Whiz Bolt 4 1 4 20 Whiz Nut NOTES 1 Make sure all bends are to the outside 2 Use caulk to...

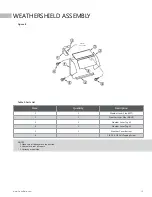
Page 13: ...ist Item Quantity Description 1 1 Weather Cover Side LEFT 2 1 Weather Cover Side RIGHT 3 1 Weather Cover Top 1 4 1 Weather Cover Top 2 5 1 Weather Cover Bottom 6 1 4 20 X 3 4 Self Tapping Screw NOTES...

Page 14: ...em Quantity Description 1 40 1 4 20 X 3 4 Self Tapping Screw 2 2 Screen Guard 3 5 3 8 16 X 1 Whiz Bolt 4 5 3 8 16 Whiz Nut 5 10 390 X 1 875 Diameter Washer NOTES 1 Equally space hardware connecting bo...

Page 15: ...t 5 5 5 3 8 16 Whiz Nut 6 10 10 390 X 1 875 Diameter Washer NOTES 1 Assemble the sheet metal parts first and then attach the screen second 2 Make sure that all bends are to the outside 3 Use caulk to...

Page 16: ...ual illustrates the appearance of PennBarry products at the time of publication View the latest updates on the PennBarry website 2018 PennBarry All Rights Reserved Revised AUGUST 2018 PennBarry is pro...

Reviews: