2-
Chapter 2 Installation
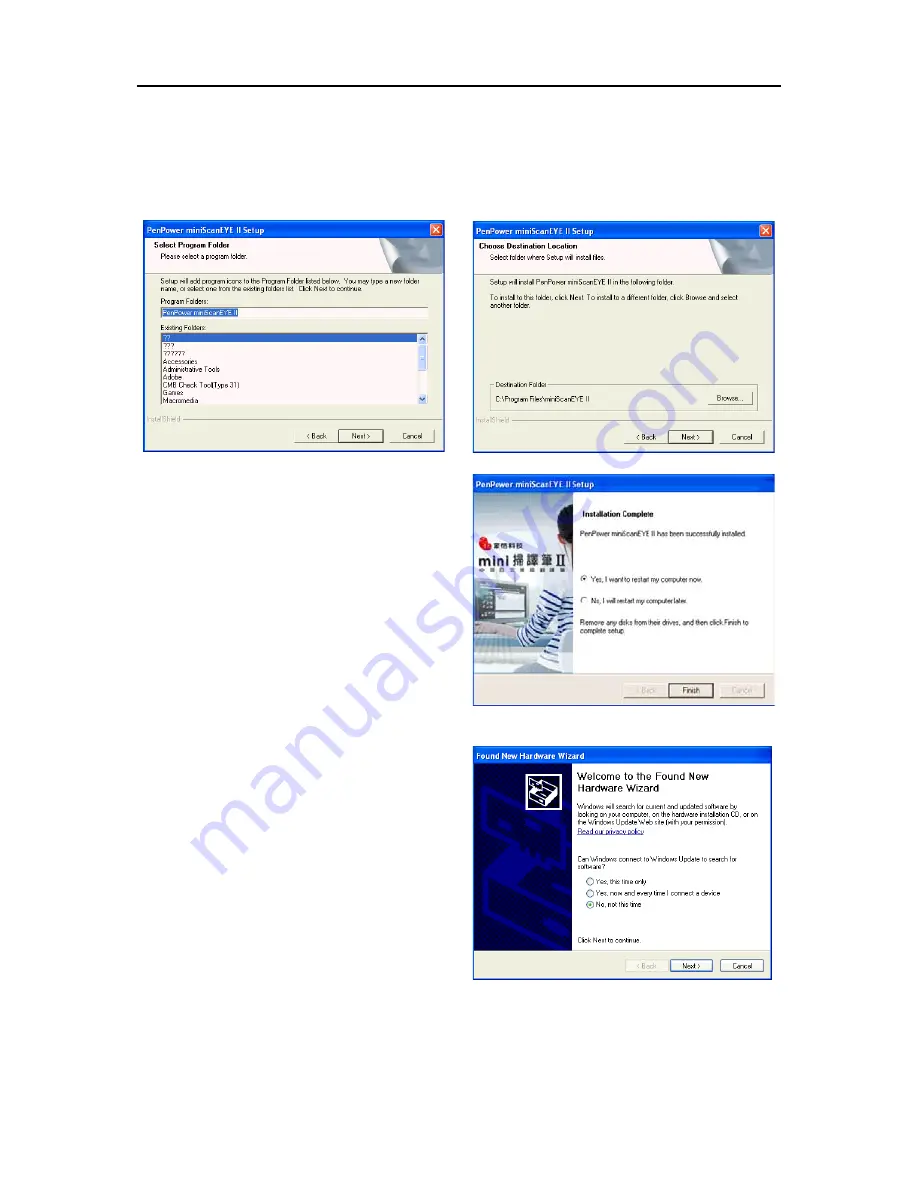
5. Choose the destination folder to install the software. This is usually left as default.
Click Next to continue.
6. Choose the folder that you want to install mini ScanEYE II to in Program Files. This
is usually left as default. Click Next to continue.
7. The installtion process will run and it
will prompt you to restart the computer
when the installtion process is finished.
Tick Yes, restart computer mow and
click on Finish to end the installation.
2.4 Hardware Installation
1. Plug in the mini ScanEYE II into your
computer’s USB port and a window
will appear, welcoming you to the
hardware installation wizard. Select
[No, not this time] and click Next to
continue.
Note: Some computers may shut down accidentally after connection. This is due to lack
of power to support several USB devices. To avoid this problem, connect your
mini ScanEYE and other USB devices to an extra-powered USB hub.


