14
04
Mat Installation
4.1
4.2
<
<
<
4.3
Caution
Caution: Do not perform any electrical work unless you are
quali
fi
ed to do so. Be sure all work is done with the power
turned OFF. Follow all local building and electrical codes.
Warning: risk of electric shock and
fi
re. Damage to cold
leads may occur if conductors are routed less than 2” from
the heating ribbon. Refer to installation instructions for
recommended means of routing cold leads.
Before Warmset products can be installed, the
fl
oor must be completely swept
of all debris.
Objects on the
fl
oor such as nails or other construction material can interfere
with the installation and operation of Warmset mat systems.
Clean the sub
fl
oor as thoroughly as you can.
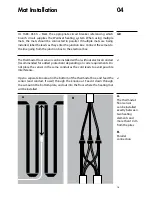
All Warmset mats have a width 20”. Depending on the layout and shape of
your room, creative placement of the heating mats may be required.
To facilitate working around obstacles, or unusual room shapes, the heating
element may be removed from the mesh. When the heating ribbon is
removed from the mesh to facilitate working around obstacles or unusually
shaped rooms, the measured center-to-center spacing between runs must be
maintained throughout the installation. However, in order to maintain even
heat dissipation, avoid removing excessive amounts of mesh.
Depending on your installation, large gaps between the mesh can exist. If you
are laying large quantities of heating mats outside of the mesh, pay close at-
tention to your spacing.
Remember that gaps larger than 1.5” can create
cold spots.
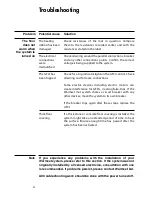
Verify that the wiring will reach the required electrical box or junction box.
Never run wiring back over mats to reach these boxes.
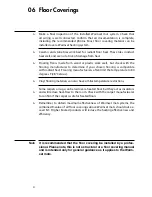
Warmset heating mats can be cut for any straight or right angle.
This process is shown on the next page
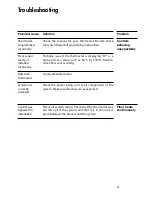
When cutting and placing mats, remember to try and space them appropriately.
There isn’t minimum bending radius but it is important to ensure there is
no overlap between installed mats. Overlapped mats can cause dangerous
overheating.


