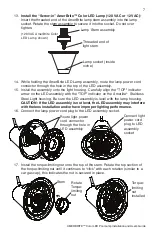
AMERBRITE™ Color LED Pool Lamp Installation and User’s Guide
18.
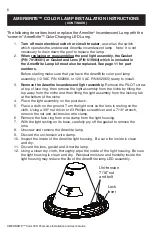
Install NEW LENS and GASKET:
Align the lens and gasket onto the light
housing. Note: The gasket is shipped installed on the lens.
a
) With the lamp housing resting on its base, place the lens/gasket on top of the
Amerlite
®
light housing.
b
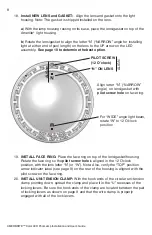
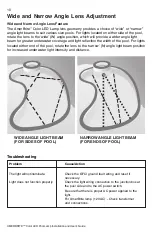
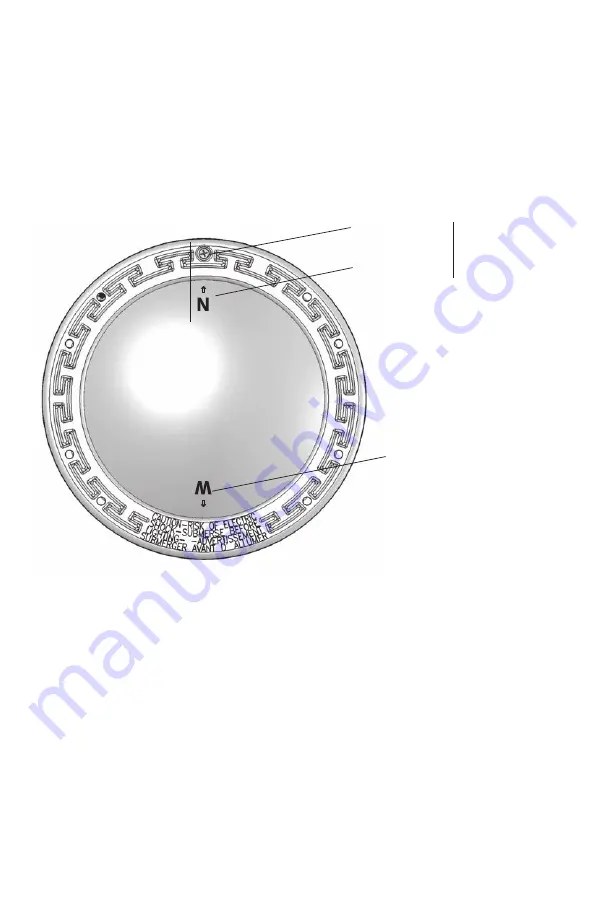
) Rotate the lens/gasket to align the letter “N” (“NARROW” angle for installing
light at either end of pool length) on the lens to the UP arrow on the LED
assembly.
See page 10 to determine the best option
.
19.
INSTALL FACE RING:
Place the face ring on top of the lens/gasket/housing.
Rotate the face ring so the
pilot screw hole
is aligned in the 12 O’clock
position, with the lens letter “N” (or “W”). Note: Also, verify the “TOP” position
arrow indicator label (see page 9) on the rear of the housing is aligned with the
pilot screw on the face ring.
20.
INSTALL UNI-TENSION CLAMP:
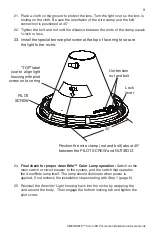
With the hook ends of the circular uni-tension
clamp pointing down, spread the clamp and place it in the “U” recesses of the
locking levers. Be sure the hook ends of the clamp are located between the pair
of locking levers as shown on page 9 and that the wire clamp is properly
engaged with all of the lock levers.
8
Align letter “N” (“NARROW”
angle) on lens/gasket with
pilot screw hole
on face ring.
ALIGN
PILOT SCREW
(12 O’clock)
“N” ON LENS
ALIGN
For “WIDE” angle light beam,
rotate “W” to 12 O’clock
position


