8
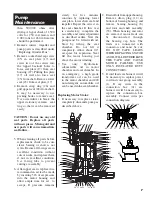
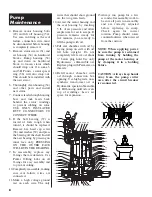
4. Remove motor housing bolts
(29) and lift off housing (34).
Use care in lifting as the seal
failure con
nec
tion wire must
be disconnected before housing
is completely removed.
5. Remove stator screws (31) and
set housing (34) on hardwood
blocks. Bump housing (34)
up and down on hardwood
block to loosen sta
tor which
should drop out. On some 3
and 5 HP units, a stator spacer
ring (36) will also drop out.
This should be re in stalled with
the new stator.
6. Thoroughly clean housing (34)
and other parts and install
new stator.
7. Connect leads through housing
bore and tuck leads back
behind the stator windings
to prevent rub
bing on rotor.
USE
ONLY
IN SU LAT ED
BUTT CONNECTORS TO
CONNECT WIRES.
8. If the ball bearing (37) is
rusted or feels rough when
turned, it should be replaced.
Remove hex head cap screw
(38) and washer (39) and press
the bearing off the shaft. Install
the new bearing by press ing on
inner face only. PRESS
ING
ON THE OUTER FACE
WILL RUIN THE BEARING.
9. In reassembly, replace any
O-rings that are defective. Use
Parker O-Ring Lube on all
O-rings for easy assembly and
to prevent cutting.
10.Completely reassemble, making
sure seal failure wires are
connected.
11.Make a high voltage ground
test on each wire. The only
Pump
Maintenance
wires that should show ground
are the two green leads.
12.Air test the motor housing and
the seal housing by inserting
5 lb. of air pressure and allow
ample time for air to escape. If
pressure re
mains steady for
five minutes, you are ready to
fill the pump with oil.
13.Fill seal chamber with oil by
lay ing pump on side with oil
fill hole upright. Do not
completely fill; leave oil about
1
⁄
2
" below plug hold. Use only
Hydromatic submersible oil.
Replace plug with Permatex on
threads.
14.Refill motor chamber with
oil through connection box
opening. Use high grade, non-
synthetic trans
form
er oil or
Hydromatic special submersible
oil. Fill housing until oil covers
top of windings. Leave air
space for expansion.
15.Always run pump for a few
sec onds after assembly work to
be sure all parts run smoothly
and are correctly adjusted
before re
plac
ing in sump.
Check again for cor
rect
rotation. Pump should rotate
counterclockwise when viewed
from the suction.
NOTE: When applying power,
be sure the pump is restrained
from turning by holding the
pump at the motor housing or
by clamping it in a holding
fixture.
CAUTION: Always keep hands
away from the pump cutter
area after the circuit breaker
is reconnected.
16
25
17
26
64
48
31
46
49
50
51
53
15
18
14
30
29
7
45
32
45
35
8
52
54
24
23
28
13
27
11
10
6
5
3
2
1
47
42
4
34
9
12
59
19
58 57 56 22
21 20 55
41 40 64 38 39
33
43
44
;;;;
;;;
;
;
;;;
;;;
;;;
;
;
;
;
;
40
39
38
8
63
62
53
52
64
65
37
67
50
49
66
51


