
1
2
3
4
5
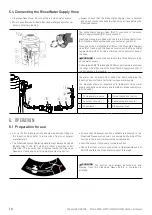
6
7
8
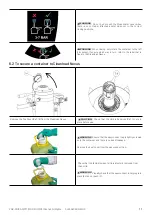
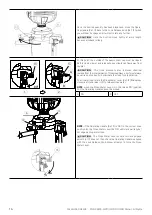
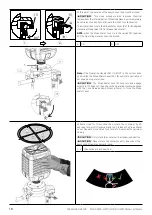
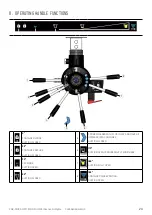
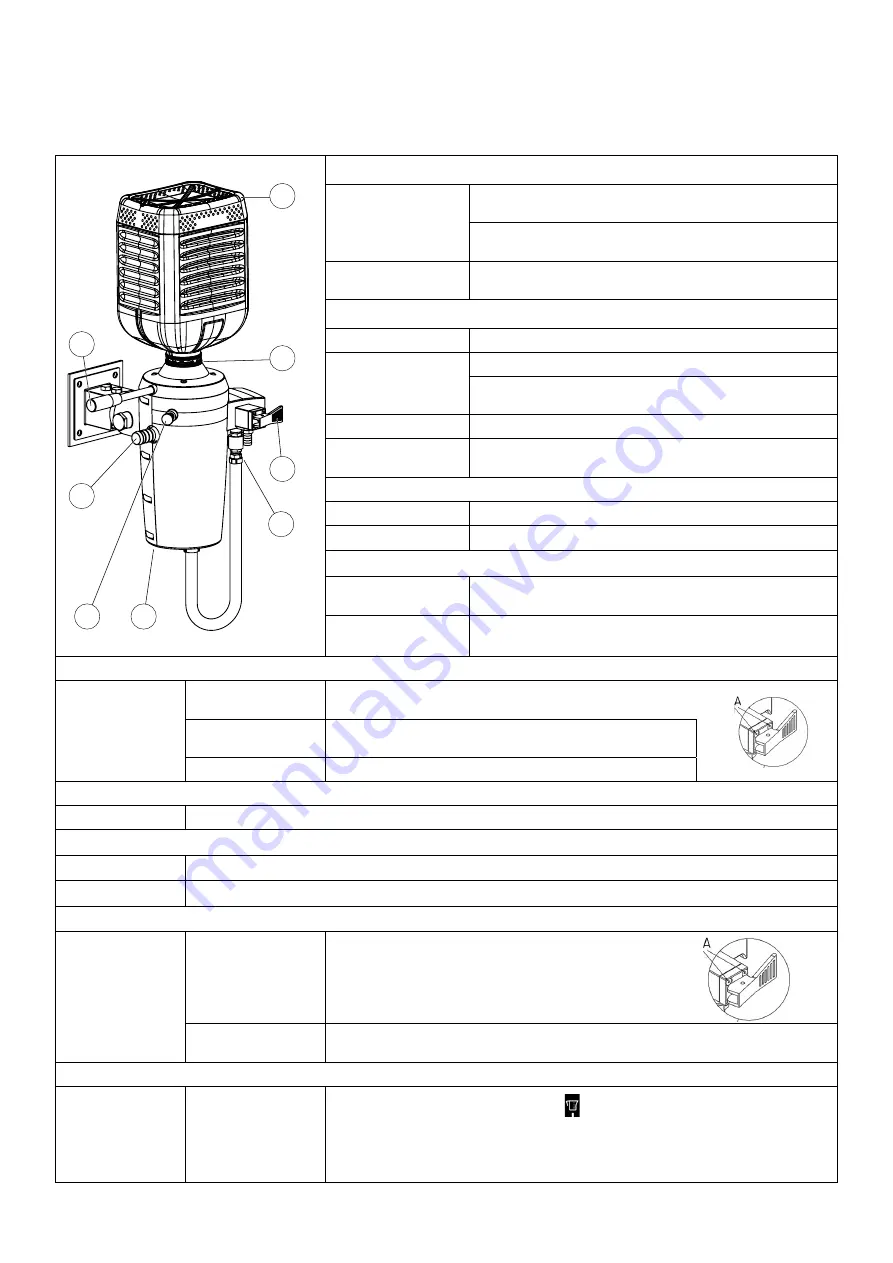
General Function of Cleanload Nexus
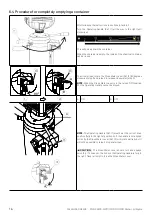
Slow or incomplete
emptying due to low
suction.
Insert a suction gauge in the line to check suction pressure, if
necessary review the industor (venturi) specification of the sprayer.
Check for obstruction of the suction line or air leaks in the Suction
Hose or connections.
Poor rinsing of container
or cap.
Rinse pressure must be a minimum 3.5 bar.
①
Operating Handle
Hard to turn.
Consult a trained service technician.
Will not turn at all.
Check rinse water lever (6) is not engaged.
Check chemical residue and cleaning regime or consult a trained
service technician.
Makes a noise.
Consult a trained service technician.
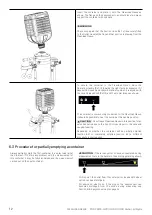
Flow is hard to control
when partial dosing.
Reduce sprayer suction pressure, e.g. by adjusting the pump speed,
the optimum suction for dosing is -0.4 bar.
②
Hosetail Outlet
Leak from Hosetail.
Secure hose clamp.
Foaming in suction line.
Check for air leaks.
③
Lock Release Knob
Fails to stop Operating
Handle on return.
Consult a trained service technician.
Fails to release operating
handle on return.
Consult a trained service technician.
④
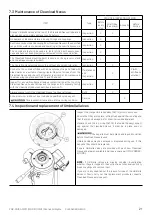
Outer Casing
Leak through outer
casing, seen at the
base.
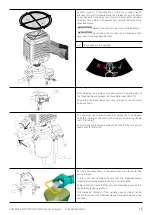
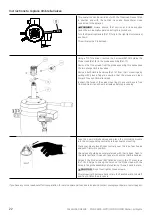
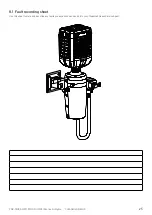
Rinse water, constant
flow.
Rinse valve fault, check the four retaining screws (A) for tightness or
consult a trained service technician.
Rinse water,
intermittent.
Back flow from the Suction Hose may be escaping into casing. Ensure
that a Check Valve is installed in the suction line.
Is it chemical?
Immediately stop using and consult a trained service technician.
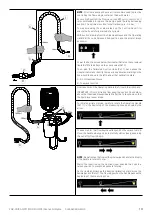
⑤
Rinse Water Hoses
Leaking.
Check and tighten connections.
⑥
Rinse Water Lever
Will not engage.
Check Operating Handle is in one of the 2 rinse positions or or consult a trained service technician.
Will not disengage.
Consult a trained service technician.
⑦
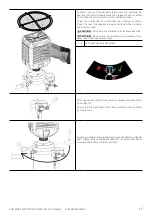
Top of Coupler
Liquid emerges or
pools around the top
of the probe head
when no container is
attached.
Constant when there is
rinse water supply.
Rinse valve fault, check the four retaining screws (A) for tightness or
or consult a trained service technician
Intermittent, only when
suction is switched off.
Back flow from the Suction Hose may be escaping into casing. Ensure that a Check Valve is
installed in the suction line.
⑧
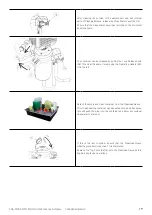
Easyconnect Container
After measuring a
partial container,
and when rinsing the
outside of the cap,
rinse water is seen to
enter the container.
The plug from the
easyconnect cap has
become dislodged and
entered the container
Move the Operating Handle to closed position
then EITHER: Fully discharge the container
by moving the Operating Handle fully to the right and then rinse as usual. OR
:
T
o retain the
remaining contents inside the container, with the container still locked onto the Cleanload
Nexus invert both the Cleanload Nexus and the container to drain the contents back into the
container which can then be carefully removed.
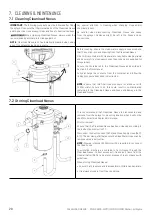
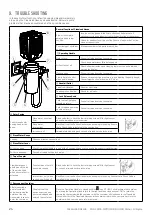
9. TROUBLESHOOTING
In the event of malfunction or a fault developing, please immediately
stop using the Cleanload Nexus and seek advice. Below are some
problems that may be encountered and their possible causes.
CLEANLOAD NEXUS
PNR-CN100-OIPM (10/12/21) ©2021 Pentair. All Rights.
24


