background image

®

IMPORTANT SAFETY INSTRUCTIONS

READ AND FOLLOW ALL INSTRUCTIONS

SAVE THESE INSTRUCTIONS


Underwater Pool

LED Color-Changing Light

Installation and User’s Guide

Summary of Contents for IntelliBrite

Page 1: ... IMPORTANT SAFETY INSTRUCTIONS READ AND FOLLOW ALL INSTRUCTIONS SAVE THESE INSTRUCTIONS Underwater Pool LED Color Changing Light Installation and User s Guide ...

Page 2: ...ss noted names and brands of others that may be used in this document are not used to indicate an affiliation or endorsement between the proprietors of these names and brands and Pentair Water Pool and Spa Inc Those names and brands may be the trademarks or registered trademarks of those parties or others P N 619675 Rev C 08 21 09 Customer Service If you have questions about ordering Pentair repla...

Page 3: ...ng a Wall Switch 2 Maximum Wattage when Using Multiple Lights with the IntelliBrite Controller 2 IntelliBrite LED Pool Light Installation 3 Installing the IntelliBrite LED Light Fixture New Pool Construction 3 Installing the IntelliBrite LED Light After Electrical Requirements are Met 3 Replacing the IntelliBrite LED Light Assembly in an Existing Pool 4 Before Replacing the IntelliBrite LED Light ...

Page 4: ...UAL WARNING Important Safety Information for Pentair Niche and Light Installation All Niche and Light installations must conform with all codes If local codes mandate a cord seal use Pentair Water Pool and Spa plastic niches P N 79206600 and P N 79206700 Under no circumstances replace lights by splicing wire under water or behind niche WARNING RISK OF ELECTRIC SHOCK AND INJURY USE ONLY THE INSTALL...

Page 5: ... power from a standard wall switch By turning the switch on and off a specific number oftimes thelightactivatesoneofthesevenlightshowmodes fixedcolors andenablesthe Hold and Recall feature Selecting a light show mode or fixed color Switch power on to the light A white light will momentarily illuminate followed by the previously selected color To select a color show mode 1 7 or fixed color 8 12 tur...

Page 6: ... o o p e h t t a x o b n o i t c n u j e h t o t n o i t c e n n o c g n i r i w t h g i l e h t k c e h C h c t i w s r e w o p C A e h t o t d n a t h g i l e h t o t d e i l p p a r e w o p C A r e p o r p s i e r e h t t a h t e r u s e B Turn switch off on 13 times to save color effect Capture a unique color effect while Romance Mode is active Off Saved color effect is displayed On Turn switc...

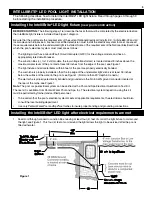
Page 7: ...op edge of the underwater light s lens is at least 18 inches below the surface of the water in the pool see Figure 1 Not more than 20 depth in Canada The wet niche is properly electrically bonded and grounded via the No 8 AWG ground connector located at the rear of the niche see Figure 1 Note The pool or spa electrical system can be verified with a Pool and Spa Electrical Qualification Test Kit Th...

Page 8: ...d which could result in death or serious injury to pool users installers or others due to electrical shock and may also cause damage to property Always disconnect the power to the pool light at the circuit breaker before servicing the light Failure to do so could result in death or serious injury to serviceman pool users or others due to electrical shock Before replacing the IntelliBrite LED light...

Page 9: ...Figure 1 on page 2 This four 4 feet of cord coiled around the light allows the light to be serviced after the pool is filled with water 6 Cut the cord at the Junction Box leaving at least size 6 inches of cord to make connections 7 Strip six 6 inches of the outer cord jacket from the cord to expose the three 3 insulated wires be careful not to damage the insulation on the three inner wires 8 Conne...

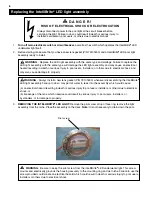
Page 10: ...sulting in death or serious injury to pool users installers or others due to electrical shock or b breakage of the lens which likewise could result in serious injury to pool users installers or bystanders or in damage to property 3 REMOVING THE INTELLIBRITE LED LIGHT Remove the pilot screw at top of face ring remove the light assembly from the niche Place the assembly on the deck Note It is not ne...

Page 11: ...S GASKET P N 79101600 MUST BE USED EACH TIME THE LIGHT IS REASSEMBLED See page 10 for replacement kit part numbers 7 Using a nut driver carefully remove the four retainer nuts from the LED light assembly Place the nuts aside for reinstallation 8 Unplug the LED light assembly connector and remove the assembly from the housing Retaining nut 4x Face ring Gasket and lens Light housing Unplug the LED l...

Page 12: ...ut driver secure the light assembly in place with the four 4 retaining nuts 14 Install the new gasket onto the lens a With the light housing resting on its base place the lens then the gasket on top of the light housing b Place the face ring on top of the gasket Make sure that the lens and gasket are centered correctly on the lighthousing c Aligning the face ring and lens Align the face ring and l...

Page 13: ...e housing securely to the mounting ring and wet niche Failure to use the screw provided could create an electrical hazard which could result in death or serious injury to pool users installers or others due to electrical shock 18 Before powering on the IntelliBrite LED light be sure the IntelliBrite LED light is completely submerged in the water The light should never be powered on out of the wate...

Page 14: ...iBrite Spa light be used It is also recommended not to exceed 100 feet of total cable run between the transformer and light see diagram below If a longer cable run is necessary it is recommended that separate 100 Watt transformers be used for each light with no more than 200 feet of total cable run between the transformer and light see diagram below 300Watt Transformer J Box 12 Gauge minimum 100 f...

Page 15: ...er tempered 600076 Light assembly IntelliBrite LED Pool Gasket 8 3 8 in diameter off white 79104800 Pilot screw with captive gum washer 79101600 Gasket 8 3 8 in diameter off white Note A 12 VAC 60 Hz 50 Hz where applicable external isolating safety transformer is required for the 12 VAC model IntelliBrite LED Pool light See page 1 for more information Pilot screw with captive gum washer Face ring ...

Page 16: ...P N 619675 Rev C 08 21 09 619675 ...

Page 17: ...INSTRUCCIONES IMPORTANTE DE SEGURIDAD LEA Y OBSERVE TODAS LAS INSTRUCCIONES GUARDE ESTAS INSTRUCCIONE Guía de Instalación y del Usuario Lámpara Submarina de LED para Piscinas que Cambia de Color ...

Page 18: ...ara indicar una afiliación o endoso entre los propietarios de estos nombres y marcas y Pentair Water Pool and Spa Inc Esos nombres y marcas podrían ser las marcas registradas de esas partes u otros P N 619675 Rev C 08 21 09 Servicio al Cliente Si tiene preguntas acerca de cómo ordenar piezas de repuesto Pentair y productos de piscinas por favor use la siguiente información de contacto Servicio al ...

Page 19: ... lugar de usar un interruptor de pared 2 Vataje wattage máximo al usar múltiples lámparas con el Regulador IntelliBrite 2 Instalación de la lámpara de LED IntelliBrite para piscinas 3 Instalación de la lámpara de LED IntelliBrite construcción de piscinas nuevas 3 Instalación de la lámpara de LED IntelliBrite luego de cumplir los requisitos eléctricos 3 Reemplazo del ensamblaje de la lámpara de LED...

Page 20: ...producida bajo el Listado y el servicio de seguimiento de UL para la ubicación del uso asociado PRECAUCIÓN La lámpara de LED IntelliBrite para Pentair Water Pool and Spa debe ser usada sólo con carcasas nichos para lámparas de Pentair Water Pool and Spa Si la lámpara de LED IntelliBrite está instalada en otros nichos la instalación no tendrá la aprobación U L y se anularán todas las garantías ADVE...

Page 21: ...ed regular Mediante el encendido y apagado del interruptor una cantidad específica de veces la lámpara activa uno de los siete modos de espectáculo lumínico de colores fijos y habilita la función de Capturar y Traer a la memoria Selección de un modo de espectáculo lumínico o color fijo Encienda la lámpara Una luz blanca se encenderá momentáneamente seguido por el color seleccionado previamente Par...

Page 22: ...a r a p m á l a l e d s e l b a c e d n ó i x e n o c a l e u q i f i r e V o d a g a p a y o d i d n e c n e e d r o t p u r r e t n i l e n e y a n i c s i p a l e d o d a l l a s e m l a p m e a e s a d a i p o r p a a n r e t l a e t n e i r r o c e d a c i r t c é l e a í g r e n e a l e u q e s e r ú g e s A a r a p m á l a l a a d a r t s i n i m u s Encienda y apague el interruptor 14 vece...

Page 23: ...a a través del conector a tierra Nº 8 AWG ubicado en la parte posterior del nicho consulte la Figura 1 Nota El sistema eléctrico de la piscina o del baño termal puede ser verificado con un equipo de prueba de idoneidad El equipo de prueba puede ser adquirido en Pentair Water Pool and Spa Inc La inspección del sistema eléctrico mediante este equipo debe ser realizada por personal capacitado y certi...

Page 24: ...scarga eléctrica y también podría causar daños a la propiedad Siempre desconecte la alimentación eléctrica de la lámpara de la piscina en el cortacircuito antes de efectuar el mantenimiento de la lámpara Dejar de hacer esto puede resultar en la muerte o lesión grave del técnico los usuarios de la piscina u otras personas debido a descarga eléctrica Antes de reemplazar la lámpara de LED IntelliBrit...

Page 25: ... lámpara consulte la Figura 1 en la página 2 Esto permite efectuar el mantenimiento de la lámpara después de que la piscina esté llena de agua 6 Corte el cable en la caja de empalme dejando un tramo de al menos 15 24 cm 6 pulg para efectuar las conexiones 7 Quite unos 15 24 cm 6 pulg de la cubierta exterior del cable para poner a la vista los tres alambres aislados Tenga cuidado de no dañar el ais...

Page 26: ...causar daños a la propiedad ADVERTENCIA Siempre instale una junta para lentes nueva P N 79101600 cada vez que desarme la lámparadeLEDIntelliBrite Elnohacerlopodríapermitirqueentreaguaalensamblajelocualpudieraprovocar a unpeligroeléctricoquepuederesultarenlamuerteolesióngravedelosusuariosdelapiscina losinstaladores u otras personas debido a descarga eléctrica o b rotura del lente lo cual puede igua...

Page 27: ...Z QUE LA LÁMPARA ES REENSAMBLADA Consulte la página 10 para obtener los números de los kits de piezas de repuesto 7 Utilizando una llave para tuercas de remueva con cuidado las cuatro tuercas de retención del ensamblaje de la lámpara de LED Coloque las tuercas a un lado para utilizarlas en la reinstalación 8 Desenchufe el conector del ensamblaje de la lámpara de LED y remueva el ensamblaje de la c...

Page 28: ...blaje de la lámpara con las cuatro 4 tuercas de retención 14 Instale la nueva junta sobre el lente a Con la carcasa de la lámpara descansando sobre su base coloque el lente y luego la junta sobre la carcasa de la lámpara b Coloque el aro frontal sobre la junta Asegúrese de que el lente y la junta se encuentren centralizados correctamente en la carcasa de la lámpara c Alineación del aro frontal y e...

Page 29: ... y el nicho en húmedo El incumplimiento de no utilizar el tornillo proporcionado puede crear un peligro eléctricoquepuederesultarenlamuerteolesióngraveparalosusuariosdelapiscina losinstaladores oaotras personas debido a descarga eléctrica 18 Antes de encender la lámpara de LED IntelliBrite asegúrese de que la lámpara de LED IntelliBrite se encuentre totalmente sumergida en el agua La lámpara nunca...

Page 30: ...ienda no exceder de 100 pies la corrida de cable total entre el transformador y la lámpara consulte el diagrama que aparece a continuación Si se necesita una recorrida de cable más larga se recomienda que se utilicen transformadores de 100 vatios por separado para cada lámpara con no más de 200 pies de corrida de cable total entre el transformador y la lámpara consulte el diagrama que aparece a co...

Page 31: ... lámpara IntelliBrite de LED para piscinas Junta 8 3 8 pulgs de diámetro blanco oscuro 79104800 Tornillo piloto con arandela de retención 79101600 Junta 8 3 8 pulgs de diámetro blanco oscuro Nota Se requiere un transformador aislado de seguridad externo de 12 VCA 60 Hz 50 Hz cuando sea aplicable para el modelo de la lámpara de LED IntelliBrite para piscinas de 12 VCA Consulte la página 1 para obte...

Page 32: ...P N 619675 Rev C 08 21 09 619675 ...

Reviews: