PROWLER
®
820 and 830 Installation and User’s Guide
4
PROWLER
®
820 and 830 Installation and User’s Guide
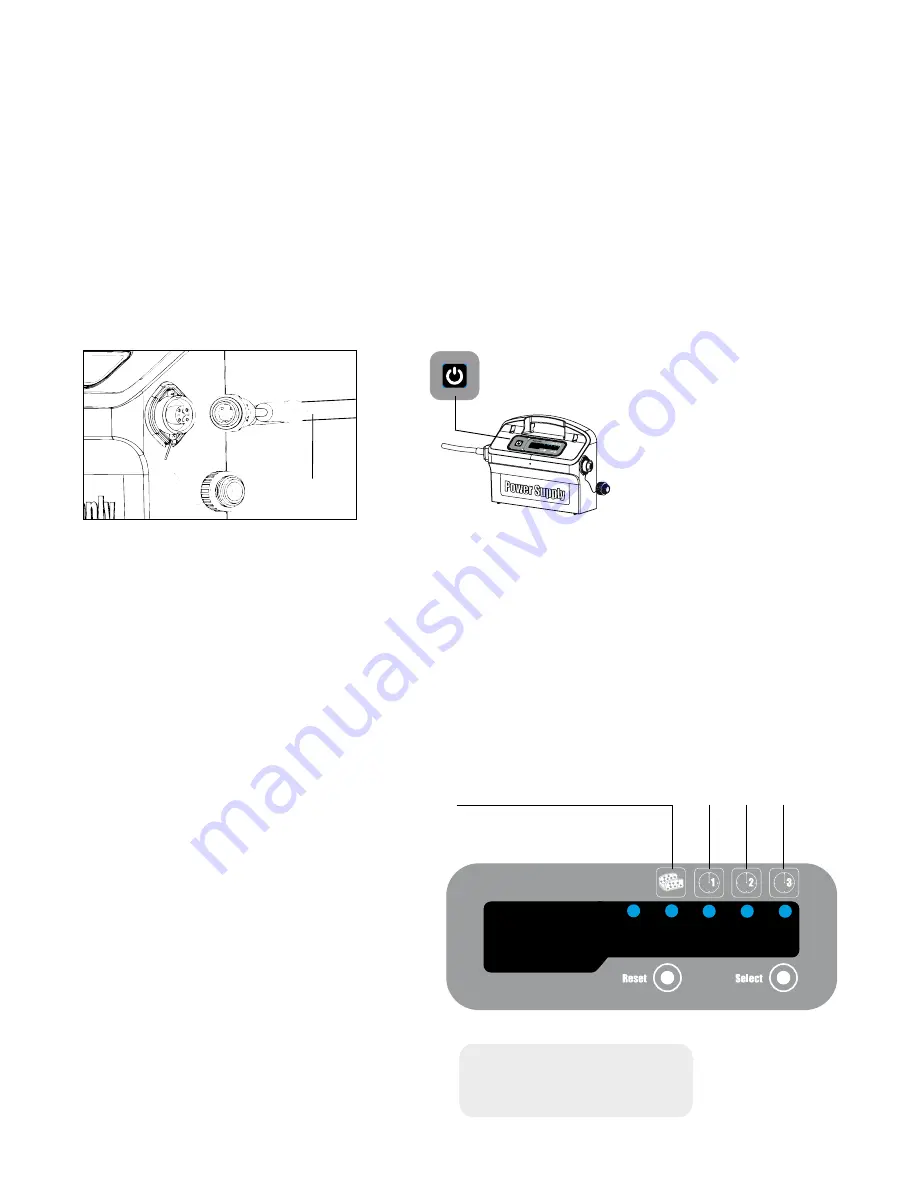
Full Filter Bag Indicator
LED 1
LED 2
LED 3
LED 1 -
7x per week - every day
LED 2 -
3x per week - every other day
LED 3 -
2x per week - every 3 days
Turning the Cleaner ON
When the power supply is switched on, the 3 LEDs will blink for 5 seconds. At this time by pressing the
SELECT button, you may choose a pool cleaning schedule for the coming week.
Note:
The cleaner will always begin to work upon set-up.
LED 1 -
The cleaner will automatically work every day for a full cycle = 7 times per week.
LED 2 -
The cleaner will automatically work every other day for a full cycle = 3 times per week.
LED 3 -
The cleaner will automatically work every 3 days = 2 times a week.
1.
Plug the floating cable from the cleaner into the power supply unit.
2. Plug the electrical cable from the power supply unit into a house receptacle.
3.
Assemble the power supply onto the cart.
4.
Press the ON/OFF switch on the power supply unit. The cleaner will now start to work.
Floating Cable
On/Off Switch
Setting the Weekly Timer (830 Model Only)
The power supply has a timer control that allows you to set an automatic cleaning schedule each week. Be sure the
cleaner is fully immersed in water before turning on the power.
Floating Cable
On/Off Switch
Digital Switch Mode Power Supply
Weekly Timer and Full Filter Bag Indicator
If you do not press any of the buttons within the first
5 seconds after the power has been switched on,
the cleaner will default to running one cycle only.
While the cleaner is working in weekly timer mode,
the LED will blink constantly between cycles. At the
end of the week the power supply automatically
shuts off.
• Input - 100-250 AC Volts
• 50-60 Hertz
• 180 Watt
• Output - 30 VDC
• IP 54


