background image

2

598-1351-01

INSTALLATION

For easy installation, select an existing light operated 
by a wall switch for replacement.
For best performance, mount the fixture about 8 feet 
(2.4 m) above the ground. 

NOTE: If fixture is mounted 

higher  than  8  ft.  (2.4  m),  aiming  the  sensors  down  will 
reduce coverage distance.

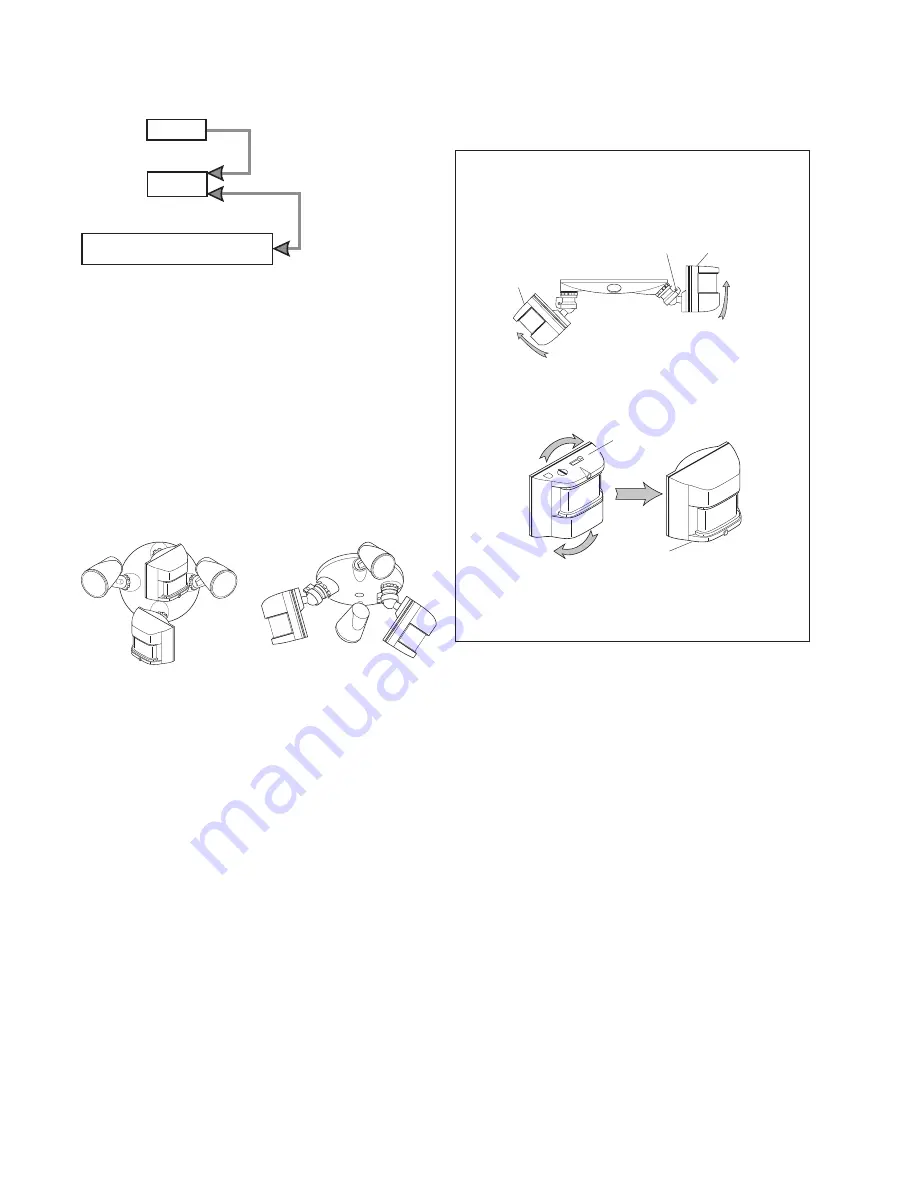
For eave mount only:

 Swing the sensor heads toward the clamp screw 

joint. 

If a sensor pops out of the ball joint, loosen the clamp 
screw and push the sensor back into the ball joint. 
Tighten the clamp screw when done.

 Then rotate the sensor heads clockwise 180° so 

the controls face down.

Controls

For under eave installation, the sensor heads must 
be rotated
 as shown in the next two steps for proper 
operation and to avoid the risk of electrical shock.

For second story installation, point one sensor head for-
ward for maximum coverage and point the other sensor 
head downward for coverage close to the building.
Also,  one  sensor  may  be  pointed  toward  a  specific 
area for coverage while the other is pointed forward for 
maximum coverage.

Controls

Controls

Clamp Screw

Move ON-TIME Switch 

to 1, 5, or 10 minutes

Mode Switching Summary

Flip light switch 

off for one second 

then back on*

MANUAL MODE

AUTO

TEST

*  If you get confused while switching modes, turn the 

power off for one minute, then back on. After the cali-
bration time the control will be in the AUTO mode.


Wall Mount 

Eave Mount

Controls

Summary of Contents for MSL360FWPB

Page 1: ...ors This package includes 6 Screws 3 sizes included OPERATION resets to Auto Mode at dawn TEST 10 5 1 TEST ON TIME Put the ON TIME switch on the bottom of the sensors in the TEST position MANUAL MODE...

Page 2: ...For under eave installation the sensor heads must be rotated as shown in the next two steps for proper operation and to avoid the risk of electrical shock For second story installation point one senso...

Page 3: ...ace If a wet location junction box was not used caulk the wall plate mounting surface with silicone weather sealant Shell Slot Black to Black White to White Gasket Connect any fixture ground wire s to...

Page 4: ...inute warm up period beforetheywilldetectmotion Whenfirstturned on wait 1 1 2 minutes Bottom of Sensor Avoid aiming the control at Objects that change temperature rapidly such as heating vents and air...

Page 5: ...ct or of any furnished component will void this warranty in its entirety This warranty does not include reimbursement for inconvenience installation setup time loss of use unauthorized service or retu...

Page 6: ...ENTO Se pone en Autom tico al amanecer Para MODO MANUAL pr ndalo 1 segundo APAGADO luego Para AUTOMATICO Para PRUEBA Nota Cuando lo prenda por primera vez espere 1 1 2 minutos hasta que el circuito se...

Page 7: ...tro de la uni n esf rica Ajuste el tornillo sujetador cuando termine Apriete el tornillo sujetador cuando termine S lo para montaje el ctrico Oscile los cabezales de los detectores hacia la uni n del...

Page 8: ...se us una caja de empalme para sitio mojado calafatee la superficie de montaje de la placa de pared con un sellador de silicona contra la intemperie Blanco a blanco Negro a negro Empaquetadura l mina...

Page 9: ...na dores de aire Estas fuentes de calor pueden causar falsas alarmas Areas donde animales dom sticos o el tr fico puedan activar el control Los objetos grandes cercanos y de colores res plandecientes...

Page 10: ...uehacequeelcaloractiveeldetector Reposicione la l mpara lejos del detector o de los objetos cercanos 2 El control de luz est apuntando hacia unafuentedecalortalcomounconducto de aire de secadora o hac...

Page 11: ...nstalaci n perdida de uso servicio no autorizado o costos de transporte de retorno Por favor guarde su recibo de venta fechado se lo requiere para cualquier solicitud de garant a SERVICIO T CNICO Favo...

Page 12: ...rend Mod le MSL360FWPB Commande d clairage d tecteur de mouvement Conforme aux exigences ENERGY STARMD lorsquevousutilisezunelampe de 120 W maximum FONCTIONNEMENT Revient au mode automatique au lever...

Page 13: ...on Pour montage sous avant toit seulement Faites pivoter le capteur en direction de la vis de la bride Faites ensuite tourner le capteur de 180 de sorte qu il soit plac face au sol Pour une installati...

Page 14: ...ement en place Si vous ne pouvez pas utiliser une bo te de jonction pourmilieuhumide calfeutrezlasurfacedemontage de la plaque murale avec un scellant silicone C blage De La Commande D clairage Raccor...

Page 15: ...ds objets clairs proximit qui r fl chissent la lumi re du jour et risquent de d clencher le dispositif d arr t Ne pas pointer d autres appareils d clairage vers le d tecteur 21 m 2 4 m D tecteur Mouve...

Page 16: ...les protecteurs de lampes ont t install s GARANTIE LIMIT E DE 2 ANS Il s agit d une Garantie limit e qui vous conf re des droits juridiques sp cifiques Vous pouvez galement jouir d autres droits varia...

Reviews: