Technical Support: 800.861.8758 (M-F 7:30 a.m. - 5:00 p.m. CST)
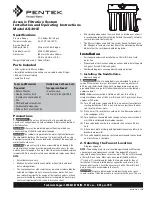
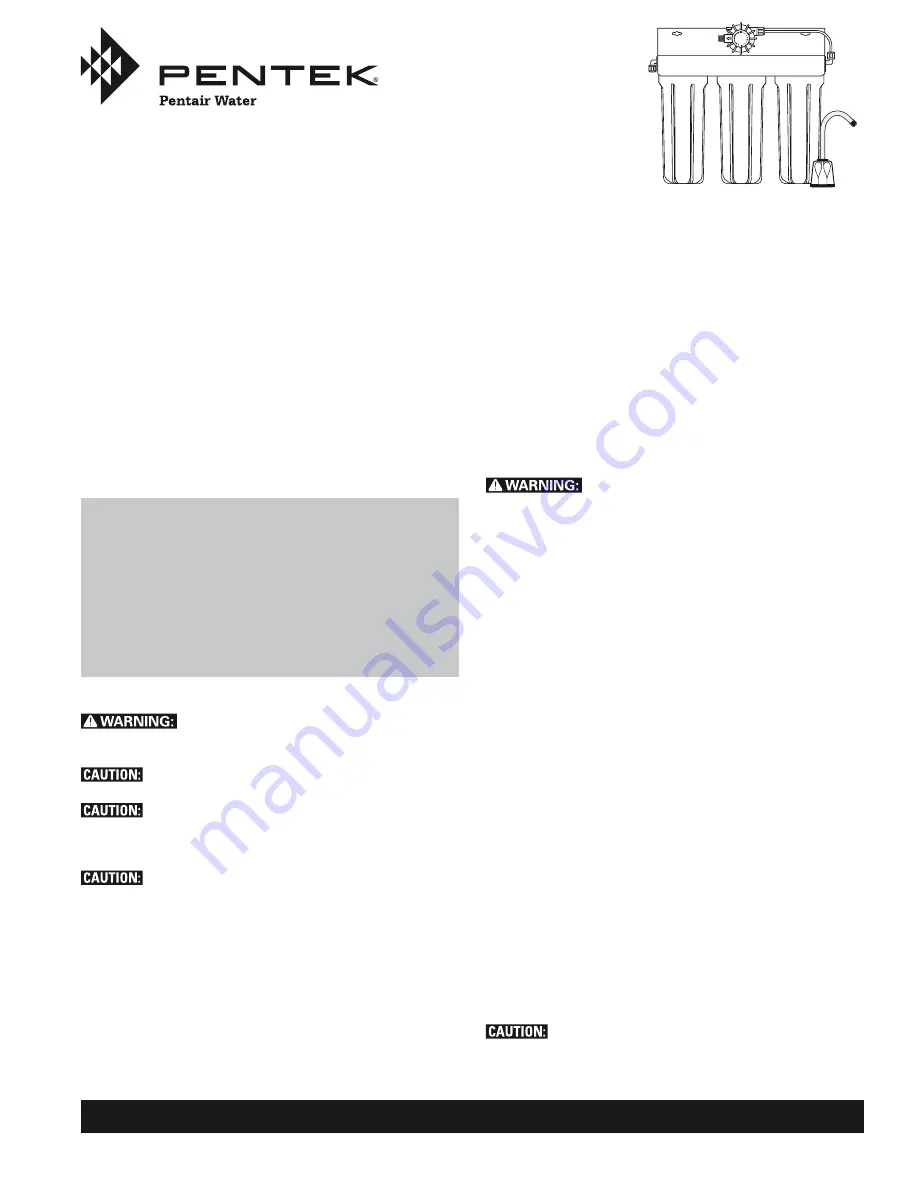
Arsenic Filtration System
Installation and Operating Instructions
Model AS-301E
Specifications
Pressure Range:
2.1–8.62 bar (30–125 psi)
Temperature Range:
4.4–37.8°C (40–100°F)
Service Flow Rate
@60 psi (4.1 bar):
2.3 Lpm at 4.1 bar 0.6 gpm
Rated Service Life:
3,785 L (1000 gallons)
Dimensions:
394 mm x 133 mm x 356 mm
(15.5 in. x 5.25 in. x 14 in.)
Weight (filled with water): 8.6 kg (19 lbs.)
Parts Included
• Filter system with filter cartridges
• Installation hardware (mounting screws, saddle valve, fittings)
• 6.35 mm (1/4-inch) tubing
• Lead-free faucet
Precautions
Do not use with water that is microbiologically
unsafe or of unknown quality without adequate disinfection before or
after the system.
Filter must be protected against freezing, which can
cause cracking of the filter and water leakage.
The rubber o-ring provides the water-tight seal between
the cap and the bottom of the housing. It is important that the o-ring
be properly seated in the groove below the threads of the housing or a
water leak could occur.
To prevent costly repairs or possible water damage, the
sump of plastic housings must be replaced every five years for clear,
and ten years for opaque. If sump is older than recommended, replace
immediately. Date sump for reference and indicate replacement date.
NOTE:
• For cold water use only.
• Make certain that installation complies with all state and local
laws and regulations.
• The contaminants or other substances removed or reduced by the
selected cartridges are not necessarily in your water. Ask your
local water municipality for a copy of their water analysis, or have
your water tested by a reputable water testing lab. See water pre-
treatment requirements in Arsenic Information sheet.
• After prolonged periods of non-use (such as during a vacation) it
is recommended that the system be flushed thoroughly. Let water
run for 5-6 minutes before using.
• The filter cartridges used with this system have a limited service
life. Changes in taste, odor, and/or flow of the water being filtered
indicate that the cartridges should be replaced.
Installation
• For standard under-sink installation on 10 mm (3/8-inch) cold
water line.
• Please read all instructions and precautions before installing and
using your Arsenic Filtration System.
• Numbered diagrams correspond with numbered steps.
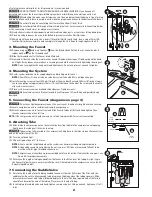
1. Installing the Saddle Valve
diagram on page
2
Use of a hand drill is recommended. To protect
yourself from serious injury or fatal shock when using an electric
drill, be sure the drill and the outlet it is plugged into are properly
grounded. When using a drill, follow the manufacturer’s guidelines
and procedures.
NOTE:
Saddle valve must be installed on a 51 mm (2-inch) long,
straight-walled section of 10-22 mm (3/8-inch to 7/8-inch) steel, brass,
copper, or PVC pipe.
(A) Turn off cold water supply and (B) turn on nearest faucet before
starting installation. Place a tray or towels under the cold water
line to catch excess water.
(C) Drill a 3 mm (1/8-inch) hole in cold water line. Remove any burrs
with sandpaper or file.
(D) Turn handle on the saddle valve to expose lance no more than 5
mm (3/16-inch) beyond black rubber gasket.
(E) Place valve body over hole in cold water line so lance fits into
hole.
(F) Attach back plate of clamp and tighten bolts evenly and firmly so
brackets are parallel.
(G) Turn valve handle clockwise to closed position and leave closed
until installation is complete.
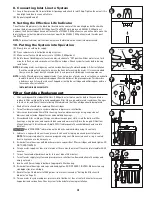
2. Selecting the Faucet Location
Diagram on page 2
NOTE:
The drinking water faucet should be positioned with function,
convenience, and appearance in mind. An adequate flat area is
required to allow faucet base to rest securely. The faucet fits through
a 19mm (3/4-inch) hole. Most sinks have pre-drilled 35 or 38mm
(1
3
⁄
8
-inch or 1
1
⁄
2
-inch) diameter holes that may be used for faucet
installation. If these pre-drilled holes cannot be used or are in an
inconvenient location, it will be necessary to drill a 19mm (3/4-inch)
hole in the sink to accommodate the faucet.
This procedure may generate dusts which can cause
severe irritation if inhaled or come in contact with the eyes. The use
Tools and Materials
Required:
• Safety Glasses
• Hand or electric drill
(cordless recommended)
• File
• Phillips head screwdriver
• 2 Adjustable wrenches
• Tube cutters or utility knife
If sink does not have hole
for separate faucet:
• Center punch
• 19 mm (3/4-inch) drill bit
146320 Rev A JE05

