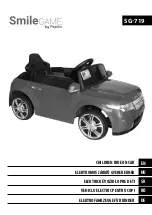
background image

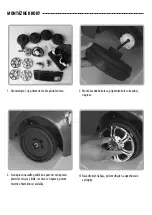
NÁVOD NA MONTÁŽ  

Pozor! Inštaláciu musí vykonať dospelá osoba. 
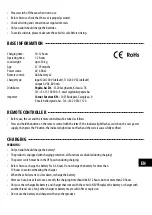
- Pre deti vo veku 37-95 mesiacov 
- Maximálna nosnosť: 30 kg

BEZPEČNOSTNÉ OPATRENIA   ------------------------------------------------------------------------------------------------------------------------

•  V záujme bezpečnosti vašich detí starostlivo pozorne si prečítajte nasledujúce upozornenia. Výrobok používajte na bez-

pečných miestach, napríklad doma, v záhrade alebo na detskom ihrisku.

•  Vozidlo používajte na rovnom teréne kvôli bezpečnosti vašich detí. Nepoužívajte ho v nebezpečných oblastiach uvedených 

nižšie: 
a. Priekopa alebo priehlbina, potok, sklenený povrch, svah a iné nerovnosti terénu. 
b. Cesty, diaľnice alebo iné miesta, ktoré používajú autá alebo chodci.

•  Vek používateľa by mal byť primeraný výrobku a hmotnosť by nemala prekročiť maximálnu nosnosť.
•  Pozor! Neopravujte ani neupravujte komponenty alebo obvody vozidla sami bez predchádzajúcich pokynov výrobcu.
•  Pravidelne kontrolujte obvody vozidla a uistite sa, že sú v dobrom stave.
•  Udržujte deti mimo pohybujúceho sa vozidla a nikdy nedovoľte deťom dotýkať sa pohybujúcich sa kolies.
•  Pri montáži sa vyskytujú malé časti, aby sa predišlo zraneniu detí mladších ako 3 roky.
•  Plastové obaly uchovávajte mimo dosahu detí.
•  Deti by mali vozidlo používať len pod dohľadom dospelých. Nikdy nenechávajte deti bez dozoru dospelých.
•  Upozornenie: nepoužívať v premávke.
•  Používanie vozidla si vyžaduje opatrnosť, pretože pády a kolízie môžu spôsobiť zranenie používateľa a iných osôb. Vyhnúť 

sa im si vyžaduje cvik.

•  Pred použitím skontrolujte batériu. Ak je poškodený alebo netesný, nepoužívajte ho a vymeňte ho.
•  Varovanie. Musia sa používať ochranné prostriedky. Pri používaní vždy noste obuv.
•  Varovanie. Len na domáce použitie.
•  Vozidlo by sa malo používať len s priloženou nabíjačkou.
•  Pred čistením vozidla ho odpojte od nabíjačky.
•  Počas jazdy je potrebný neustály dohľad dospelej osoby. 
•  Deti musia vždy nosiť prilby. 
•  Jazdite len po chodníku, nie po ceste.
•  Nejazdite na mokrom povrchu alebo na svahoch strmších ako 15°. 
•  Odporúča sa jazdiť len po rovnom povrchu. 
•  Nepoužívajte vozidlo, ak prší.
•  Pred zmenou smeru jazdy (cúvaním dopredu) sa uistite, že ste vozidlo úplne zastavili. 
•  Nedovoľte dieťaťu manipulovať s nabíjačkou ani sa hrať s batériou. 
•  Vozidlo čistite len mäkkou handričkou. 
•  Dodržiavajte hmotnostné a vekové obmedzenia vozidla. 
•  Úprava obvodov alebo pridávanie iných elektrických komponentov je prísne zakázané a má za následok stratu záruky.
•  Dospelí sú zodpovední za to, aby naučili svoje deti jazdiť bezpečne. 
•  Keď sa dodávka nepoužíva, vypnite ju. 

Summary of Contents for SmileGAME SG-719

Page 1: ...SG 719 ELEKTROFAHRZEUGE F R KINDER DE ELEKTRICK VOZIDLO PRE DETI SK CHILDREN RIDE ON CAR EN VEHICLU ELECTRIC PENTRU COPI RO ELEKTROMOS J RM GYEREKEKNEK HU...

Page 2: ...should only use the vehicle under adult supervision Never leave children without adult supervision Warning not to be used in traffic Use of the vehicle requires caution as falls and collisions may ca...

Page 3: ...Press and hold the button on the remote control with the letter P the indicator light flashes switch on the car s power supply then press the P button the indicator light does not flash and the code i...

Page 4: ...3 Place a washer on the axle and then push the eagle pin through the axle through the hole in the axle then slightly bend the end of the cotter pin 2 Rear wheel assembly attach the wheel to the rear...

Page 5: ...6 Place a washer on the axle and then push the eagle pin through the axle through the hole in the axle then slightly bend the end of the cotter pin 7 Put on the hubcap taking care of the fixing tabs...

Page 6: ...ut the handlebars in place on the axle taking care of the cables 11 Snap the windscreen into place 10 Insert the long bolt and tighten it to secure the handle bars to the 12 Connect the rear view mirr...

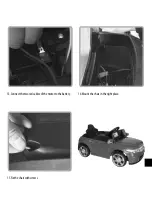
Page 7: ...13 Connect the two red cables of the motor to the battery 14 Mount the chair in the right place 15 Fix the chair with screws...

Page 8: ...l A gyerekek csak feln tt fel gyelete mellett haszn lhatj k a j rm vet Soha ne hagyja a gyerekeket feln tt fel gyelete n lk l Figyelem aut forgalomban nem haszn lhat A j rm vet haszn lata odafigyel s...

Page 9: ...NY T Haszn lat el tt az aut t s a t vir ny t t ssze kell hangolni az al bbi m don Nyomja meg s tartsa lenyomva a t vir ny t n a P bet vel ell tott gombot a jelz f ny villog kapcsolja be az aut ramel l...

Page 10: ...egl t t 3 Helyezzen egy al t tet a tengelyre majd a sasszeget dugja t a tengelyen l v furaton majd a saszeg v g t g rb tse ki kiss 2 H ts ker k sszeszerel se csatlakoztassa a kereket a h ts tengelyre...

Page 11: ...ts tengelyre 6 Helyezzen egy al t tet a tengelyre majd a sasszeget dugja t a tengelyen l v furaton majd a saszeg v g t g rb tse ki kiss 7 Helyezze fel a d szt rcs t vigy zzon a r gz t f lekre 8 Csatla...

Page 12: ...korm nyt a hely re a tengelyre vigy zzon a k belekre 11 Pattintsa a hely re a sz lv d t 10 Helyezze be a hossz csavart s szor tsa meg hogy a korm ny r gz lj n a tengelyhez 12 Csatlakoztassa a visszapi...

Page 13: ...13 Csatlakoztassa a motor k t piros k bel t az akkumul torhoz 14 Szerelje be a sz ket a megfelel helyre 15 R gz tse csavarokkal a sz ket...

Page 14: ...ahu det Deti by mali vozidlo pou va len pod doh adom dospel ch Nikdy nenech vajte deti bez dozoru dospel ch Upozornenie nepou va v prem vke Pou vanie vozidla si vy aduje opatrnos preto e p dy a kol zi...

Page 15: ...rebn vozidlo a dia kov ovl da naladi nasledovne Stla te a podr te tla idlo na dia kovom ovl da i s p smenom P kontrolka blik zapnite nap janie vozidla potom stla te tla idlo P kontrolka neblik a k d j...

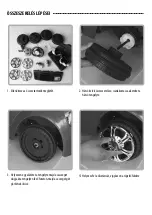
Page 16: ...enstvo 3 Na n pravu nasa te podlo ku a potom cez n pravu prestr te orlojov kol k cez otvor v n prave potom mierne ohnite koniec z vla ky 2 Mont zadn ho kolesa pripevnite koleso k zadnej n prave 4 Nas...

Page 17: ...r axle 6 Place a washer on the axle and then push the eagle pin through the axle through the hole in the axle then slightly bend the end of the cotter pin 7 Nasa te kryt n boja pri om dbajte na upev o...

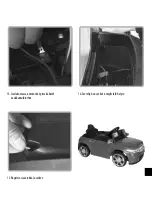
Page 18: ...9 Nasa te riadidl na os pri om dbajte na k ble 11 eln sklo zacvaknite na miesto 10 Vlo te dlh skrutku a utiahnite ju aby ste upevnili riadidl k 12 Pripojte sp tn zrkadlo...

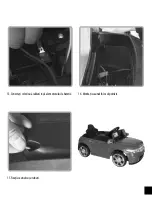
Page 19: ...13 Pripojte dva erven k ble motora k bat rii 14 Namontujte kreslo na spr vne miesto 15 Upevnite stoli ku pomocou skrutiek...

Page 20: ...evita r nirea V rug m s p stra i materialele de ambalare din plastic departe de copii Copiii trebuie s utilizeze vehiculul numai sub supravegherea unui adult Nu l sa i niciodat copiii f r supravegher...

Page 21: ...LECOMAND nainte de utilizare ma ina i telecomanda trebuie reglate dup cum urmeaz Ap sa i i men ine i ap sat butonul de pe telecomand cu litera P indicatorul luminos clipe te porni i alimentarea cu ene...

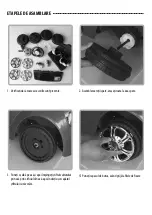
Page 22: ...sunt prezente 3 Pune i o aib pe ax i apoi mpinge i tiftul vulturului prin ax prin orificiul din ax apoi ndoi i u or cap tul tiftului cu z vor re 2 Asamblarea ro ii spate ata a i roata la axa spate 4...

Page 23: ...xa spate 6 Pune i o aib pe ax i apoi mpinge i tiftul de vultur prin ax prin orificiul din ax apoi ndoi i u or cap tul tiftului cu z vor re 7 Pune i capacul de butuc av nd grij la urechile de fixare 8...

Page 24: ...9 Pune i ghidonul la locul lui pe ax av nd grij la cabluri 11 Cupla i parbrizul n pozi ie 10 Introduce i urubul lung i str nge i l pentru a fixa ghidonul de ghidon pe 12 Conecta i oglinda retrovizoare...

Page 25: ...13 Conecta i cele dou cabluri ro ii ale motorului la baterie 14 Monta i scaunul n locul potrivit 15 Fixa i scaunul cu uruburi...

Page 26: ...s Fahrzeug nur unter Aufsicht von Erwachsenen benutzen Lassen Sie Kinder nie ohne Aufsicht von Erwachsenen Achtung nicht im Stra enverkehr verwenden Bei der Benutzung des Fahrzeugs istVorsicht geboten...

Page 27: ...t werden Halten Sie dieTaste mit dem Buchstaben P auf der Fernbedienung gedr ckt die Kontrollleuchte blinkt schalten Sie die Stromversorgung des Fahrzeugs ein dr cken Sie dann dieTaste P die Kontrolll...

Page 28: ...terlegscheibe auf die Achse und schie ben Sie dann den Achsstift durch die Achse durch das Loch in der Achse dann biegen Sie das Ende des Splintes leicht 2 Hinterradmontage befestigen Sie das Rad an d...

Page 29: ...scheibe auf die Achse setzen und dann den Adlersplint durch die Achse stecken durch das Loch in der Achse dann biegen Sie das Ende des Splintes leicht 7 Die Radkappe aufsetzen und dabei auf die Befest...

Page 30: ...r auf die Achse und achten Sie auf die Kabel 11 DieWindschutzscheibe einrasten lassen 10 Setzen Sie die lange Schraube ein und ziehen Sie sie fest um den Lenker an der Halterung zu befestigen 12 Den R...

Page 31: ...13 Schlie en Sie die beiden roten Kabel des Motors an die Batterie an 14 Montieren Sie den Stuhl an der richtigen Stelle 15 Den Stuhl mit Schrauben befestigen...

Page 32: ...r UE Corner Services Kft 1031 Budapest Saroglya u 9 E mail hello proda hu Tel 36 20 336 1124 Distributor Forgalmaz Vertriebsh ndler Distrib tor Distribuitor Pepita hu Zrt 5520 Szeghalom Kinizsi u 78 E...

Reviews: