background image

RTC-15.3 Protective Canopy 

4.  Set the anchors all the way down the prepared holes. 


Warning! 

  Further work should be carried out after installation of the 

RTD-15

 turnstile. 

  Be particularly careful when installing parts of the canopy before they are secured in 

place, prevent the parts from fall. 

5.  Erect and fix the posts with anchor bolts observing their verticality by means of a level gauge, 

use insertions when necessary. 

6.  Remove the plugs from the side surfaces of the turnstile top channel (4 plugs on each side of 

the channel). 

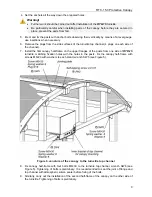
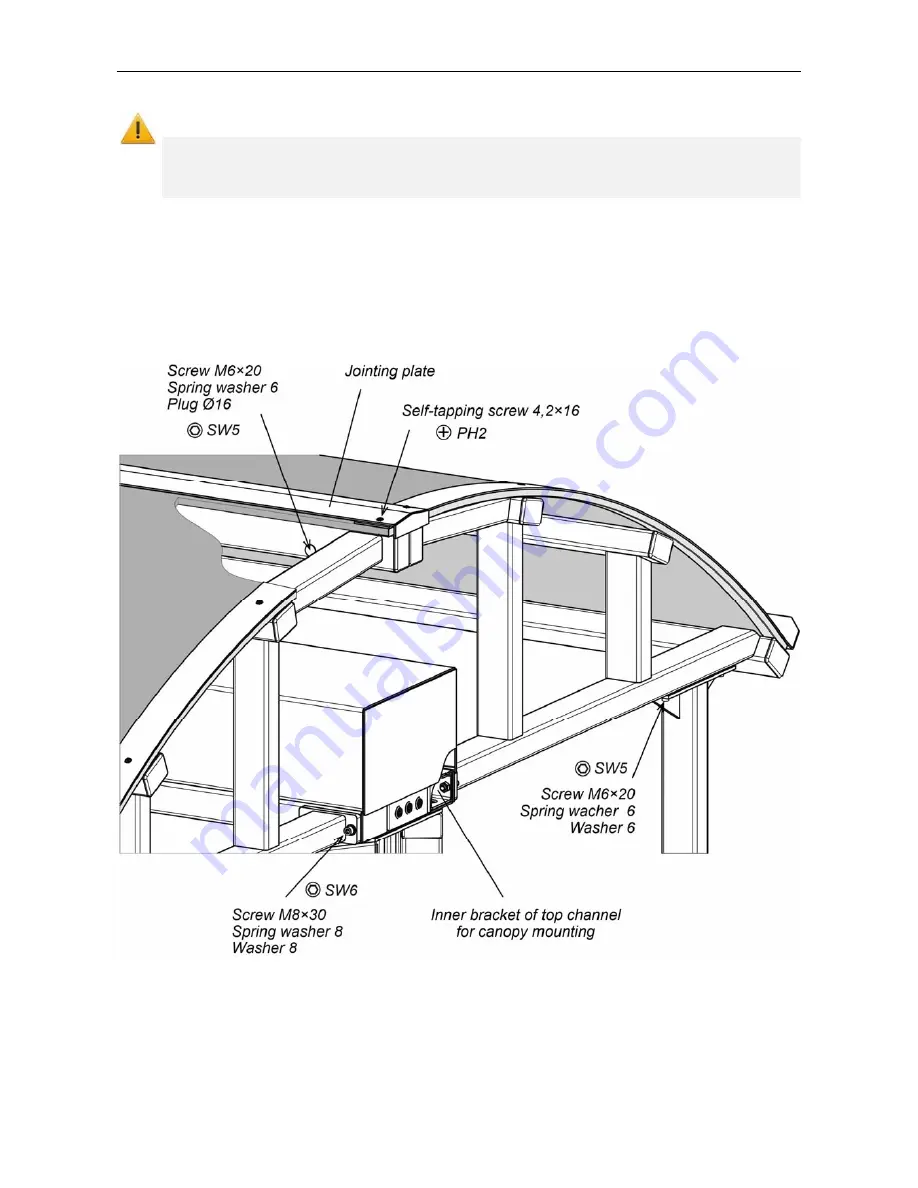
7.  Install the first canopy half-frame on the upper flanges of the posts from one side of 

RTD-15


turnstile, matching fixation holes with the holes in the posts. Fix the canopy half-frame with 
screws M6×20 with washers to each stand, wrench SW5 (see Figure 5). 


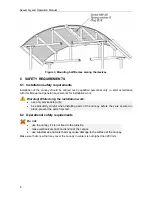
Figure 5. Juncture of the canopy to the turnstile top channel 

8.  Fix canopy half-frame with four bolts M8×30 to the turnstile top channel, wrench SW6 (see 

Figure 5). Tightening of bolts is preliminary. It is recommended to seal the joint of flange and 
top channel with atmospheric silicon sealer before fixing of the bolts. 

9.  Similarly, carry out the installation of the second half-frame of the canopy on the other side of 

the turnstile. Tightening of bolts is preliminary. 

Summary of Contents for RTC-15.3

Page 1: ...ASSEMBLY AND OPERATION MANUAL WARRANTY CARD RTC 15 3 Protective Capony...

Page 2: ...Protective Canopy RTC 15 3 Assembly and Operation Manual Warranty Card...

Page 3: ...ipment supplied on request 4 5 DESIGN 4 5 1 Main features 4 5 2 The canopy design 4 6 SAFETY REQUIREMENTS 6 6 1 Installation safety requirements 6 6 2 Operational safety requirements 6 7 INSTALLATION...

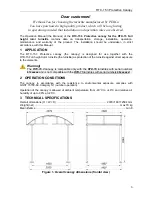
Page 4: ...py the canopy is designed for use together with the RTD 15 Full height rotor turnstile the turnstile as protection of the turnstile against direct exposure to the elements Warning The RTC 15 3 canopy...

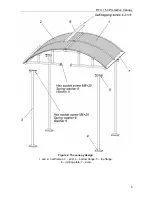
Page 5: ...ars of service 5 2 The canopy design The design is shown in Fig 2 Numbers of the position correspond to Fig 2 The canopy consists two half frame 1 and 2 with transparent infill and the sloping drain f...

Page 6: ...RTC 15 3 Protective Canopy Figure 2 The canopy design 1 and 2 half frames 3 post 4 bottom flange 5 top flange 6 jointing plate 7 drain 5...

Page 7: ...rk Warning While doing the installation work use only serviceable tools be particularly careful when installing parts of the canopy before they are secured in place prevent the parts from fall 6 2 Ope...

Page 8: ...lation tools Use the following tools for the installation work 1 2 1 5 kW electric perforator 0 6 kW electric drill 16 mm carbide drill bits 3 5 drill bits SW5 SW6 hex nut wrenches PH2 cross tip screw...

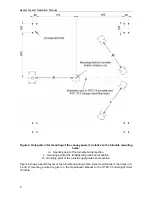
Page 9: ...turnstile barrier section L mounting point of the turnstile left guide barrier section R mounting point of the turnstile right guide barrier section Figure 4 shows a sketch layout of the turnstile mou...

Page 10: ...l 7 Install the first canopy half frame on the upper flanges of the posts from one side of RTD 15 turnstile matching fixation holes with the holes in the posts Fix the canopy half frame with screws M6...

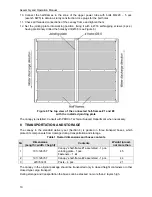
Page 11: ...ith PERCo Technical Support Department when necessary 8 TRANSPORTATION AND STORAGE The canopy in the standard delivery set Section 4 is packed in three transport boxes which protect its components fro...

Page 12: ...lation maintenance modification alteration or adjustment damages due to force majeure circumstances natural disasters vandalism etc or defects as a result of external circumstances power surges electr...

Page 13: ...claims with regard to the technical specifications of the Product in case they are in compliance with those stated by the Manufacturer The Manufacturer does not guarantee that the Product purchased w...

Page 14: ...of sale ____________________ 201___ ____________________________________ signature seal Cutting line WARRANTY REPAIR COUPON RTC 15 3 Protective Canopy for RTD 15 Full Height Rotor Turnstile Date of m...

Page 15: ......

Page 16: ......

Page 17: ...PERCo Polytechnicheskaya str 6A 194021 Saint Petersburg Russia Tel 7 812 247 04 64 E mail export perco com support perco com www perco com...

Page 18: ...www perco com...
Reviews: