ST-02 Speed gate and STD-02 Double-sided section
37
8.7.6 Installation and dismantling of the sliding panel
Attention!
Be careful! When you turn on the power of the speed gate, the sliding panels motor drive is
automatically activated, but in order to avoid injuries, make sure that there are no tools,
fingers, clothing items, as well as other foreign objects left in before you turn the
mechanism on!
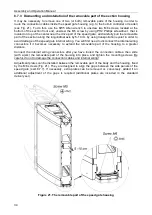
Follow these steps to install the sliding panel (2) on the speed gate section:
1. Power the speed gate and wait for a few seconds. The motor drive will work according to the
calibration algorithm and move the sliding panel fixing bracket to its end position, the closest to
the out from the section housing.
It is also possible to tighten the bracket by using a long screwdriver or other suitable tools
through the upper gap between the central insert and the housing without powering the speed
gate on.
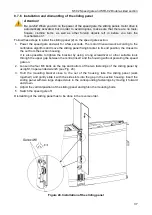
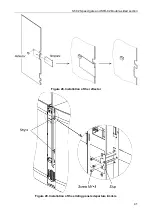
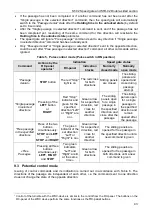
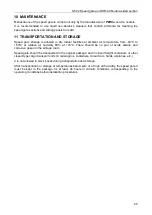
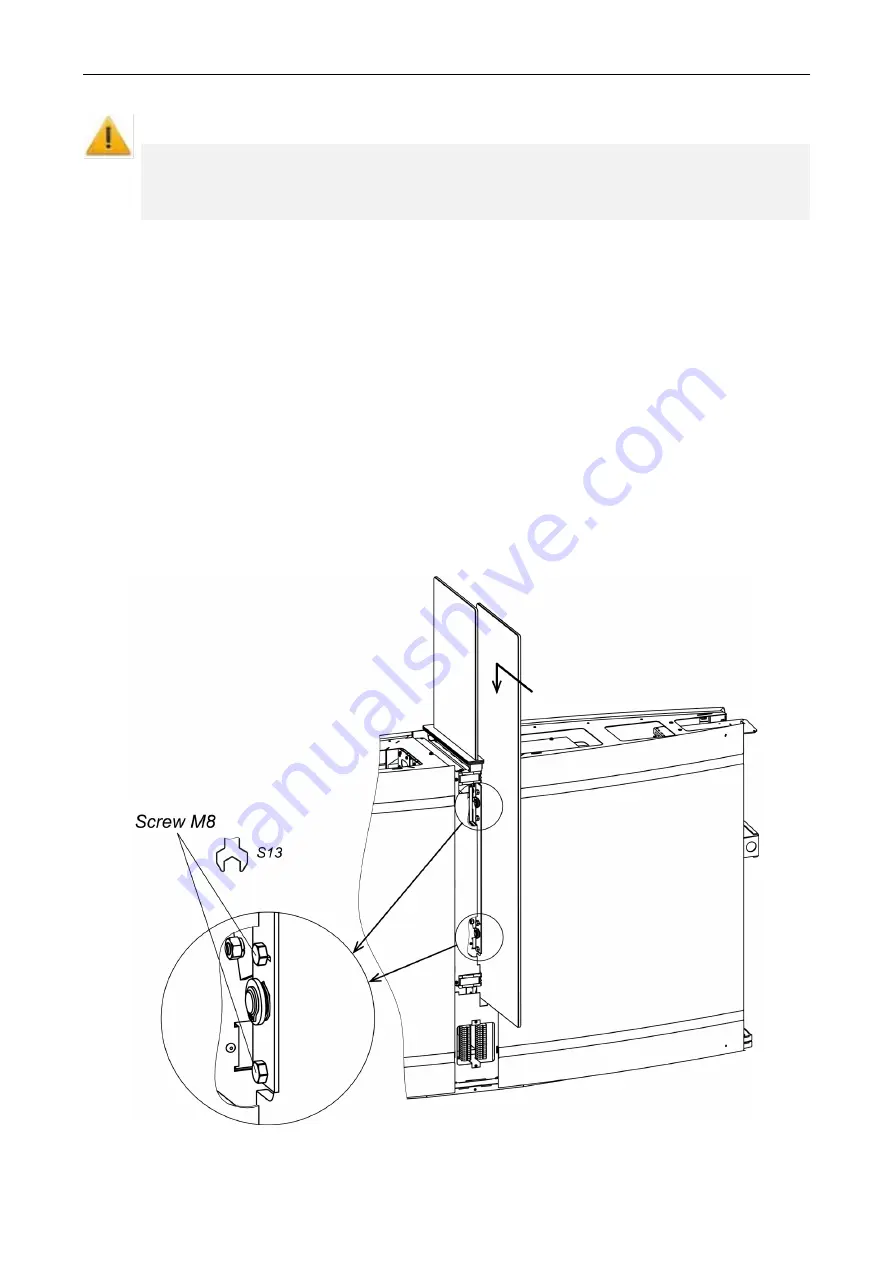
2. Loosen the four M8 bolts on the top and bottom of the two fastenings of the sliding panel by
using S13 open-ended wrench (see Fig. 24).
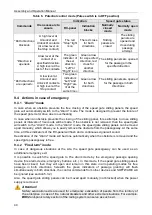
3. Hold the mounting bracket close to the out of the housing, take the sliding panel (work
together!) and gently slide it with the side slots into the gap in the section housing. Insert the
sliding panel with two large shaped slots in the corresponding fastenings by moving it forward
and down.
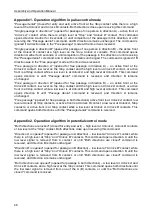
4. Adjust the vertical position of the sliding panel and tighten the mounting bolts.
5. Switch the speed gate off.
Dismantling of the sliding panel has to be done in the reverse order.
Figure 24. Installation of the sliding panel

