w w w . c l a s s i c
e x h i b i t s . c o m
866.652.2100
© 2014
WHEN DISASSEMBLING TIGHTEN ALL KNOBS TO PREVENT LOSS DURING SHIPPING
Order #XXXXX - P10 -
Page 4 of 4
Step 4
patent D599,121
Workstation Assembly (Cont’d)
Part Number
E
F
Steps:
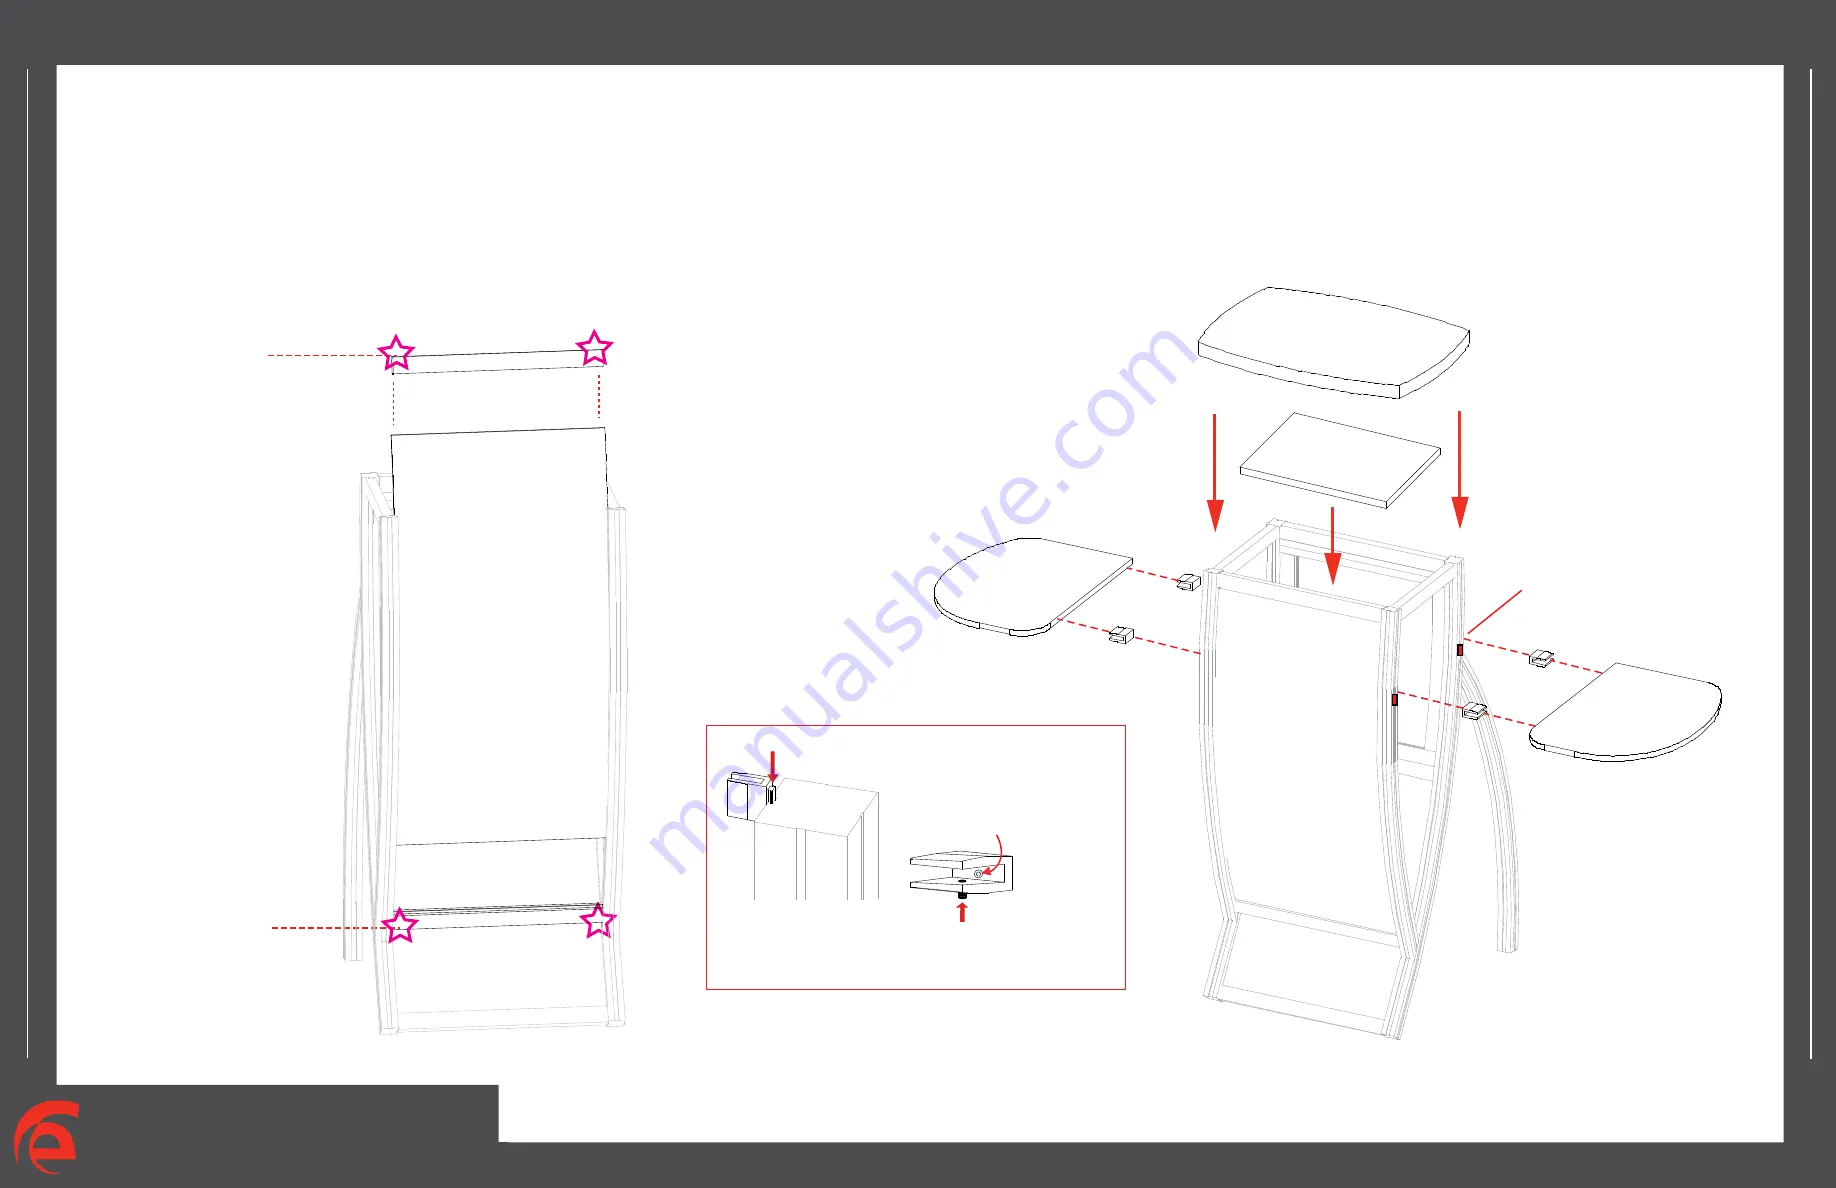
1) Attach horizontal extrusion [E] between vertical leg assemblies [A and B] as shown below.
2) Insert Laminated infill into grooves of vertical leg assemblies [A and B].
3) Attach upper horizontal extrusion [F] between vertical leg assemblies [A and B] atop infill.
4) Place internal shelf into assembled pedestal atop pins..
5) Set Counter atop assembled pedestal and secure with velcro straps attached to underside of top.
6) Attach shelves to assembled pedestal where indicated using A10 clamps.
Description
Horizontal Extrusion
Horizontal Extrusion
E
Laminated
Infill
Knobs facing FORWARD
F
Knobs face INSIDE
of workstation
Place internal shelf into
workstation then
place counter atop
assembled workstation.
Internal
Shelf
Attach A10
atop stopper
When desired location
is found, tighten
set screw to secure.
Slide connector on back
of A10 clamp into groove
of extrusion.
Example of A10 Clamp Attachment
Tighten knob to
secure shelf in
place.
NOTE: Make sure the lock is flush with extrusion
before tightening. If lock will not fully engage,
gently rock lock and extrusion back and forth while
turning knob until lock fully opens.


