w w w . c l a s s i c
e x h i b i t s . c o m
Step 2
Page 2 of 2
866.652.2100
© 2014
WHEN DISASSEMBLING ALUMINUM EXTRUSION, TIGHTEN ALL
SETSCREWS AND LOCKS TO PREVENT LOSS DURING SHIPPING
Order #XXXXX - Workstation Assembly (Cont’d)
Part Number
E
F
Description
Horizontal Extrusion
Horizontal Extrusion
E
Laminated
Infill
Knobs facing FORWARD
Place internal shelf into
workstation then
place counter atop
assembled workstation.
Internal
Shelf
F
Knobs face INSIDE
of workstation
Steps:
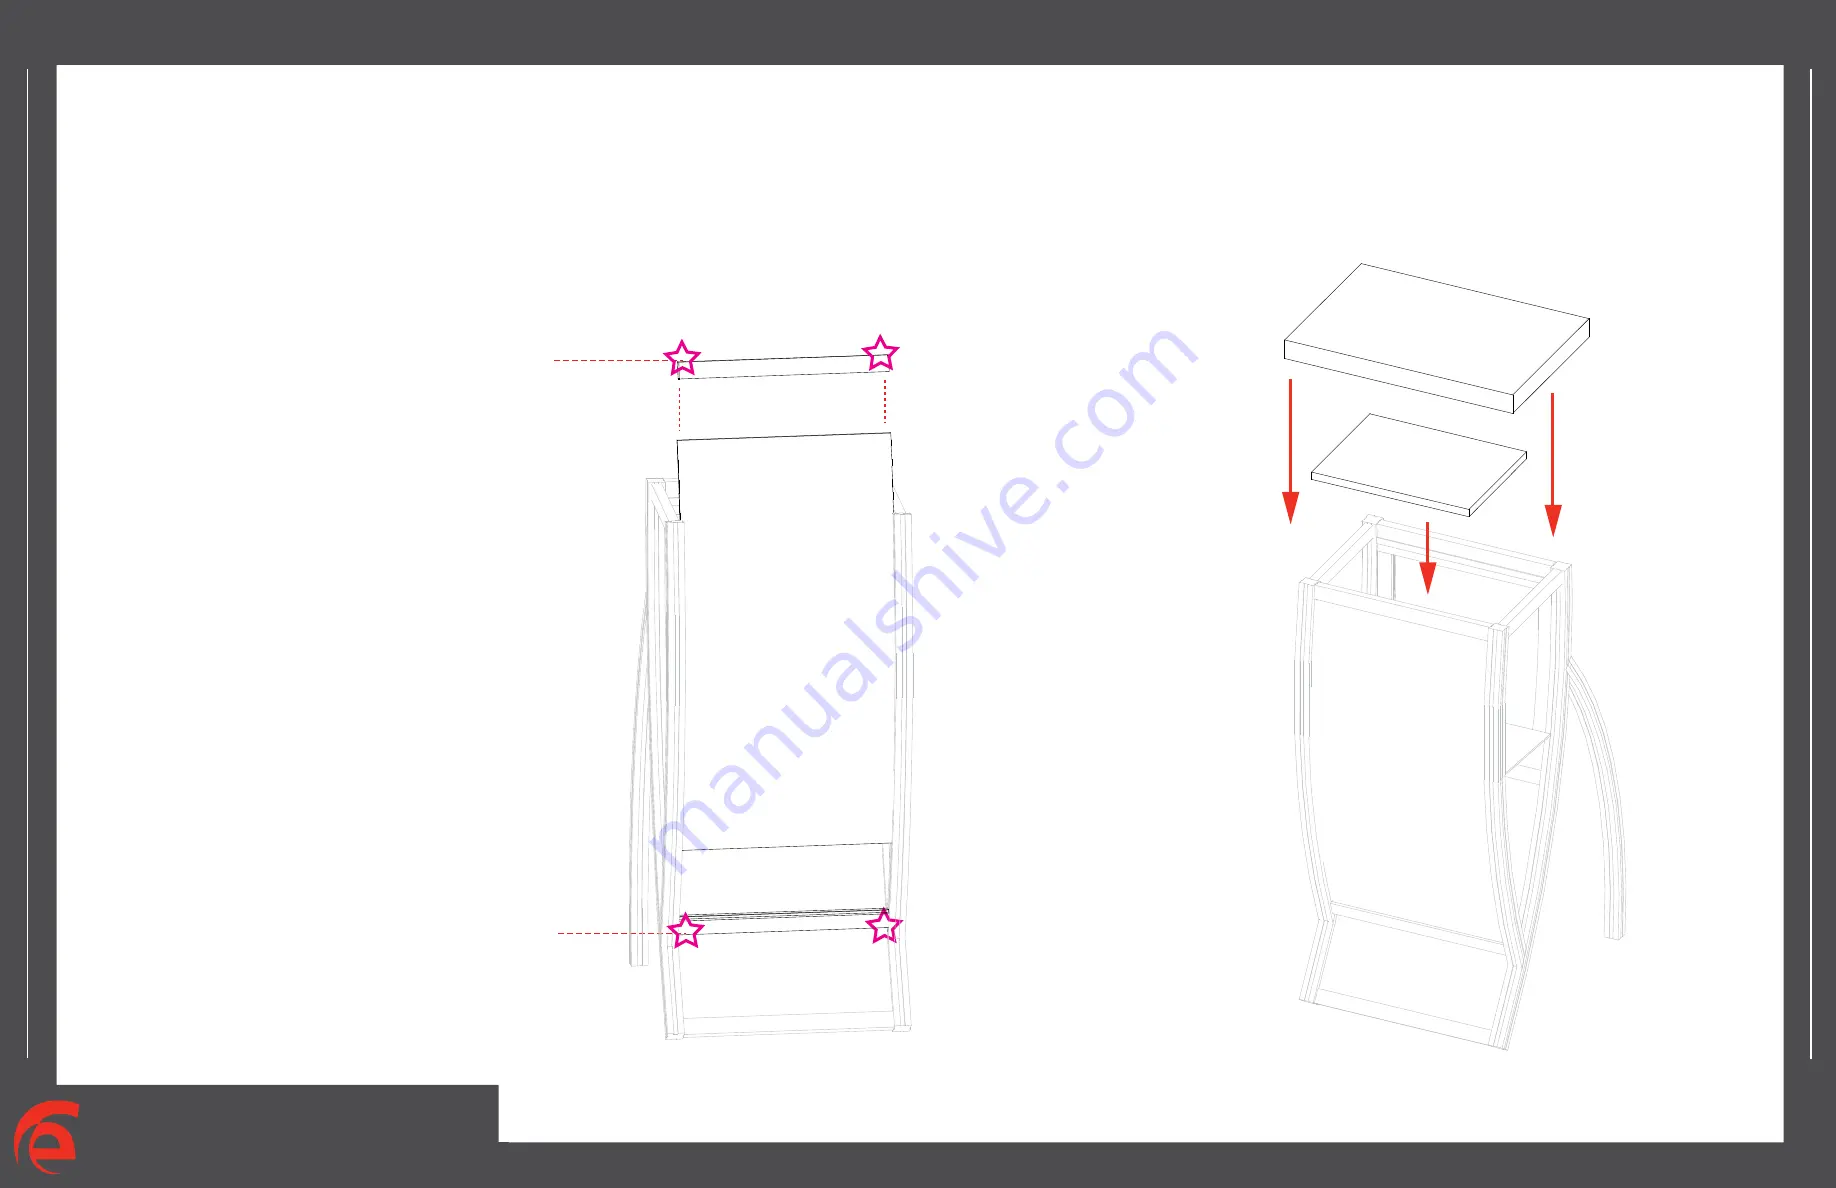
1) Attach horizontal extrusion [E] between vertical leg assemblies [A and B] as shown below.
2) Insert Laminated infill into grooves of vertical leg assemblies [A and B].
3) Attach upper horizontal extrusion [F] between vertical leg assemblies [A and B] atop infill.
4) Place internal shelf into assembled pedestal atop pins..
5) Set Counter atop assembled pedestal and secure with Velcro straps attached to underside of top.


