8
TYPE 2:
SLIDING WINDOW
INSTALLATION
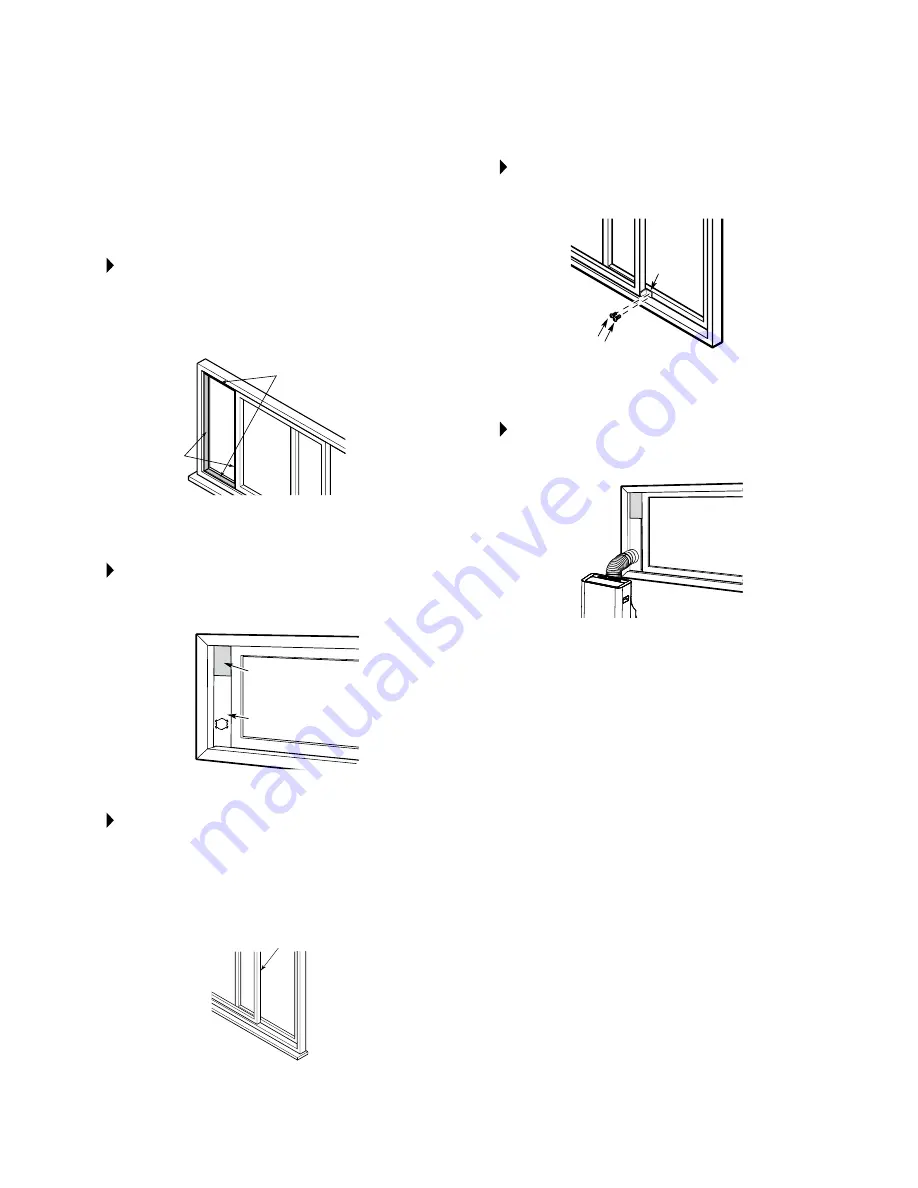
STEP 1
Fig. 18.
Cut the adhesive foam seal A and B strips to the
proper lengths, and attach them to the window sash
and frame as shown.
STEP 2
Fig. 19.
Insert the window slider assembly into the window
opening.
STEP 3
Fig. 20.
Cut the non-adhesive foam seal C strip to match
the width of the window. Insert the seal between
the glass and the window frame to prevent air and
insects from getting into the room.
STEP 4
Fig. 21.
If desired, install the security bracket with 2 screws
as shown.
STEP 5
Fig. 22.
Insert the window slider adapter into the hole of the
window slider.
NOTE:
All the illustrations in this manual are for
explanation purposes only. Your unit may be
slightly different.
FIG. 18
FIG. 19
FIG. 20
FIG. 21
FIG. 22
Foam Seal B
(Adhesive type - shorter)
Foam Seal A
(Adhesive type)
Foam Seal C
(Non-adhesive type)
Window
Slider A
Security
Bracket
2 Screws
Window
Slider B
(if required)


