background image

5

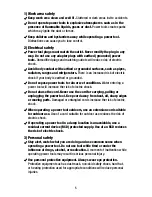
1) Work area safety

  Keep work area clean and well lit.

 Cluttered or dark areas invite accidents.

  Do not operate power tools in explosive atmospheres

such as in the 

presence of flammable liquids, gases or dust.

 Power tools create sparks 

which may ignite the dust or fumes.

  Keep children and bystanders away


while operating a power tool.


Distractions can cause you to lose control.

2) Electrical safety

  Power tool plugs must match the outlet. Never modify the plug in any 

way. Do not use any adapter plugs with earthed (grounded) power 

tools. 

Unmodified plugs and matching outlets will reduce risk of electric 

shock.

  Avoid body contact with earthed or grounded surfaces, such as pipes, 

radiators, ranges and refrigerators.

 There is an increased risk of electric 

shock if your body is earthed or grounded.

  Do not expose power tools to rain or wet conditions. 

Water entering a 

power tool will increase the risk of electric shock.

  Do not abuse the cord. Never use the cord for carrying, pulling or 

unplugging the power tool. Keep cord away from heat, oil, sharp edges 

or moving parts.

 Damaged or entangled cords increase the risk of electric 

shock.

  When operating a power tool outdoors, use an extension cord suitable 

for outdoor use.

 Use of a cord suitable for outdoor use reduces the risk of 

electric shock.

  If operating a power tool in a damp location is unavoidable, use a 

residual current device (RCD) protected supply. Use of an RCD reduces 

the risk of electric shock.

3) Personal safety

  Stay alert, watch what you are doing and use common sense when 

operating a power tool. Do not use tool while tired or under the 

influence of drugs, alcohol, or medication.

 A moment of inattention while 

operating power tools may result in serious personal injury.

  Use personal protective equipment.


Always wear eye protection. 

Protective equipment such as dust mask, non-skid safety shoes, hard hat, 
or hearing protection used for appropriate conditions will reduce personal 
injuries.

Summary of Contents for 241-0964

Page 1: ...al are used to flag possible dangers The safety symbols and their explanations require your full understanding The safety warn ings do not by themselves eliminate any danger nor are they substitutes f...

Page 2: ...attention to possible dangers The safety symbols and the explanations with them deserve your careful attention and understanding The symbol warnings do not by themselves eliminate any danger The inst...

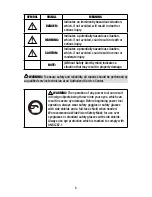
Page 3: ...at may result in property damage WARNING To ensure safety and reliability all repairs should be performed by a qualified service technician at an Authorized Service Center WARNING The operation of any...

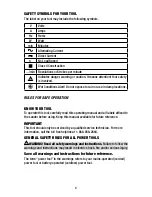
Page 4: ...refully read this operating manual and all labels affixed to the sander before using Keep this manual available for future reference IMPORTANT This tool should only be serviced by a qualified service...

Page 5: ...ol will increase the risk of electric shock Do not abuse the cord Never use the cord for carrying pulling or unplugging the power tool Keep cord away from heat oil sharp edges or moving parts Damaged...

Page 6: ...for which it was designed Do not use the power tool if the switch does not turn it on and off Any power tool that cannot be controlled with the switch is dangerous and must be repaired Disconnect the...

Page 7: ...le sanding chemically pressure treated objects Always wear ear protection during extended periods of operation Use clamping devices or other suitable means to secure the workpiece to a firm surface wh...

Page 8: ...lead based paints Crystalline silica from bricks and cementand other masonry products and Arsenic and chromium from chemically treated lumber Your risk from these exposures varies depending on how of...

Page 9: ...ve the sander from the carton and examine it carefully Do not discard carton or any packaging material until all parts are examined WARNING To avoid injury ALWAYS turn the tool off and disconnect the...

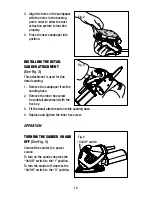
Page 10: ...sanding 1 Remove the sandpaper from the sanding base 2 Remove the inner hex screw from detail attachment with the hex key 3 Fit the detail attachment onto the sanding base 4 Replace and tighten the i...

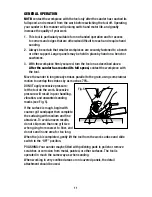
Page 11: ...e with the tool Move the sander in long steady strokes parallel to the grain using some lateral motion to overlap the strokes by as much as 75 DONOT apply excessive pressure let the tool do the work E...

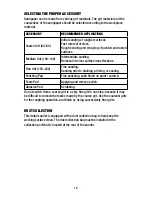
Page 12: ...ine Grit 150 220 Fine sanding Sanding prior to staining priming or sealing Polishing Pad Fine polishing satin finish on paint varnish Foam Pad Applying and remove polish Abrasive Pad Scrubbing Do not...

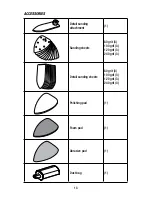
Page 13: ...ORIES Detail sanding attachment 1 Sanding sheets 80 grit 3 100 grit 3 120 grit 3 240 grit 3 Detail sanding sheets 80 grit 3 100 grit 3 120 grit 3 240 grit 3 Polishing pad 1 Foam pad 1 Abrasive pad 1 D...

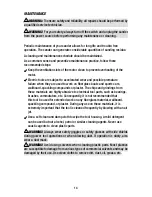
Page 14: ...ling compounds or plaster The chips and grindings from these materials are highly abrasive to electrical tool parts such as bearings brushes commutators etc Consequently it is not recommended that thi...

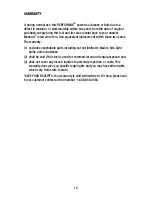
Page 15: ...wo years The warranty 1 excludes expendable parts including but not limited to blades bits light bulbs and or batteries 2 shall be void if this tool is used for commercial or and rental purposes and 3...

Page 16: ...16...

Reviews: