9
Owner’s Guide
PCC-100 & PCC-200
STEP 6
System adjustments
and programming
Adjusting the Signal Field Width
(PCC-100 & PCC-200)
PLEASE NOTE:
The number displayed on
your wall-mount transmitter in its normal,
active state is
NOT THE STRENGTH OF
CORRECTION OR COLLAR OUTPUT.
This
number represents the signal fi eld area.
The signal fi eld setting determines the
total correction area or how far your dog’s
fencing collar will activate from the fenc-
ing wire. Your system comes preset from
the factory on setting 10, which is 10 total
feet or 5 feet from the fence wire. You can
adjust your system easily by pressing the
top or bottom transmitter buttons to select
a setting between 1 and 32.
EXAMPLE
Setting
Total Signal
Area
Distance
From Wire
10
10 ft
5 ft
14
14 ft
7 ft
20
20 ft
10 ft
All Comfort Contact Pet Fencing Systems
come fully programmed from the factory
ready to use, however the Ultra Comfort
Contact PCC-200 has two optional pro-
gramming functions:
Correction Level Programming
(model PCC-200 only)
Perimeter Pet Fencing Systems come
factory preset with an automatic adjusting
level of correction from low to high de-
pending on your pet’s speed and proximity
to the boundary wire. The Ultra Comfort
Contact system can be programmed to
any one of 5 different output levels from
Extra Light to Extra High depending on
your dog’s personality and temperament.
To change the system correction levels:
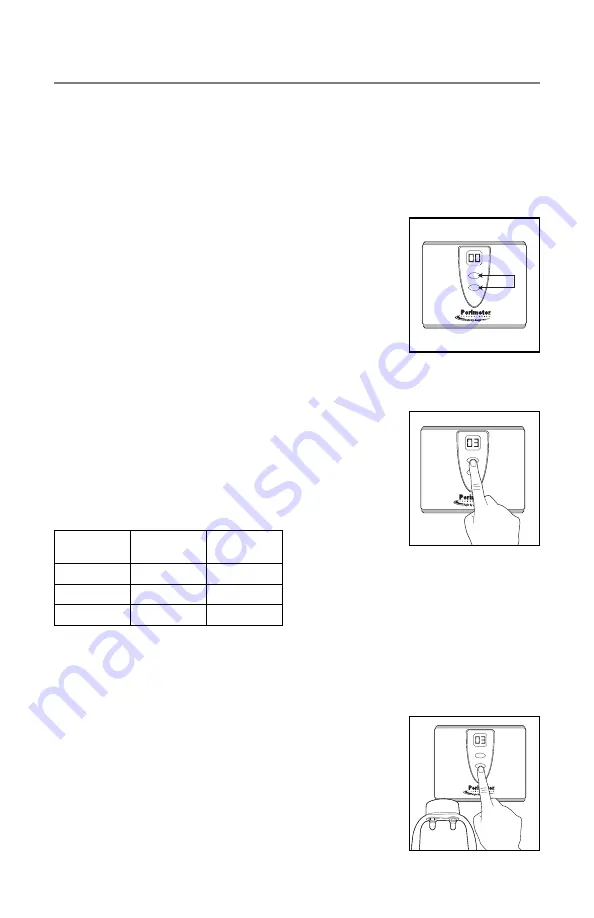
STEP 1 –
Press
and hold both
the top and
bottom but-
tons, marked
SCROLL and
SET on the wall
transmitter
simultaneously
for 3 seconds. The transmitter display will
show “00” indicating programming mode.
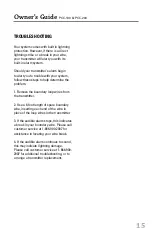
STEP 2
–
Release both
transmitter
buttons. Press
and release
the SCROLL
button to select
desired cor-
rection setting.
The transmitter display will show corre-
sponding number with each button push.
Settings
1 = Extra Light
2 = Light
3 = Medium
4 = High
5 = Progressive
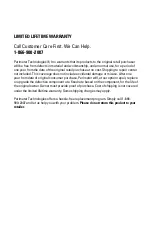
STEP 3 –
Hold
the pet fence
collar receiver
against the
wall mount
transmitter.
The collar
receiver light
will illuminate
SCROLL
SET
SCROLL
SET
SCROLL
SET


