Maintenance
150
Removing and Disassembling the Torch
1. Turn off the plasma if it is on.
2. Open the side door to the sample compartment.
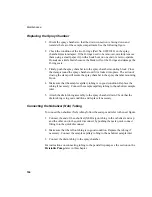
3. With two hands firmly grasping the torch coupler turn in a counterclockwise
direction. Allow the two locking lugs, located on the side of the torch coupler
and guide pin to pass through the torch coupler channels and out. The torch is
mounted on an assembly that slides out. Carefully slide the torch out of the
plasma induction plates. The torch coupler and torch are now separated from the
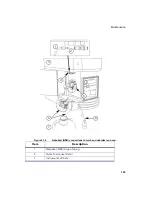
instrument. See the following figure.
5
Clamp
6-7
Torch Coupler
8
Injector Lock
9
Injector
If the plasma has been on, the torch glass will be very hot and can
cause serious burns.
Wait five minutes after turning off the plasma
before you begin these maintenance procedures.
Item
Description
!
Warning
Summary of Contents for OPTIMA 8000
Page 1: ...OPTIMA 8000 Customer Hardware and Service Guide ICP OPTICAL EMISSION Return to Document Menu...
Page 2: ......
Page 3: ...Optima 8000 Customer Hardware and Service Manual...
Page 12: ...Contents 10...
Page 18: ...16 Indicates the ON position of the main power switch Indicates alternating current...
Page 24: ...22 Figure C Location of warning labels in the sample compartment 1 2...
Page 28: ...26...
Page 29: ...Safety Practices 1...
Page 49: ...Preparing Your Laboratory 2...
Page 61: ...Preparing Your Laboratory 60...
Page 62: ...System Description 3...
Page 89: ...Installation 4...
Page 136: ...Maintenance 5...
Page 241: ...Troubleshooting 6...
Page 264: ...Error Messages 7...
Page 284: ......


