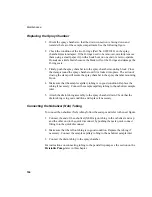
Maintenance
170
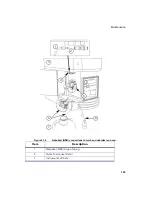
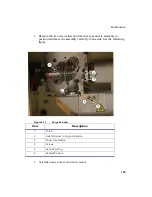
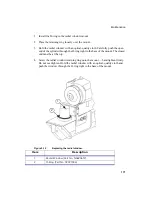
4. Remove the O-ring that holds the axial window in the mount and remove the
window.
5. Unscrew and remove the radial window retaining ring.
6. Lift the radial window and O-ring out of the mount — take care if the
spectrometer purge is set to high and you have not removed the axial window,
the pressure inside the spectrometer may force out the radial window.
Cleaning the Windows
1. Rinse the windows thoroughly with deionized water.
2. To remove more stubborn marks:
Soak the windows in warm, 40°C, 10-20% nitric acid for one hour.
Rinse the windows thoroughly with deionized water.
3. Dry them with an optical-quality cloth.
4. If the windows are scratched or badly etched, discard them and install new ones.
Replacing the Radial Window
Note
Do
not
rub the surfaces of the windows before you have cleaned them as
described below. The more you rub the surface of the windows, the more
chance there is of scratching them. You must discard scratched windows.
Allow to dry completely before reinstalling. If there is any moisture on the
inside of the window it can degrade the UV performance and/or damage
the optics.
Caution
Do not leave fingermarks on the window.
Use an optical cloth to handle
the window. Normally you should install the radial window before the
axial window. This helps avoid objects or contamination falling into the
radial snout. If the axial window is already installed, and the spectrometer
purge is set to high, the pressure inside the spectrometer may lift the radial
purge window unless you hold it in place until you have tightened the
retaining ring.
Summary of Contents for OPTIMA 8000
Page 1: ...OPTIMA 8000 Customer Hardware and Service Guide ICP OPTICAL EMISSION Return to Document Menu...
Page 2: ......
Page 3: ...Optima 8000 Customer Hardware and Service Manual...
Page 12: ...Contents 10...
Page 18: ...16 Indicates the ON position of the main power switch Indicates alternating current...
Page 24: ...22 Figure C Location of warning labels in the sample compartment 1 2...
Page 28: ...26...
Page 29: ...Safety Practices 1...
Page 49: ...Preparing Your Laboratory 2...
Page 61: ...Preparing Your Laboratory 60...
Page 62: ...System Description 3...
Page 89: ...Installation 4...
Page 136: ...Maintenance 5...
Page 241: ...Troubleshooting 6...
Page 264: ...Error Messages 7...
Page 284: ......


