Troubleshooting
255
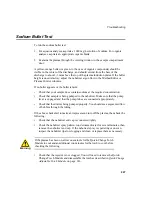
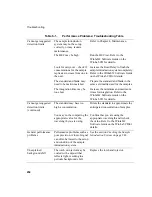
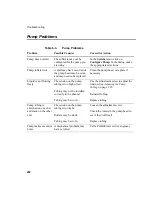
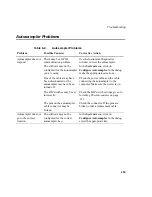
Plasma Ignition and Stability Problems
Plasma Ignition Problems
Possible reasons for unsuccessful ignition follow. Correct the problem, if possible,
and then try to ignite the plasma again.
•
If the plasma will not light check the
ignitor.
Open the door to the sample
compartment. Check that the ignitor finger is making contact with the tape on
the bottom of the torch glassware. Also, check the ignitor ground. If necessary,
use a brush to clean it.
•
If the plasma is unstable check the
exhaust vent.
Be certain that your exhaust
vent is operating properly and is not blocked. Operation of the exhaust vent is
required to establish proper argon gas flow patterns as well as for safety reasons.
•
Torch Connections.
Verify that all gas fittings to the torch are finger-tight.
Leakage of air into any part of the torch, nebulizer or spray chamber will cause
ignition problems. The torch should be clean and in good condition.
Do not use
tools to tighten, the nebulizer fittings may be damaged.
•
If the plasma will not light check the
plasma induction plates.
Check the
plasma induction plates for condensation, particularly in labs with high
humidity. Dry the plasma induction plates with a soft cloth if necessary.
•
Torch Glassware.
Check the condition of the torch glassware. If it is cloudy or
dirty, clean it in a 5-20% nitric acid solution. See
Cleaning the Torch
on page
153.
•
If the plasma is unstable check the
drain.
Check the drain tubing for flat spots
and replace the tubing if necessary. Check that the drain fitting on the spray
chamber drain is secure. Be sure that the pump is properly draining the spray
chamber and that the drain liquid is not backing up into the spray chamber or
building up in the torch.
•
Argon.
Check that the argon supply is on. Check the argon hose connections.
Make sure that they are not obstructed. Check that the pressure at the cylinder
regulator is 550-825 kPa (80-120 psig).
•
Injector.
Check that the injector is not clogged. You will need to remove the
injector and injector adaptor as described in
Removing the Injector
on page 148.
In addition, try pumping solutions with the Nebulizer, Auxiliary, and Plasma gas
Summary of Contents for OPTIMA 8000
Page 1: ...OPTIMA 8000 Customer Hardware and Service Guide ICP OPTICAL EMISSION Return to Document Menu...
Page 2: ......
Page 3: ...Optima 8000 Customer Hardware and Service Manual...
Page 12: ...Contents 10...
Page 18: ...16 Indicates the ON position of the main power switch Indicates alternating current...
Page 24: ...22 Figure C Location of warning labels in the sample compartment 1 2...
Page 28: ...26...
Page 29: ...Safety Practices 1...
Page 49: ...Preparing Your Laboratory 2...
Page 61: ...Preparing Your Laboratory 60...
Page 62: ...System Description 3...
Page 89: ...Installation 4...
Page 136: ...Maintenance 5...
Page 241: ...Troubleshooting 6...
Page 264: ...Error Messages 7...
Page 284: ......

