7-2
Operation
7.1.2. The Plug Group Control Screen - Web Browser Interface
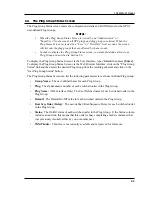
The Plug Group Control Screen is used to send switching and reboot commands to the user-
defined Plug Groups. As described in Section 5.6, Plug Groups allow you to specify a group of
outlets that are dedicated to a similar purpose or client, and then direct switching commands to
the group, rather than switching one plug at a time.
To apply power switching commands to Plug Groups, first access the RPS Command Mode (see
Section 5.1.) Click on the "Plug Group Control" link on the left hand side of the screen to display
the Plug Group Control Screen. When the Plug Group Control Screen appears, click the down
arrow in the "Action" column for the desired Plug Group(s), then select the desired switching
option from the dropdown menu and click on the "Confirm Plug Actions" button
When the "Confirm Plug Group Actions" button is pressed, the RPS will display a screen which
lists the selected action(s) and asks for confirmation before proceeding. To proceed, click on
the "Execute Plug Group Actions" button. The RPS will display a screen which indicates that
a switching operation is in progress, then display the Plug Status screen when the command is
complete. At that time, the Status Screen will list the updated On/Off status of each plug.
Notes:
• When switching and reboot operations are initiated, Boot/Sequence Delay times
will be applied as described in Section 5.7.
• If a switching or reboot command is directed to a plug that is already in the
process of being switched or rebooted by a previous command, then the new
command will be placed in a queue until the plug is ready to receive additional
commands.
• When the Plug Group Control Screen is displayed by an account that permits
Administrator or SuperUser level commands, all user-defined Plug Groups will
be displayed.
• When the Plug Control Screen is displayed by a User level account, the screen
will only include the Plug Groups that are specifically allowed for
that account.

