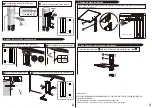
Insert the glass shelf into the slot of the wall plate, then glissade it to the desired location and
fasten the screws on it
Insert the cable manager into the wall bracket, then attach the end caps .
Tighten the screws
C
B
Made in China
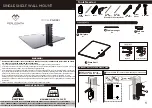
PERLE ELECTRONICS HARDWARE (HONGKONG) CO., LIMITED • FLAT B07, 23/F HOVER IND BLDG NO.
26-38 KWAI CHEONG RD •
Any questions please contact : customerservice@perlegear.com
C
B
D
A
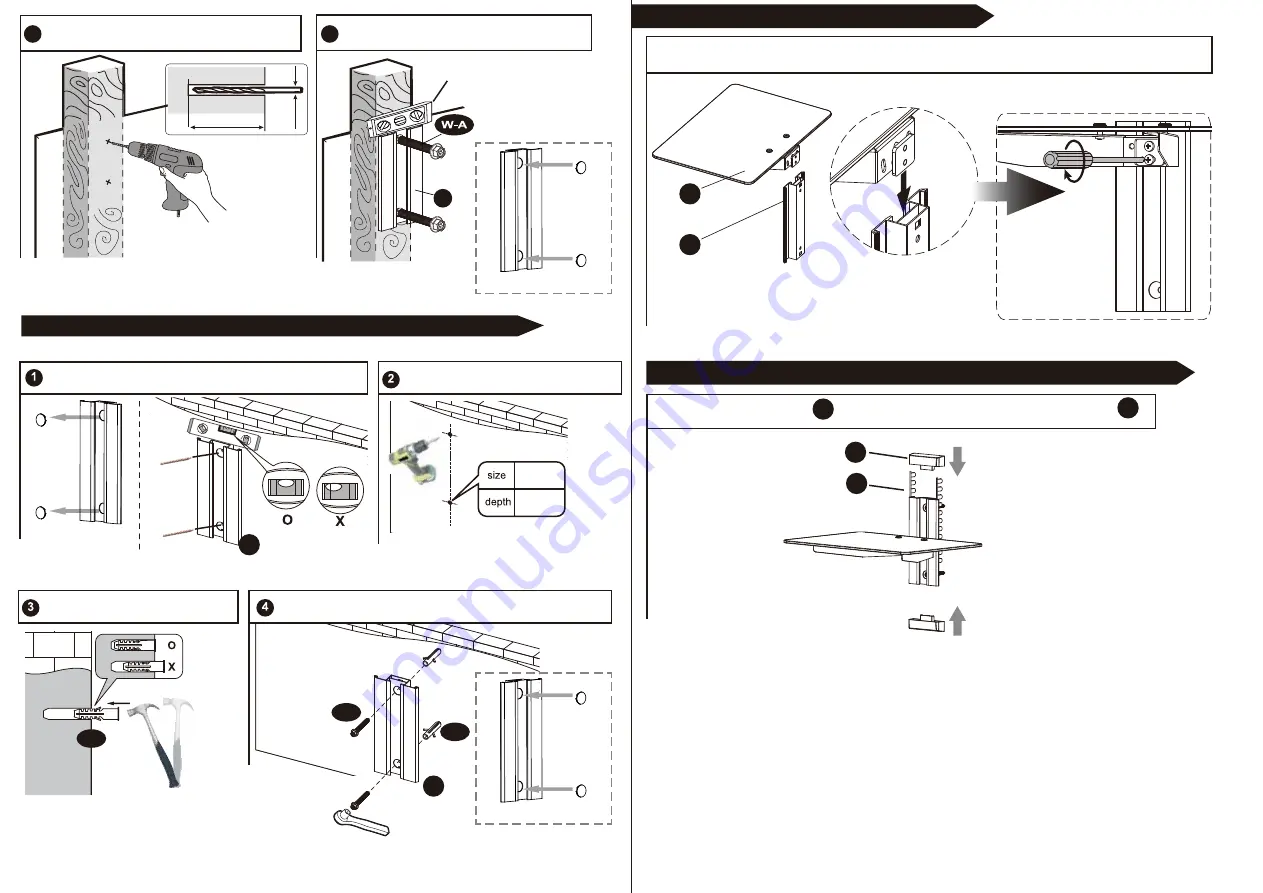
Drill pilot holes using a 1/8 in. (3.2 mm)
diameter drill bit.
Secure the wall plate with the lag bolt.
A
3
4
Level
1/8 in. Ø3.2 mm
2.2
in. (55mm)
W-A
W-B
1/8”
(3.2mm)
2 3/8”
(60mm)
3/8”
(10mm)
2 3/8”
(60mm)
Drill 2 pilot holes on concrete wall.
Remove covers and save
W-B
A
A
1b. MOUNT WALL PLATE ON CONCRETE WALL
2
3
3. End caps and cable manager installation
2. Tempered glass Installation
Attach the saved covers
Attach the saved covers
Use wall bracket holes to mark 2 mounting
locations.Use level to ensure proper alignment.
Insert 2 concrete anchors into
drilled holes
Secure wall plate to concrete wall using screws with
socket wrench
Please check www.perlesmith.com for more products and company information.


