background image

8

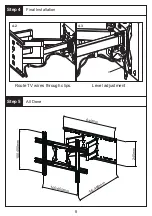
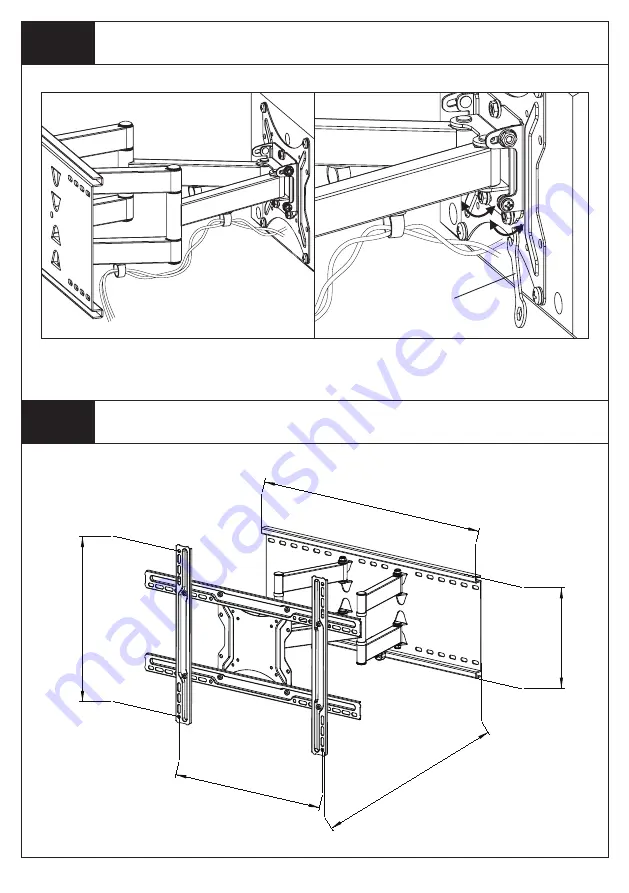
Step 4

Final Installation

Step 5

All Done

Route TV wires through clips.

Level adjustment

F

100-400mm

100-600mm

56-458mm

245mm

640mm

Summary of Contents for PSLF2

Page 1: ...e to provide the best quality and services for our customers Would you kindly share your experience on Amazon if you are satisfied Should you have any issues please don t hesitate to contact us Telephone 800 5566 806 Mon Fri 10am 6pm PST USA Email supportus perlesmith com US CA DE UK FR IT ES JP AU V2 0 ...

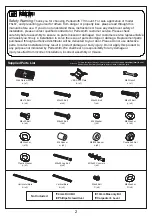
Page 2: ...smith TV mount For safe application of model FSLF2 and preventing yourself or others from danger or property loss please read through this manual before use If you do not understand these instructions or have any doubt over safety of installation please contact qualified contractor or Perlesmith customer service Please check carefully before assembly to ensure no parts missed or damaged Our custom...

Page 3: ...gh more than 132 lbs 60kg 132 lbs 60kg NO Perfect Yes This mount is NOT compatible 3 What is your wall made of CAUTION DO NOT install into drywall alone Perfect Drywall with wood studs Solid concrete wall Perfect 24 Yes Perfect No This mount is NOT compatible If this mount is NOT compatible please contact customerservice perlegear com to find a compatible mount supportus perlesmith com to find a c...

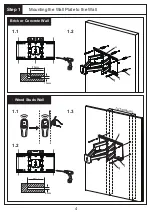
Page 4: ...4 80mm 90mm 10mm 90mm 4mm Mounting the Wall Plate to the Wall Step 1 D D q q l l r 16 406mm ULFN RU RQFUHWH DOO RRG 6WXGV DOO ...

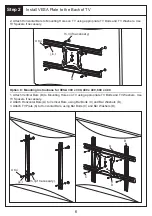
Page 5: ... 100 200 x 100 200 x 200 Attach TV Plate b to Mounting Holes on TV using appropriate TV Bolts and TV Washers Use TV Spacers if necessary Option B Mounting instructions for VESA 400 x 200 1 Attach TV Plate b to Horizontal Bars A using Bar Bolts C and Bar Washers D G WR L M N O P Q LI QHFHVVDU ...

Page 6: ...al Bars A to Vertical Bars using Bar Bolts C and Bar Washers D 3 Attach TV Plate b to Horizontal Bars using Bar Bolts C and Bar Washers D 2 Attach Horizontal Bars to Mounting Holes on TV using appropriate TV Bolts and TV Washers Use TV Spacers if necessary Option C Mounting instructions for VESA 300 x 300 400 x 400 600 x 400 G WR L M N O P Q LI QHFHVVDU G WR L M N O P Q LI QHFHVVDU ...

Page 7: ... slide TV Plate Nut over Notch on TV Mount and route Lower Posts through Lower Post Holes 3 Attach TV Plate Washers p and Nuts o to Lower Posts using included Wrench Do not tighten Nuts 4 Level TV then tighten Nuts on Upper and Lower Posts securely Lower Posts TV Plate Nut Adjust Tilt if desired a Loosen Tilt Adjustment Nuts on Wall Mount behind TV Plate with included Wrench b Adjust tilt c Tighte...

Page 8: ...8 Step 4 Final Installation Step 5 All Done Route TV wires through clips Level adjustment F 100 400mm 100 600mm 56 458mm 245mm 640mm ...

Reviews: