7
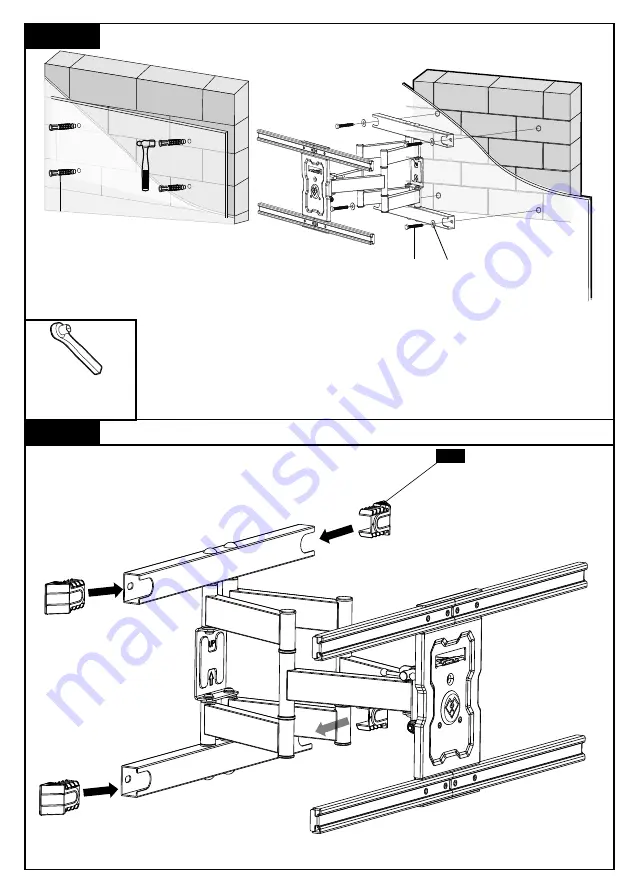
Step 3
13mm
Socket Wrench
Use the hammer to knock
anchors [A3] into the wall.
Install the arm assembly/wall plate [01] using lag bolts [A1],
washers [A2] and anchors [A3]. Be sure the anchors [A3] are
seated flush with the concrete surface. Tighten the lag bolts
[A1] only until the washers [A2] are pulled firmly against the
wall plate. DO NOT over-tighten the lag bolts [A1].
(Not included)
Add the Decorative Cap [04] to the Arm Assembly/Wall Plate[01]
04
A3
A1 A2
2B-3
Summary of Contents for PSLFK5
Page 11: ...Step 10 Manage Cables ...


