background image

Perlick is committed to continuous improvement. Therefore, we reserve the right to change specifications without prior notice 

12

48” TWO DOOR AND DUAL-ZONE REFRIGERATOR/WINE RESERVE 

Operation/Installation Manual

Cleaning the Condenser

DANGER

Flammable Refrigerant. Risk of fire 

or explosion. Do not damage 

refrigeration tubes.

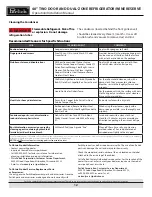
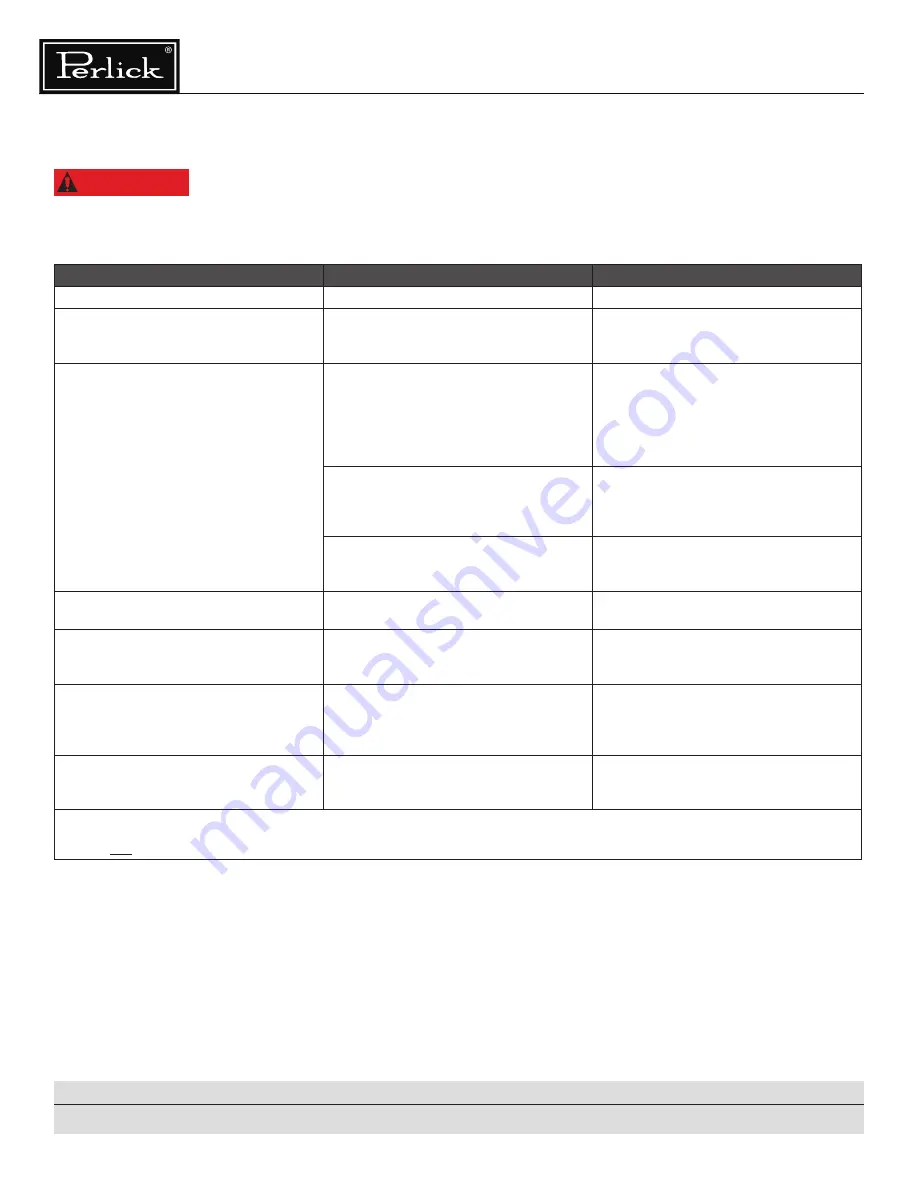
Recommended Cleaners for Specific Situations

JOB

CLEANING AGENT

COMMENTS

Routine cleaning

Soap, ammonia, detergent

Apply with sponge or soft cloth

Fingerprints and smears

Areal 20, Lac-O-Nu, Lumin Wash, O-Cedar 

Cream Polish

Provides barrier film to minimize fingerprints. 

Can be used on all finishes. Rub the surface 

with a cloth as directed on the package.

Stubborn stains and discolorations

AllChem Concentrated Cleaner, Samae, 

Twinkle, Cameo Copper Cleaners, Grade FFF 

Italian Pumice Whiting, Steel Bright, Lumin 

Cleaner, Zud Restoro, Sta-Clean, Highlite 

Cooper’s Stainless Steel Cleaner or Revere 

Stainless Steel Cleaner

Apply with a damp sponge or cloth, then 

rinse with clear water and wipe dry.

Old Dutch, Lighthouse Sunbrite, Wyandotte 

Bab-O, Gold Dust, Sapollo, Bon Ami or Comet

For these household cleaners, rub with a 

damp cloth. They may contain chlorine 

bleaches so rinse thoroughly after use and 

wipe dry.

Liquid NuSteel or Dubois Temp

For these products, rub the surface with a dry 

cloth using only a small amount of cleanser. 

Rinse with water and dry.

Heat tint or heavy discoloration

Penny-Brite, Copper Brite, Paste Nu-Steel, 

Dubois Temp or Tarnite

Rub onto surface with a dry cloth

Bar Keepers Friend, Revere Stainless Steel 

Cleaner, Allen Polish, Steel Bright Wyandotte 

Bab-O or Zud

When using these cleaners, apply with a 

damp sponge or cloth, rinse thoroughly and 

wipe dry.

Tenacious deposits, rust, discoloration, 

industrial atmospheric stains

Oakite No. 33 Dilac, Texo NY, Flash-Klenz 

Caddy Cleaner, Turco Scale 4368 or Permag 

57

Swab and soak with a clean cloth. Let 

stand for 15 minutes or more according to 

directions on package, then rinse and wipe 

dry.

Rust dicoloration or corrosion caused by 

cleaning agents containing hydrochloric 

(muriatic) acid or chlorine bleach

3M Scotch Pad, type A, grade “fine”

Clean off the surface soil using cleaning 

methods above. Then rub discolored or 

corroded areas lightly with a dry pad.

Use of property names is intended only to indicate a type of cleaner and does not constitute an endorsement. Omission of any proprietary cleaner does not imply its inadequacy. 
All products should be used in strict accordance with instructions on the package.

NOTE: Do NOT use steel wool or scouring pads to clean stainless steel.

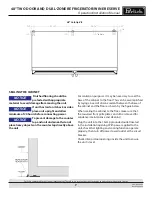
The condenser (located behind the front grille cover)

should be cleaned every three (3) months. Use a soft 

bristle brush and vacuum to remove dust and lint.

To Obtain Product Information

•  Contact your selling dealer.

•  Inquire on the web at www.perlick.com.

•  Call 800-558-5529 for factory assistance for information,  


  planning, installation or product information.

• Write 

Perlick Corporation, Customer Service Department,

  8300 W. Good Hope Road, Milwaukee, Wisconsin 53223.

•  E-mail us at 

warrantyserv@perlick.com

.

To Obtain Product Service, Replacement Parts 

or Accessories:

Use only genuine Perlick replacement parts and accessories. Genuine 

Perlick parts and accessories are designed to work correctly with 

Perlick products and offer superior service life. The use of non-Perlick 

parts can damage the unit and may void the warranty.

Check the model and serial number of the unit located on the label 

attached to the inside top of the cabinet. 

Call a Perlick Factory Authorized service center. For the location of the 

nearest Service Center, contact your dealer, or inquire via the web at 

www.perlick.com, or write to: 

Perlick Corporation, Customer Service Department, 

8300 W. Good Hope Road, Milwaukee, Wisconsin 53223, 

call 800-558-5592, or e-mail us at: 

warrantyserv@perlick.com.

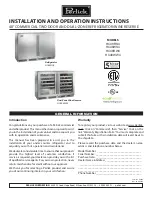
Summary of Contents for HC48RS4

Page 1: ...ler Name Address___________________________ ______________________________________________ ______________________________________________ ______________________________________________ Phone Number__________________________________ Introduction Congratulations on your purchase of a Perlick commercial underbarproduct Thismanualhasbeenpreparedtoassist you in the installation of your cabinet and to a...

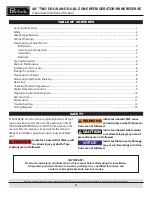
Page 2: ...6 Preparing the Cabinet 8 Adjusting Full Extension Shelving 8 Operation 9 Checking Product Temperature 9 Digital Temperature Control 9 Programming Button Definitions 10 LED Functions 10 Maintenance 11 Troubleshooting 13 Wiring Diagrams 14 SAFETY PLEASE READ all instructions completely before attempt ing to install or operate the unit Take particular note of the DANGER WARNING and CAUTION informati...

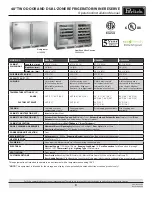
Page 3: ...e tapping not available Wine tapping not available Wine tapping not available CABINET CONSTRUCTION INT Interior Stainless Steel CABINET CONSTRUCTION EXT Exterior Sides Exterior Top and Grill Stainless Steel Exterior Back and Exterior Bottom Stainless Steel Door Exterior Customer Choice see below under Customer Options CABINET INSULATION Polyurethane Ecomate Wall Thickness 2 Door Thickness 2 DOORS ...

Page 4: ... CORPORATION NOT TO BE COPIED OR USED DETRIMENTAL TO OUR INTERESTS DR DATE 1 28 2016 JMP SCALE 1 12 J Dwg 95000 95316 slddrw SHEET 2 OF 2 95316 REVISIONS JMP PROPERTY OF THE PERLICK CORP A 50 1270 Area in which electrical outlet must be located 12 1 4 311 24 15 16 634 Min clearance for door swing 22 559 44 1118 11 3 4 298 20 5 8 523 6 7 16 164 6 3 16 158 9 5 8 245 26 9 16 674 18 1 8 460 18 3 16 46...

Page 5: ...Remove all crating material before operating Carefully inspect cabinet for hidden damage If damage is discovered file your claim immediately with the transport company Perlick is not responsible for damage in transit DANGER Do not use or store flammable liquids ie gasoline or vapors near the appliance to avoid fire INSTALLATION NOTICE The unit must NOT be totally enclosed or damage may occur Air c...

Page 6: ...ce may result in fire INSTALLING CASTERS OR LEGS OPTIONAL Attach bracket assembly to the bottom of the cabinet base using the 20 Philips head machine screws provided Attach casters or legs to the mounting bracket with 20 Philips head screws provided NOTICE To comply with NSF requirements cabinet must be sealed to floor or on legs casters or rollers PLACING THE CABINET To assure maximum performance...

Page 7: ...e counter top directly above the unit For sanitation purposes it may be necessary to seal the base of the cabinet to the floor This can be accomplished by laying a bead of silicone sealant between the base of the cabinet and the floor as shown by the figure below When sealing the cabinet to the floor make sure that the louvered front grille plate can still be removed for condenser maintenance and ...

Page 8: ...nd six full extension black vinyl coated wine shelves The shelves are removable and adjustable to accommodate oversized magnum bottles ADJUSTING FULL EXTENSION SHELVING CAUTION Shelves should be emptied and free of any product prior to moving or adjusting Pull the shelf out to its furthest position Locate the tabs in the middle of both extenders see extender tabs below Press tabs and pull out Repo...

Page 9: ...ate for a minimum of 24 hours to allow temperatures to stabilize When loading items into the unit leave a minimum of 1 inch clearance in front of internal louvers and fan guard openings blocking airflow will result in decreased performance CHECKING PRODUCT TEMPERATURE 1 To accurately check the temperature of product stored in the refrigerated compartment insert an accurate thermometer into a plast...

Page 10: ... label AP1 will appear 2 Browse the various applications AP1 AP2 AP3 AP4 using the and keys 3 Select the desired application using the key AP3 in the example or cancel the procedure by pressing the key alternatively wait for the timeout 4 If the operation is successful the display will show y if not it will show n 5 After a few seconds the instrument will return to the main display Power on Select...

Page 11: ...ers are the worst offenders Preventing Stainless Steel Rust Use non abrasive tools to clean stainless steel products Soft cloths and plastic scouring pads will not harm the steel s passive layer Clean with polish lines Some stainless steels have visible polishing lines or grain When visible lines are present always scrub in a motion parallel to the lines When the grain cannot be seen polish in a c...

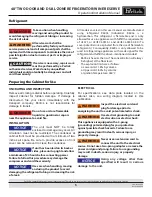
Page 12: ...y Cleaner Turco Scale 4368 or Permag 57 Swab and soak with a clean cloth Let stand for 15 minutes or more according to directions on package then rinse and wipe dry Rust dicoloration or corrosion caused by cleaning agents containing hydrochloric muriatic acid or chlorine bleach 3M Scotch Pad type A grade fine Clean off the surface soil using cleaning methods above Then rub discolored or corroded a...

Page 13: ...oor opening occurred Has warm product just been placed in the unit On hot days and in warm room temperatures the system will run longer Condensation forms inside the refrigerated compartments This is normal during high humidity and frequent door openings Are the doors closing and sealing properly Condensation forms on the outside of the unit During periods of high humidity some condensation might ...

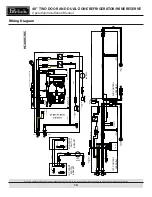
Page 14: ...NET LIGHT MACHINE COMPARTMENT BLACK BLACK BLACK BLACK BLACK BLACK EVAPORATOR FAN CONDENSER FAN CONTROL MASTER POWER SWITCH DC DRIVER 2 DC DRIVER 1 1 1A I320 C 14 10 AMP 5 15P CORD END NOT USED CAP ENDS GROUNDED ABOVE CONDENSER FAN 1B 1 1A 1026854 WHITE BLACK RED WHITE RED BLUE NORMAL CLOSED NORMAL OPEN 1026973 1 WHITE BLACK LIGHT SWITCH EVAPORATOR SENSOR WHITE RED RED BLACK 68755 CABINET LIGHT 1B ...

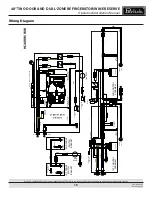
Page 15: ...ROL DC DRIVER 2 DC DRIVER 1 I320 C 14 10 AMP 5 15P CORD END GROUNDED ABOVE CONDENSER FAN 1B 1 1A 1026854 WHITE BLACK RED WHITE RED BLUE 1026973 1 WHITE BLACK LIGHT SWITCH EVAPORATOR SENSOR WHITE RED RED BLACK 68755 CABINET LIGHT 1B 1 1A WHITE RED BLUE LIGHT SWITCH BLUE BROWN DC DRIVER 3 WHITE BLACK RED BLACK RED BLACK CENTER FAN WHITE BLACK BLUE BLUE WHITE BLACK BLACK BLACK WHITE BLUE BLACK WHITE ...

Page 16: ...PERLICK CORPORATION 8300 W Good Hope Road Milwaukee WI 53223 800 558 5592 perlick com Form No Z2426 Rev 03 04 2022 ...

Reviews: