18” SHALLOW-DEPTH SERIES
Operation/Installation Manual
Perlick is committed to continuous improvement. Therefore, we reserve the right to change specifications without prior notice
5
Form No.Z2325
18” SHALLOW-DEPTH SERIES
Operation/Installation Manual
Figure 2. Electrical Connections
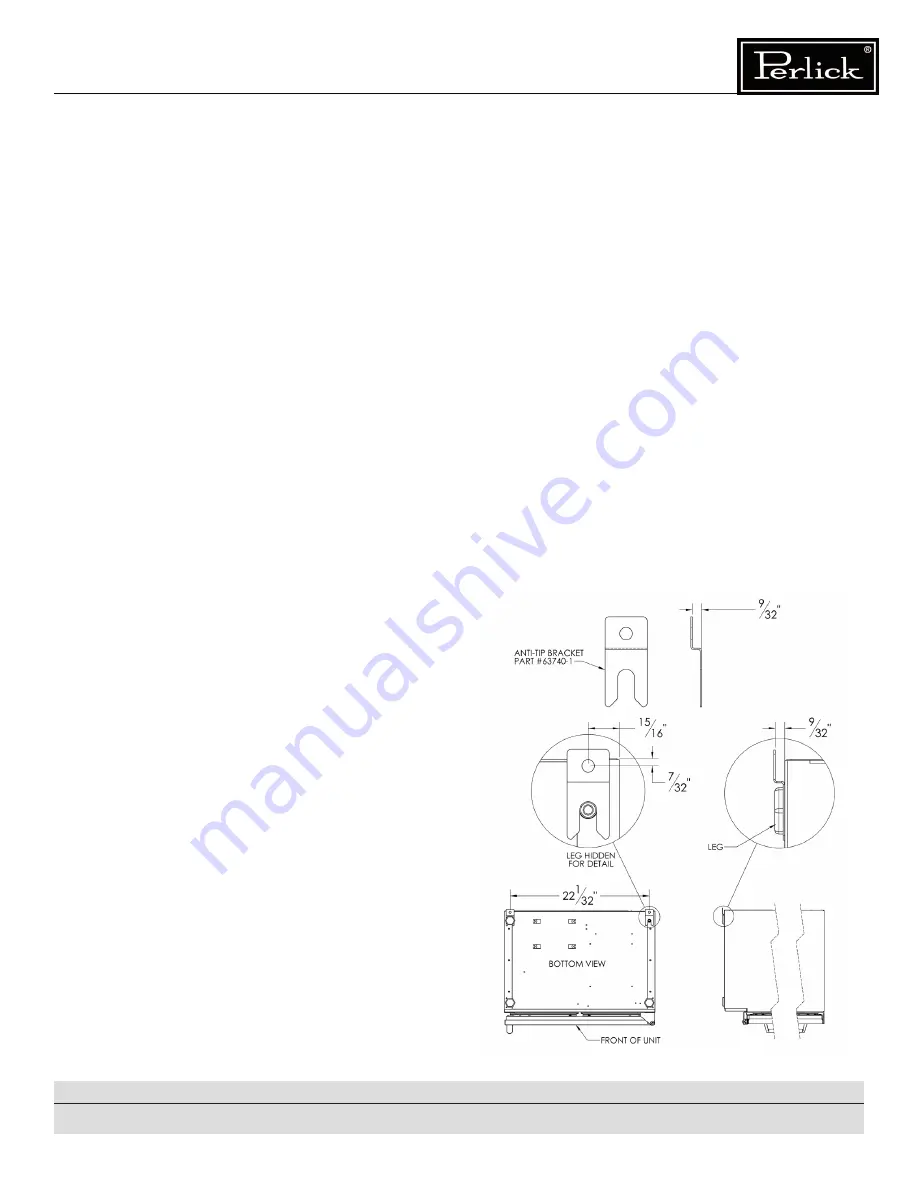
ANTI-TIP BRACKETS
WARNING
Unit may tip forward if loaded racks/shelves
are all pulled out at the same time. To prevent
tipping and provide a stable installation, the
unit must be secured in place with the anti-tip
brackets provided with the unit.
A set of metal anti-tip brackets are supplied with the
unit. The anti-tip brackets, when properly installed,
should secure the rear legs and prevent the unit
from tipping forward. Select fasteners based on
the material the brackets will be fastened to.
Some installation sites may require modification
to provide a secure surface for attaching the
brackets. Refer to
Figure 3
for mounting bracket
locations.
IMPORTANT:
If installing on a concrete floor,
concrete fastners are required and are not included
in the Anti-Tip Kit.
UNPACKING AND MOVING THE UNIT
CAUTION
Do not cut cardboard sleeve covering the unit.
Cutting may result in damage to the exterior of
the unit.
1.
Uncrate the unit on a flat level surface. Remove
the cardboard sleeve by removing the banding
holding the sleeve to the shipping base.
Carefully lift the cardboard sleeve up over the
top of the cabinet.
2.
Carefully lift unit off base onto a hand truck or
dolly (this should be done with a minimum of two
people, larger cabinets may require additional
helpers). Make sure unit it is balanced on
transporting device. Secure unit to transporting
device using soft flexible strapping. Protect
cabinet surfaces with cloth material where
strapping contacts the unit.
3.
Before moving unit, secure door to unit with
tape to hold the door closed.
Figure 3. Installing Anti-tip Brackets


