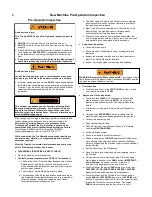
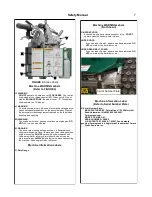

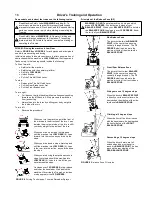

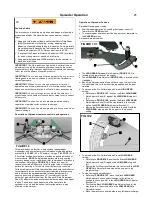

Pre-Operation Inspection
Replacement parts
Use of parts other than those supplied by Perma-Green Supreme,
Inc. may compromise the safe use of the machine and void the
warranty.
Use only genuine PermaGreen parts. Check with your Dealer or at
PermaGreen.com for the latest Parts List for your PermaGreen
equipment.
22
13
Handling and disposal of hazardous waste products
Dispose of all hazardous waste products properly.
Clean up hazardous waste spills immediately.
Refer to the Pesticide Label for proper handling and disposal
instructions.
Refer to MSDS for proper handling and disposal instructions.
Wear the Personal Protective Equipment specified on MSDS
and Pesticide Labels.
Before disposing of hazardous waste check with your local
regulatory agency.
21
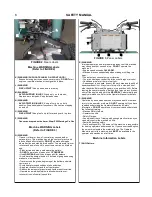
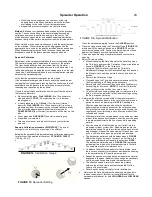
Maintenance and service
Improper maintenance can cause serious injury.
Lock brakes, stop engine and disconnect spark plug wire. Wait
for all movement to stop before adjusting, cleaning or repairing .
Clean grass and debris from drives, mufflers, and engine to help
prevent fires. Clean up oil or fuel spillage.
Let engine cool before storing and do not store near flame.
Shut off fuel while storing or transporting.
DO NOT
store fuel
near flames or drain indoors.
Park machine on level ground. Never allow untrained personnel
to service machine.
Use jack stands to support components when required.
Carefully release pressure from tires and spray system.
Remove spark plug wire before making any repairs.
Keep hands and feet away from moving parts. If possible, do
not make adjustments with the engine running.
Keep all parts in good working condition and all hardware
tightened.
Replace all worn or damaged Machine Safety Labels.
Replace worn or damaged footpads.
Perform all scheduled maintenance as directed in the Service
Manual.
19
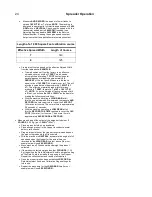
Pesticide Safety
The improper use, handling, application, and disposal of pesticide
products applied by this machine may cause death or serious
injury.
Read and follow product label and Material Safety Data Sheet
(MSDS) precautions for handling, mixing, applying, and
disposing of pesticides applied by this machine. Some materials
may present health hazards that will require the use of Personal
Protective Equipment (PPE). Always wear required PPE.
Keep required PPE available for use by the operator or
mechanic at all ties.
Keep pesticide labels and MSDS available for the operator or
mechanic at all times.
20
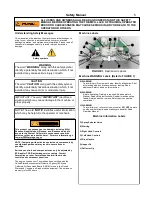
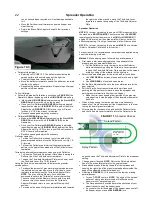
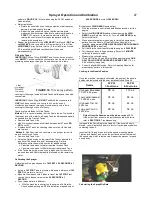
Tire Safety
Tires are filled with pressurized diluted RV antifreeze to provide
ballast for a lower center of gravity. Explosive separation of rim and
tires may cause serious injury.
DO NOT
remove fluid from tires.
All replacement tires must be fluid filled.
Wear a face shield when checking, filling, and repairing fluid-
filled tires.
Refer to the Service Manual for instructions on repairing fluid
filled tires.
Do not attempt to check, repair or replace fluid fill tires without
the proper equipment.
Use a clip-on chuck and extension hose. Stand to the side of
the tire when filling.
Always maintain tire pressure at
12 PSI
.
DO NOT
under or
over-inflate tires.
Rear tires have split rims. Release tire pressure prior to
loosening any nuts or bolts.
Never weld or heat the tire rims as this could cause a tire
explosion or structural damage to the rim.
Check tires often for cuts, wear, bubbles and missing or lose lug
nuts. Check pressure often.
Fix or replace worn or damaged tires, rims, and hardware.
Always replace tires with genuine PermaGreen liquid-filled tires
and rims.
18
This product can expose you to chemicals including Ethyl
Benzene, Naphthalene, N-Hexane, and Benzene which are
known to the State of California to cause cancer and birth
defects or other reproductive harm. For more information go
to www.P65Warnings.ca.gov
WARNING
23


