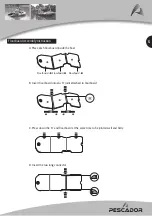
How to repair small punctures
Warranty Registration Card
Check that the tube is fully defl ated and lies fl at.
1. Prepare a round patch no less than 3 inches or 7 centimeters in diameter.
2. Clean the patch and the area surrounding the leak with Alcohol.
3. To contain excess glue, use masking tape to tape off the area around the patch.
4. Apply 3 thin, even coats of repair kit adhesive to both the surface of the P265-HF and the patch.
Wait 5 minutes between each coat.
5. After the 3rd coat, wait 10-15 minutes before applying the patch. Use a hand roller to apply the patch evenly.
Pay special attention to the edges.
6. Wait 24 hours before re-infl ating.
1. General
Please fi ll out and mail in the Warranty Registration Card supplied in your order right away. You will void your warranty
by not fi ling the registration card with us. Be sure to enter the Serial #(HIN code = the 12 digit number) you will fi nd on
the capacity plate.
2. Care and Preservation
There is very little that you have to do to keep your boat in good condition for many years. You may store it infl ated or
defl ated. If you leave it outside, raise it up off the ground. If it is going to be in direct sunlight or exposed to leaves, berries
or rain, cover it with a tarp (we do not recommend hanging the boat). If you leave it in the water, you will probably have to
drain out rainwater at times. If you store it in a closet, basement or garage, we suggest you pick a cool, dry spot, making
sure the boat is clean and dry before you pack it up - or mold can accumulate. That is all you need to keep your boat
in mint condition for years to come. Most dirt can be removed with a garden hose, a sponge and mild soap. SoftScrub
works exceedingly well. Do not sprinkle with powders. Do not store in an area where it is likely to be exposed to extreme
temperatures (above 60°C or below -12°C).
7
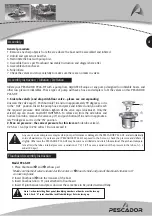
• Perform all of your repairs in a well-ventilated area.
• Avoid inhaling glue vapors.
• Avoid contact with the skin or the eyes.
• Keep all repair materials (glue, solvents, etc) away from the reach of children.
• The repairs on the welds must not be glued. Only the manufacturer of the P265-HF
can perform repairs on the welds themselves.


