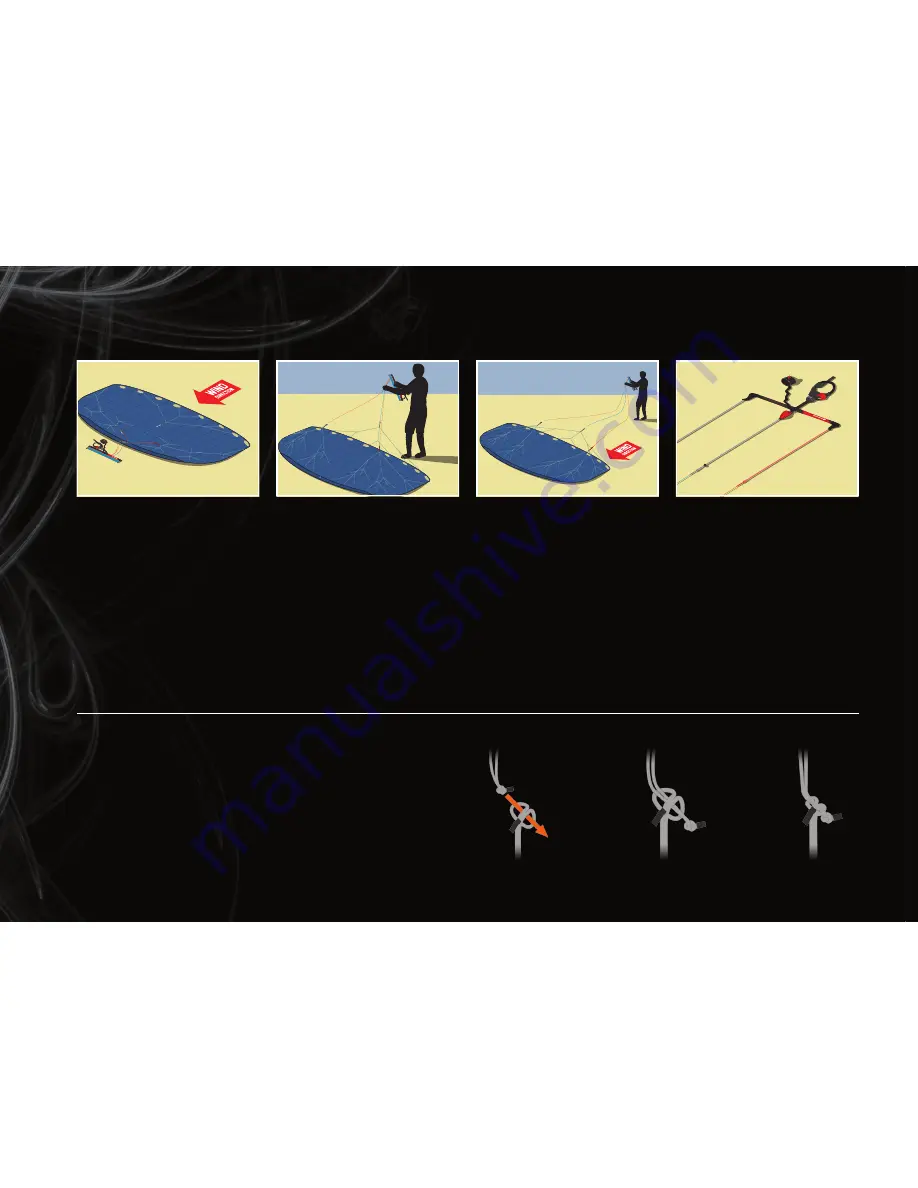
SEttinG uP yOur kitE
Find a good location to set the kite up.
Take the kite out of the bag and un-
fold the kite. Lay the kite down with
the lower skin up, trailing
edge opposite to the wind direction.
Put some sand or other suitable
weight on the trailing edge of the kite
to prevent it from blowing away.
The three bridle loops are secured
together in the Velcro tag in the
centre of the leading edge of the kite.
Remove the bridle loops from the
Velcro tag and check that the bridles
are not tangled.
Starting at the kite, slowly walk
backwards while unwinding your
lines. Walk in the opposite direction
of the wind, this prevents line tangles
and enables you to launch easier and
faster. Make sure not to put too much
tension on the lines as the kite may
take off.
When finished unwinding your flying
lines, make sure the lines have a little
tension to straighten them out. Place
your bar flat on the ground with the
correct side up (red colour on the
left). Make sure all leader lines are
untangled and not hooking behind
any part of the bar.
Check your lines to make sure they
are free of tangles and twists.
LarkShEad knOtS
Your fying lines can remain attached to the kite at all times. In case you need to
take them off, attach them to the bridle loops using larkshead knots.
Take the sleeve of the flying line, and make a larkshead. Slide it over the knot on
the end of the bridle loop. Pull the larkshead tight and slide it towards the knot
on the end of the bridle loop.
Please note the knot and loop on the center bridle connection are reversed to
prevent wrong attachment of the flying lines.
BRIDLE LOOP
FLYING LINE
FLYING LINE
FLYING LINE
BRIDLE LOOP
BRIDLE LOOP
Summary of Contents for 3 line bridled foil
Page 1: ......


