background image


www.petsafe.net


27

FI

DA

SV

EN

NO

Compliance

This equipment complies with the EMC and Low Voltage Directives. Unauthorised 
changes or modifications to the product that are not approved by Radio Systems 
Corporation may violate EU regulations, could void the user’s authority to operate the 
equipment, and will void the warranty. 
The Declaration of Conformity can be found at: 
http://www.petsafe.net/customercare/eu_docs.php.

Warranty

Two Year Non-Transferable Limited Warranty

This Product has the benefit of a limited manufacturer’s warranty. Complete details of the 
warranty applicable to this Product and its terms can be found at www.petsafe.net and/ 
or are available by contacting your local Customer Care Centre.

Europe

 – Radio Systems PetSafe Europe Ltd., 2nd Floor, Elgee Building, 

Market Square, Dundalk, Co. Louth, Ireland

Important Recycling Advice

Please respect the Waste Electrical and Electronic Equipment regulations in your country. 
This equipment must be recycled. If you no longer require this equipment, do not place it 
in the normal municipal waste system. Please return it to where it was purchased in order 
that it can be placed in our recycling system. If this is not possible, please contact the 
Customer Care Centre for further information. 

Summary of Contents for Healthy Pet Simply Feed PFD44-15749

Page 1: ...dyr Programmerbar digital foderautomat Healthy Pet Simply Feed Operating Guide Käyttöopas Bruksanvisning Bruksanvisning Betjeningsvejledning PFD44 15749 Please read this entire guide before beginning Lue tämä opas kokonaan ennen kuin aloitat Läs hela handboken innan du använder apparaten Les hele bruksanvisningen før du starter Læs hele denne vejledning før brug ...

Page 2: ...OT allow small children to play with in or around pet feeder To reduce the risk of injury close supervision is necessary when an appliance is used by or near children Intended for use with dogs or cats only Do NOT use this pet feeder with puppies kittens dogs or cats not able to reach the food tray or with any physical disability Do NOT use outdoors FOR INDOOR HOUSEHOLD USE ONLY Check operation fr...

Page 3: ...after installation Do not plug in if there is water on the power cord or plug To avoid tripping always position power cord out of the way of foot traffic Do not allow pets to chew on or swallow any parts If you are concerned about the power cord purchase a cord conduit a hard plastic protector at any hardware store to protect the power cord Do not attempt repairs on the pet feeder yourself If an e...

Page 4: ...ranty 28 Thank you for choosing the PetSafe Brand You and your pet deserve a companionship that includes memorable moments and a shared understanding together Our products and training tools enhance the relationship between pets and their owners If you have any questions about our products or training your pet please visit our website at www petsafe net or contact our Customer Care Centre For a li...

Page 5: ...ach day giving you the best way to manage your pet s feeding routine This is especially useful if specialised smaller portions are required more frequently each day Fewer refills are needed with the 5 678 ml 24 cup capacity hopper which is translucent for monitoring the food level Additionally the unique Slow Feed option is a perfect solution to help with a pet that gulps or eats too fast by slowl...

Page 6: ...tor Back Chute Power Adaptor Slow Feed Battery Indicator Meal Number Button Lock Up Button View or Set Time Right Button Immediate Feed Enter Button Down Button Pause Feed Left Button Slow Feed Meal Size Cups or Millilitres Time Indicator 12 Hour or 24 Hour Format Front Chute Gear AM or PM Indicator Dog Mode Cat Mode User Mode Lips Removable Stainless Steel Bowl Removable Bowl Holder Hopper Hopper...

Page 7: ...bowl Food Grade Material approved to come in direct contact with food without harming the food or changing the color odor or taste Hopper Holds dry or semi moist food with a 5 678 ml 24 cup capacity Hopper Base Holds hopper and bowl Main part of pet feeder with the control panel Hopper Lid Fits on top of hopper to cover the food Hopper Release Button Allows hopper to be removed for cleaning Immedi...

Page 8: ...CONS QUICK GUIDE ICON FUNCTION 18 00 TIME INDICATOR Displays current time or time of next scheduled meal Can be set to 12 hour or 24 hour format BUTTON LOCK INDICATOR Displays when 5 button Navigation is disabled Buttons automatically lock when not in use BATTERY INDICATOR Displays when D cell alkaline batteries are in use and life status POWER ADAPTOR INDICATOR Displays when power adaptor is conn...

Page 9: ...sed again TIME Push to view current time or push and hold to set clock 5 button NAVIGATION QUICK GUIDE BUTTON DESCRIPTION SETUP MODE FUNCTION OPERATING MODE FUNCTION UP Increases Selection View Time Change Time hold for 5 seconds DOWN Decreases Selection Pause Feed to temporarily suspend meals LEFT Moves Right to Left through editable fields on the LCD screen Enter Exit Slow Feed Mode RIGHT Moves ...

Page 10: ...eriod to help prevent pet from gulping or eating too fast Immediate Feed dispenses next scheduled meal with the touch of a button using 5 button Navigation Programming then picks up with scheduled meal after the meal dispensed Pause Feed Mode temporarily stops feeding schedule and will not dispense food until pause is removed When paused is removed it picks up with next scheduled feeding Food Type...

Page 11: ...ese parts easily remove for cleaning The washable parts are stainless steel bowl bowl holder hopper lid hopper and conveyor The stainless steel bowl bowl holder hopper lid and hopper are dishwasher safe Only clean the conveyor by hand washing using cool or warm soapy water These washable parts can be submerged in water Rinse and let all parts air dry completely before assembling pet feeder Stand c...

Page 12: ...sh in and lift tabs to remove battery compartment door on bottom of pet feeder Install 4 D cell alkaline batteries into battery compartment matching battery outlines see diagram Replace battery door To Install Conveyor Before installing conveyor align one lip on conveyor belt with alignment arrows on side of conveyor housing Install conveyor by first aligning food chute on conveyor front with food...

Page 13: ...re conveyor agitator is inside back chute and lower hopper into base Gently push hopper until release button snaps into place NOTE If hopper is not installed correctly with agitator inside back food chute agitator can break Also incorrect meal sizes or no food at all will be dispensed To Install Bowl Slide tabs on bowl holder into slots on front of pet feeder until tabs lock into place Insert bowl...

Page 14: ...hrough numbers to set current hour Press RIGHT button to move to minute field 2 Use UP or DOWN buttons to scroll through numbers to set current minute After current minute is set press RIGHT button to setup feeding schedule 12 Hour Format 1 For 12 hour format the screen will show 12 00 AM with the hour field blinking Use UP or DOWN buttons to scroll through numbers to set current hour with current...

Page 15: ...2 Once desired option is displayed press RIGHT or ENTER button to select and enter Operating Mode see Operating Mode section The LCD screen will then display the time and size of next scheduled meal To Set Custom Feeding Schedule User 1 To set your own feeding schedule press UP or DOWN buttons to scroll to usr 2 Press RIGHT or ENTER button to enter customisable meal menu This is shown by the numbe...

Page 16: ...E Up to 12 meals can be scheduled For any of the 12 meal options you do not want to schedule leave the meal size fields blank or set to cup or ml 8 After programming desired number of meals return to the meal number field Press and HOLD ENTER button for 5 seconds to program feeding schedule and enter Operating Mode see Operating Mode section The LCD screen will then display the time and size of ne...

Page 17: ... when you hear conveyor moving and filling each section with food getting ready for the first scheduled meal Pieces of food may be dispensed into the bowl Pour any dispensed food back into hopper Every time the hopper is empty or almost empty and is refilled with food the conveyor must be prepared NOTE If conveyor is not prepared as instructed no meal or incorrect meal sizes will be dispensed Ensu...

Page 18: ...dispenses the next scheduled meal with a push of a button The pet feeder keeps track of this activity and two consecutive meals CANNOT be immediately fed Another immediate feeding cannot be given until the scheduled meal after next is dispensed as programmed To Set Immediate Feed Mode 1 If buttons are locked press ENTER and UP buttons AT SAME TIME to unlock 2 Press the RIGHT button and the pet fee...

Page 19: ...ttons to scroll to select 12 hour or 24 hour format Use steps 3 and 4 under To Change Set Time below to set the current hour and minute To Change Set Time 1 If buttons are locked press ENTER and UP buttons AT SAME TIME to unlock 2 Press and HOLD the UP button for 5 seconds The time setup menu will display with the hour field blinking 3 Use UP or DOWN buttons to scroll through numbers to set curren...

Page 20: ...ay the first meal currently scheduled 2 See steps 2 8 under To Set Custom Feeding Schedule User section for details on changing the meal settings To Exit Setup Mode After programming desired number of meals return to meal number field Press and HOLD ENTER button for 5 seconds to program feeding schedule This returns pet feeder to Operating Mode and the screen will display the next scheduled meal ...

Page 21: ...onveyor with Food cycle by pressing the ENTER and LEFT buttons AT SAME TIME This will dispense any food remaining in the conveyor and hopper into the bowl Repeat the To Prepare Conveyor with Food until no more food is dispensed or just a few pieces of food are dispensed from the pet feeder 2 Set pet feeder to PAUSE FEED MODE This keeps the conveyor in sync with the feeding schedule when reassemble...

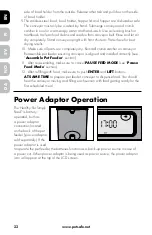
Page 22: ...ensuring conveyor is aligned and installed correctly see Assemble Pet Feeder section 1 1 After reassembling make sure to cancel PAUSE FEED MODE see Pause Feed Mode section 12 After refilling with food make sure to push ENTER and LEFT buttons AT SAME TIME to prepare pet feeder conveyor to dispense food You should hear the conveyor moving and filling each section with food getting ready for the firs...

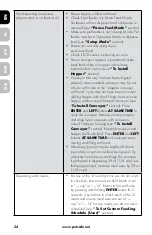
Page 23: ...hopper with release button locked in place see To Install Hopper section Check conveyor is installed with food chute and gear aligned correctly inside hopper base and conveyor latch is locked in place see To Install Conveyor section Hopper is not fitting properly Ensure conveyor agitator is positioned inside back food chute on hopper with release button locked in place see To Install Hopper sectio...

Page 24: ...ove hopper and conveyor Reinstall conveyor see To Install Conveyor section Press ENTER and LEFT buttons AT SAME TIME to cycle the conveyor Remove conveyor again and align lip on conveyor with arrows on side of conveyor housing see To Install Conveyor section Reinstall conveyor and hopper Refill with food Press ENTER and LEFT buttons AT SAME TIME until conveyor starts moving and filling with food M...

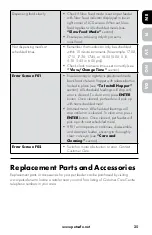
Page 25: ...on hopper with release button locked in place see To Install Hopper section All scheduled feedings will stop until error is cleared To clear error press ENTER button Once cleared pet feeder will pick up with next scheduled meal Jammed motor All scheduled feedings will stop until error is cleared To clear error press ENTER button Once cleared pet feeder will pick up with next scheduled meal If F01 ...

Page 26: ...ating Guide and any specific safety information statements 3 No Unlawful or Prohibited Use This Product is designed for use with pets only Using this Product in a way that is not intended could result in violation of Federal State or local laws 4 Limitation of Liability In no event shall Radio Systems Corporation or any of its associated companies be liable for i any indirect punitive incidental s...

Page 27: ...urer s warranty Complete details of the warranty applicable to this Product and its terms can be found at www petsafe net and or are available by contacting your local Customer Care Centre Europe Radio Systems PetSafe Europe Ltd 2nd Floor Elgee Building Market Square Dundalk Co Louth Ireland Important Recycling Advice Please respect the Waste Electrical and Electronic Equipment regulations in your...

Page 28: ...aktivointituotteet on saatavilla verkkosivulta www petsafe net PetSafe produkter är gjorda för att förbättra relationen mellan dig och ditt husdjur Om du vill veta mer om vårt breda produktutbud som omfattar begränsningssystem dressyrsystem skallkontroll husdjursluckor hälsa och välbefinnande spillningshantering samt produkter för lekar och utmaningar kan du besöka www petsafe net PetSafe produkte...

Reviews: