background image

18 

Customer Care Center 1-800-732-2677

10. The stainless steel bowl, bowl holder, hopper lid and hopper are dishwasher safe. The 

conveyor must only be washed by hand. Submerge conveyor and crumb catcher in 
cool or warm soapy water and hand-wash. Use a cleaning brush or toothbrush to clean 
food debris and residue from conveyor belt. Rinse and let air dry completely. Stand 
conveyor upright with front chute on flat surface for best drying results. 

11. Make sure all parts are completely dry. Reinstall crumb catcher on conveyor. 

Reassemble feeder ensuring conveyor is aligned and installed correctly (see 

“Assemble Feeder”

 page 11).

12. After reassembling, make sure to cancel 

PAUSE FEED MODE

 (see 

“Pause Feed 

Mode”

 page 150.

13. After refilling with food, make sure to 

push ENTER and LEFT buttons AT SAME TIME 

to prepare feeder conveyor to dispense food

. You should hear the conveyor moving 

and filling each section with food getting ready for the first scheduled meal.

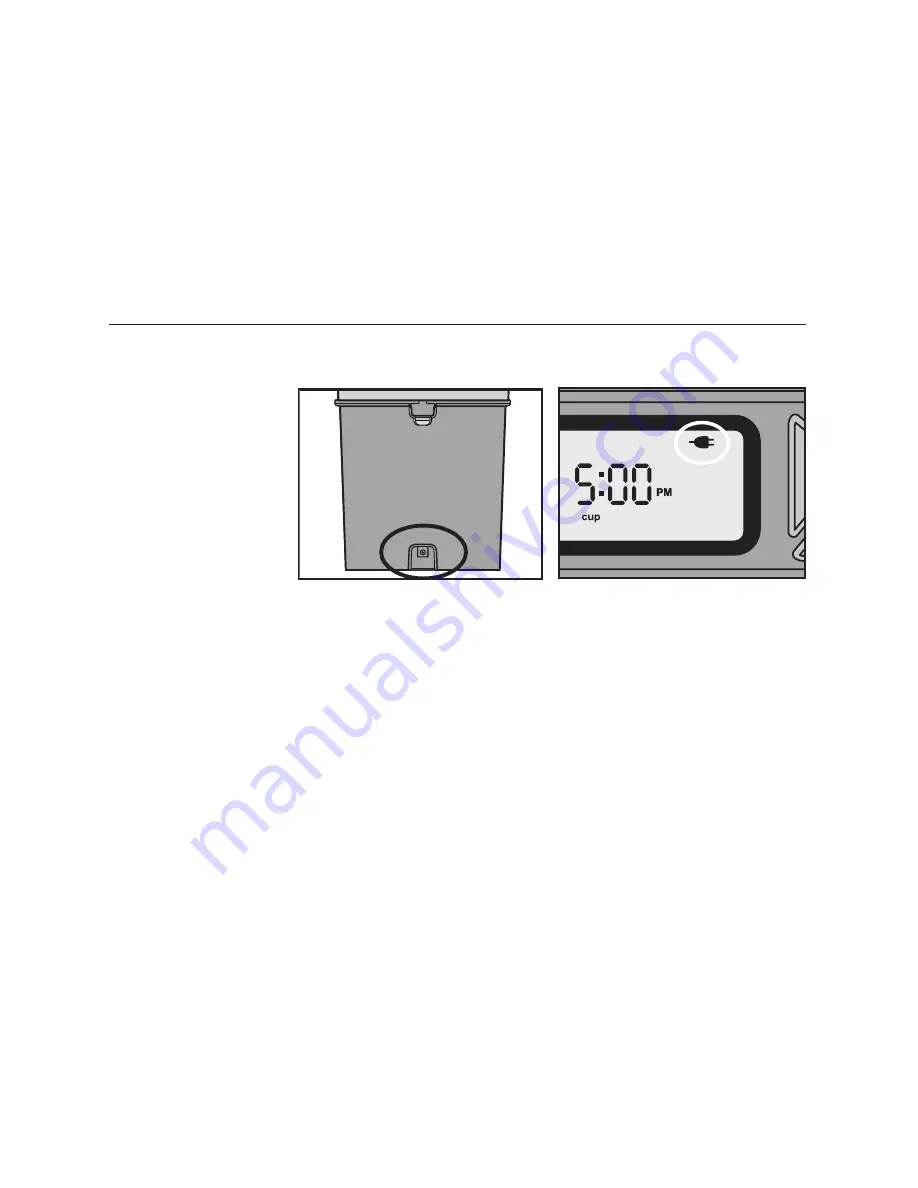
Power Adapter Operation 

The Healthy Pet Simply 

Feed

 is battery 

operated, but has a 

power adapter 

connection located on 

the back of the feeder 

(power adapter sold 

separately, see 

“Replacement Parts 

and Accessories”

 page 

20). If the power 

adapter is used to operate the feeder, the batteries function as a back-up power source in 

case of a power loss. When power adapter is being used as power source, the power adapter 

icon will appear at the top of the LCD screen.

Summary of Contents for Healthy Pet Siply Feed PFD00-14574

Page 1: ...PLEASE READ THIS ENTIRE GUIDE BEFORE BEGINNING Operating Guide Model Number PFD00 14574 ...

Page 2: ...use this pet feeder with puppies kittens dogs or cats not able to reach the food tray or with any physical disability Do NOT use outdoors FOR INDOOR HOUSEHOLD USE ONLY Check operation frequently to be sure the pet feeder is dispensing properly For dry food use only DO NOT use wet canned or moist food Pet feeder should be placed on a level surface Before leaving for extended time always replace bat...

Page 3: ... cord Do not attempt repairs on the pet feeder yourself If an extension cord is necessary an extension cord with a proper rating should be used Do not use pet feeder for anything other than intended use The use of attachments not recommended or sold by the manufacturer may cause an unsafe condition Do not modify the pet feeder Do not install or store pet feeder where it will be exposed to weather ...

Page 4: ...to call the Customer Care Center we will be able to help you faster Most importantly PetSafe will never give or sell your valuable information to anyone Complete warranty information is available online at www petsafe net Table of Contents Components 5 How the System Works 5 Features Controls and Indicators 6 Key Definitions 6 Icons Quick Guide 8 5 Button Navigation Quick Guide 9 Specifications 9 ...

Page 5: ...ecially useful if specialized smaller portions are required more frequently each day Fewer refills are needed with the 24 cup capacity hopper which is translucent for monitoring the food level Additionally the unique Slow Feed option is a perfect solution to help with a pet that gulps or eats too fast by slowly dispensing each meal A scheduled meal can easily be dispensed at the touch of a button ...

Page 6: ...s 5 Button Navigation Group of 5 buttons on control panel with up arrow key down arrow key left arrow key right arrow key and enter select key used to navigate LCD screen to program feeder Battery Compartment Located on bottom of feeder hopper base and holds 4 D cell alkaline batteries ...

Page 7: ...ages to easily program the pet feeder Located in the control panel on the hopper base Meal Number Indicates which meal is being programmed Up to 12 meals can be scheduled Meal Size Indicates portion for meal being programmed or portion for next scheduled meal Can be set to cups if using 12 hour time format or milliliters if using 24 hour time format Minimum meal size is 1 8 cup 30 ml and maximum m...

Page 8: ...ensed Can be set to cups if using 12 hour time format or milliliters if using 24 hour time format dog DOG Feeding schedule is set to default dog which is two 2 cup 473 ml meals per day at 8 am 08 00 and 5 pm 17 00 cat CAT Feeding schedule is set to default cat which is two cup 59 ml meals per day at 8 am 08 00 and 5 pm 17 00 usr USER MODE Feeding schedule is set to user mode with customized meal n...

Page 9: ...s and meal sizes Up to 12 meal times can be set each day every 24 hours within 15 minute increments Meal portions adjustable from 1 8 cup up to 4 cups 30 ml up to 946 ml in 1 8 cup 30 ml increments Slow Feed Mode slowly dispenses scheduled food portion over a 15 minute period to help prevent pet from gulping or eating too fast Immediate Feed dispenses next scheduled meal with the touch of a button...

Page 10: ...leaning The washable parts are stainless steel bowl bowl holder hopper lid hopper and conveyor The stainless steel bowl bowl holder hopper lid and hopper are dishwasher safe Only clean the conveyor by hand washing using cool or warm soapy water These washable parts can be submerged in water Rinse and let all parts air dry completely before assembling feeder Stand conveyor upright with front chute ...

Page 11: ...nes Replace battery door To Install Conveyor Before installing conveyor align one lip on conveyor belt with alignment arrows on side of conveyor housing Install conveyor by first aligning food chute on conveyor front with food chute on front of hopper base Lower back of conveyor and align with gear in hopper base Push red conveyor latch to lock in place Note If conveyor is not installed correctly ...

Page 12: ...lder Lower back of bowl into place Initial Setup 2A Time Setup The feeder automatically enters into Setup Mode after batteries are installed or power is connected The LCD will show a blinking 12 to set time format Note If time is set to 12 hour format meal size measurement is automatically set to cups If time is set to 24 hour format meal size measurement is automatically set to milliliters To Set...

Page 13: ...dule to be customized by setting number of meals meal times and meal sizes Up to 12 meals can be scheduled each day within a 24 hour period The meal times can be set in 15 minute increments Meal sizes can be set in 1 8 cup 30 ml increments with a minimum portion of 1 8 cup 30 ml to a maximum portion of 4 cups 946 ml To Set Default Feeding Schedule Dog or Cat 1 After pressing the RIGHT button when ...

Page 14: ...ram feeding schedule and enter Operating Mode see Operating Mode page 15 for more details The LCD screen will then display the time and size of next scheduled meal 2C Fill With Food Do NOT use outdoors FOR INDOOR HOUSEHOLD USE ONLY Check operation frequently to be sure the pet feeder is dispensing properly For dry food use only DO NOT use wet canned or moist food Pet feeder should be placed on a l...

Page 15: ...To Cancel Slow Feed Mode 1 If buttons are locked press ENTER and UP buttons AT SAME TIME to unlock 2 Press the LEFT button The Slow Feed icon will disappear from LCD screen Immediate Feed Mode If you wish to feed your pet before the next scheduled meal you can use Immediate Feed Mode This immediately dispenses the next scheduled meal with a push of a button The feeder keeps track of this activity ...

Page 16: ...ess and HOLD the UP button for 5 seconds The time setup menu will display with the hour field blinking 3 Use UP or DOWN buttons to scroll through numbers to set current hour with current AM or PM if in 12 hour format Press RIGHT button to move to minute field 4 Use UP or DOWN buttons to scroll through numbers to set current minute After current minute is set press ENTER or RIGHT button to program ...

Page 17: ...nd LEFT buttons AT SAME TIME This will dispense any food remaining in the conveyor and hopper into the bowl Repeat the To Prepare Conveyor with Food until no more food is dispensed or just a few pieces of food are dispensed from the feeder 2 Set feeder to PAUSE FEED MODE This keeps the conveyor in sync with the feeding schedule when reassembled 3 Remove stainless steel bowl from bowl holder by fir...

Page 18: ...ble Feeder page 11 12 After reassembling make sure to cancel PAUSE FEED MODE see Pause Feed Mode page 150 13 After refilling with food make sure to push ENTER and LEFT buttons AT SAME TIME to prepare feeder conveyor to dispense food You should hear the conveyor moving and filling each section with food getting ready for the first scheduled meal Power Adapter Operation The Healthy Pet Simply Feed i...

Page 19: ...ee To Install Conveyor page 11 Not dispensing meal sizes programmed or no food at all Ensure hopper is filled with food Check if feeder is in Pause Feed Mode Feeder will not dispense food until pause is removed see Pause Feed Mode page 15 Make sure feeder is not in Setup Mode Feeder must be in Operating Mode to dispense food see Setup Mode page 16 Ensure you are only using dry or semi moist food C...

Page 20: ... 16 Error Screen F01 Ensure conveyor agitator is positioned inside back food chute on hopper with release button locked in place see To Install Hopper page 12 All scheduled feedings will stop until error is cleared To clear error press ENTER button Once cleared feeder will pick up with next scheduled meal Jammed motor All scheduled feedings will stop until error is cleared To clear error press ENT...

Page 21: ...s all risks and liability from the use of this Product 5 Modification of Terms and Conditions Radio Systems Corporation reserves the right to change the terms conditions and notices under which this Product is offered Compliance FCC Canada This Class B digital apparatus complies with Canadian ICES 003 This equipment has been tested and found to comply with the limits for a Class B digital device p...

Page 22: ...ited Warranty What is covered Radio Systems Australia Pty Ltd hereinafter referred to as Radio Systems warrants to the original retail purchaser and not any other purchaser or subsequent owner that its Product when subject to normal and proper residential use will be free from defects in material or workmanship for a period of one 1 year from the purchase date An original retail consumer purchaser...

Page 23: ... faulty after 30 days from the date of original purchase the consumer will be required to return the Product to Radio Systems at the consumer s own expense Radio Systems will test and replace the faulty unit or its components and return to the consumer free of charge provided the Product is within its said warranty period This warranty is in addition to other rights and remedies available to you u...

Page 24: ...Radio Systems Corporation 10427 PetSafe Way Knoxville TN 37932 USA 1 800 732 2677 www petsafe net 400 1863 1 2014 Radio Systems Corporation ...

Reviews: