Rev.: 2004-001-DE
15
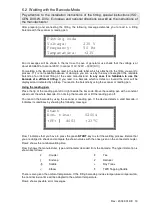
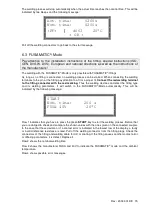
The welding process will stop automatically when the actual time reaches the nominal time. This will be
indicated by two bleeps and the following message:
Act. time:
0200s
Nom. time:
0200s
+PF+
[
d063 20°C
+ OK +
Pull off the welding connectors to go back to the start message.
6.3 FUSAMATIC
©
-Mode
Pay attention to the installation instructions of the fitting, special instructions (ISO,
CEN, DVGW, DVS), European and national directions as well as the instructions of
the manufacturers!
The welding with the FUSAMATIC
©
-Mode is only possible with FUSAMATIC
©
-fittings.
As long as no fitting is connected, no welding process can be started. When connecting the welding
terminals to the pin at the fitting pay attention to a firm a proper fit.
Connect the red welding terminal
to the fitting connector with the red marking.
Thus the welding device can detect the fitting type
and its welding parameters. It will switch to the FUSAMATIC
©
-Mode automatically. This will be
indicated by the following message:
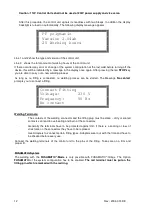
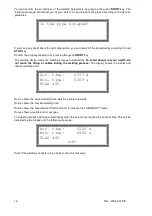
START
Nom. time: 200 s
FUSA 40V 20°C
Row 1 indicates that you have to press the green
START
-key to start the welding process. Before that
you are obliged to check and compare the shown values with the ones given on the connected coupler.
In the case that these deviate or if a contact error is indicated in the lowest row of the display, a faulty
or invalid reference resistance is read. Pull off the welding connector from the fitting plugs. Check the
connectors of the fitting and welding cable for dirt or coating. If the fitting causes another contact error
or differing parameters, it is defect. Replace it.
Row 2 shows the nominal welding time.
Row 3 shows the manufacturer FUSA and 40V to indicate the FUSAMATIC
©
mode and the ambient
temperature.
Row 4 shows possible error messages.
Summary of Contents for Polymatic
Page 2: ...Rev 2004 001 DE 2...
Page 23: ...Rev 2004 001 DE 23 9 Conformity Declaration...
Page 24: ...Rev 2004 001 DE 24...


