12 - 5
Adjustment
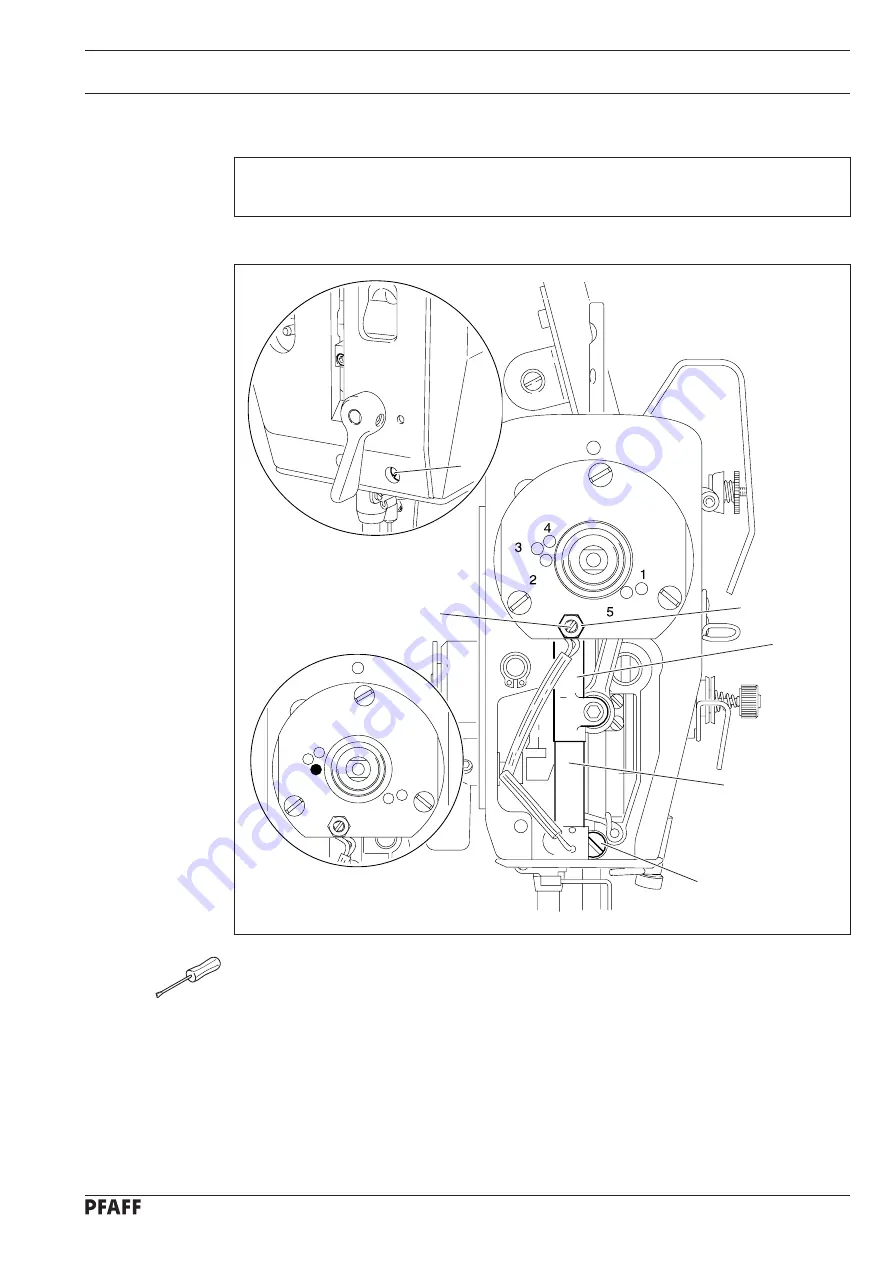
Fig. 12 - 04
6
5
4
3
1
81-018
81-019
4
2
5
1
3
2
●
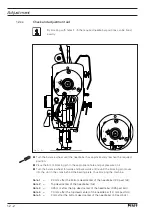
Bring the needle bar to tdc (hole 2).
●
Loosen screws
1,2
and nut
3
.
●
The largest eccentricity of pin
4
must be facing downwards.
●
Bring the groove on guide bar
5
into a position in which it rests against eccentric pin
4
,
turn eccentric pin
4
in accordance with the
requirement
and tighten nut
3
.
●
Push guide bar
5
downwards and then upwards as far as possible. Bushing
6
must not
move laterally during this movement (readjust eccentric pin
4
if necessary).
●
Move guide bar
5
until it rests against eccentric pin
4
and tighten screws
1
and
2
.
12
.05.03
Parallel guiding of the needle bar
Requirement
Guide bar
5
must be parallel to the needle bar.
Summary of Contents for 3704-2/02
Page 28: ...8 4 Installation and commissioning 8 04 Table top cutout for the PFAFF 939 U ...
Page 115: ...14 3 91 191 477 95 Part 1 Version 05 11 03 Circuit diagrams PFAFF 939 U ...
Page 116: ...14 4 Circuit diagrams Version 05 11 03 91 191 477 95 Part 2 PFAFF 939 U ...
Page 117: ...14 5 91 191 477 95 Part 3 Version 05 11 03 Circuit diagrams PFAFF 939 U ...
Page 118: ...14 6 Circuit diagrams Version 03 09 04 91 191 487 95 Part 1 PFAFF 3704 ...
Page 119: ...14 7 91 191 487 95 Part 2 Version 03 09 04 Circuit diagrams PFAFF 3704 Fadenwischer ...
Page 120: ...14 8 Circuit diagrams Version 03 09 04 91 191 487 95 Part 3 PFAFF 3704 ...
Page 121: ...Notes ...


