PF
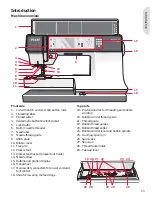
A
C
B
D
H
G
A
C
E
F
B
Pr
epar
ations
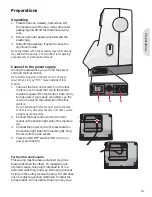
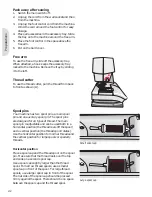
Needle threader
The needle threader allows you to thread the
needle automatically. The needle must be in the up
position to use the built-in needle threader. We also
recommend lowering the presser foot.
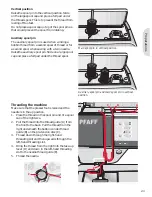
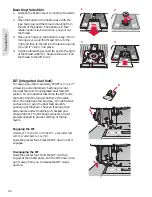
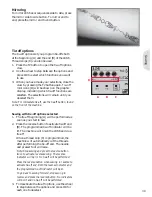
1. Use the handle to pull the needle threader all
the way down. The threader hook (G) swivels
through the needle eye.
2. Place the thread from the back over the hook
(H) and under the thread hook (G).
3. Let the needle threader gently swing back. The
hook pulls the thread through the needle eye
and forms a loop behind the needle. Pull the
thread loop out behind the needle.
Note: The needle threader is designed to be used for size
70-120 needles. You cannot use the needle threader for
size 60 needles or smaller, a wing needle, twin needle or
triple needle. There are also some optional accessories
that require manual threading of the needle.
When threading the needle manually, make sure that the
needle is threaded from front to back. The bobbin cover
can be used as a magnifying glass.
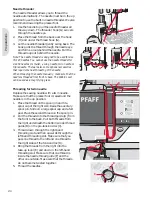
Threading for twin needle
Replace the sewing needle with a twin needle.
Make sure that the presser foot is raised and the
needle is in the up position.
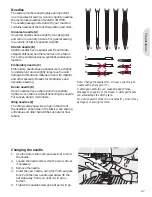
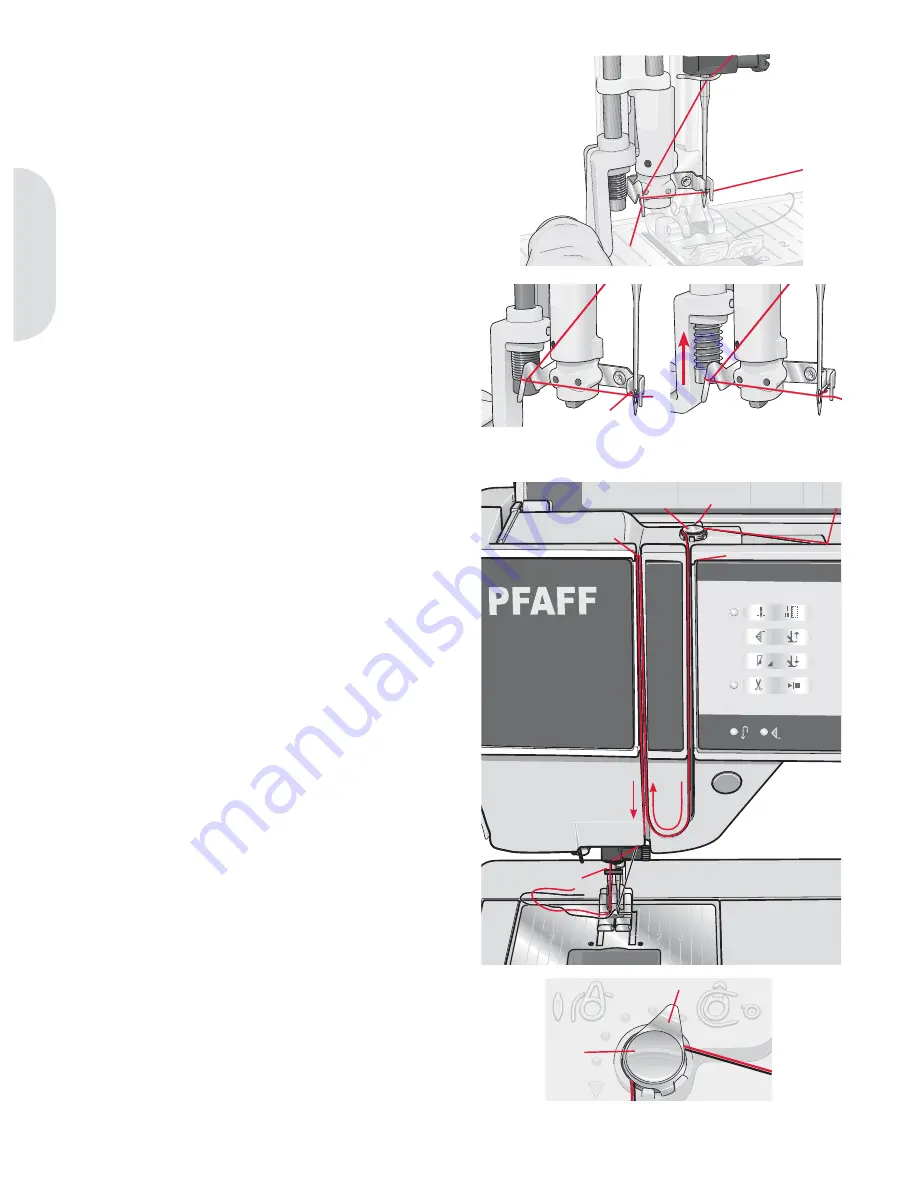
1. Place the thread on the spool pin and
À
t a
spool cap of the right size. Raise the auxiliary
spool pin. Slide on a large spool cap and a felt
pad. Place the second thread on the spool pin.
2. Pull the threads into the thread guide (A) from
the front to the back. Pull both threads from
the right underneath the bobbin winder thread
guide (B) on the pre-tension disc (C).
3. Thread down through the right-hand
threading slot and then upwards through the
left-hand threading slot. Make sure that you
pass one thread to the left and one thread to
the right sides of the tension disk (D).
4. Bring the threads from the right into the
take-up lever (E) and down in the left-hand
threading slot. Make sure that one thread is
inside the needle thread guide (F) and the
other one outside. Make sure that the threads
do not become twisted together.
5. Thread the needles.
2:4
Summary of Contents for CREATIVE 2.0 -
Page 1: ...Owner s manual ...
Page 12: ...Preparations ...
Page 28: ...Sewing ...
Page 40: ...Sequencing ...
Page 44: ...Embroidery preparations ...
Page 48: ...Embroidering ...
Page 64: ......
Page 65: ......
Page 66: ...5D Embroidery Machine Communication CD For personal computer See page 2 10 ...

